I almost feel embarrassed disclosing how often I have tacos. It feels like an above-average amount, but maybe I’m wrong. Maybe everyone cooks tacos at least once a week at home, makes taco salad during that same week, and also visits Taco Bell the weekend of that same week they already had tacos at home in two different forms. And then, they also decide on Sunday morning that breakfast tacos sound like a must.
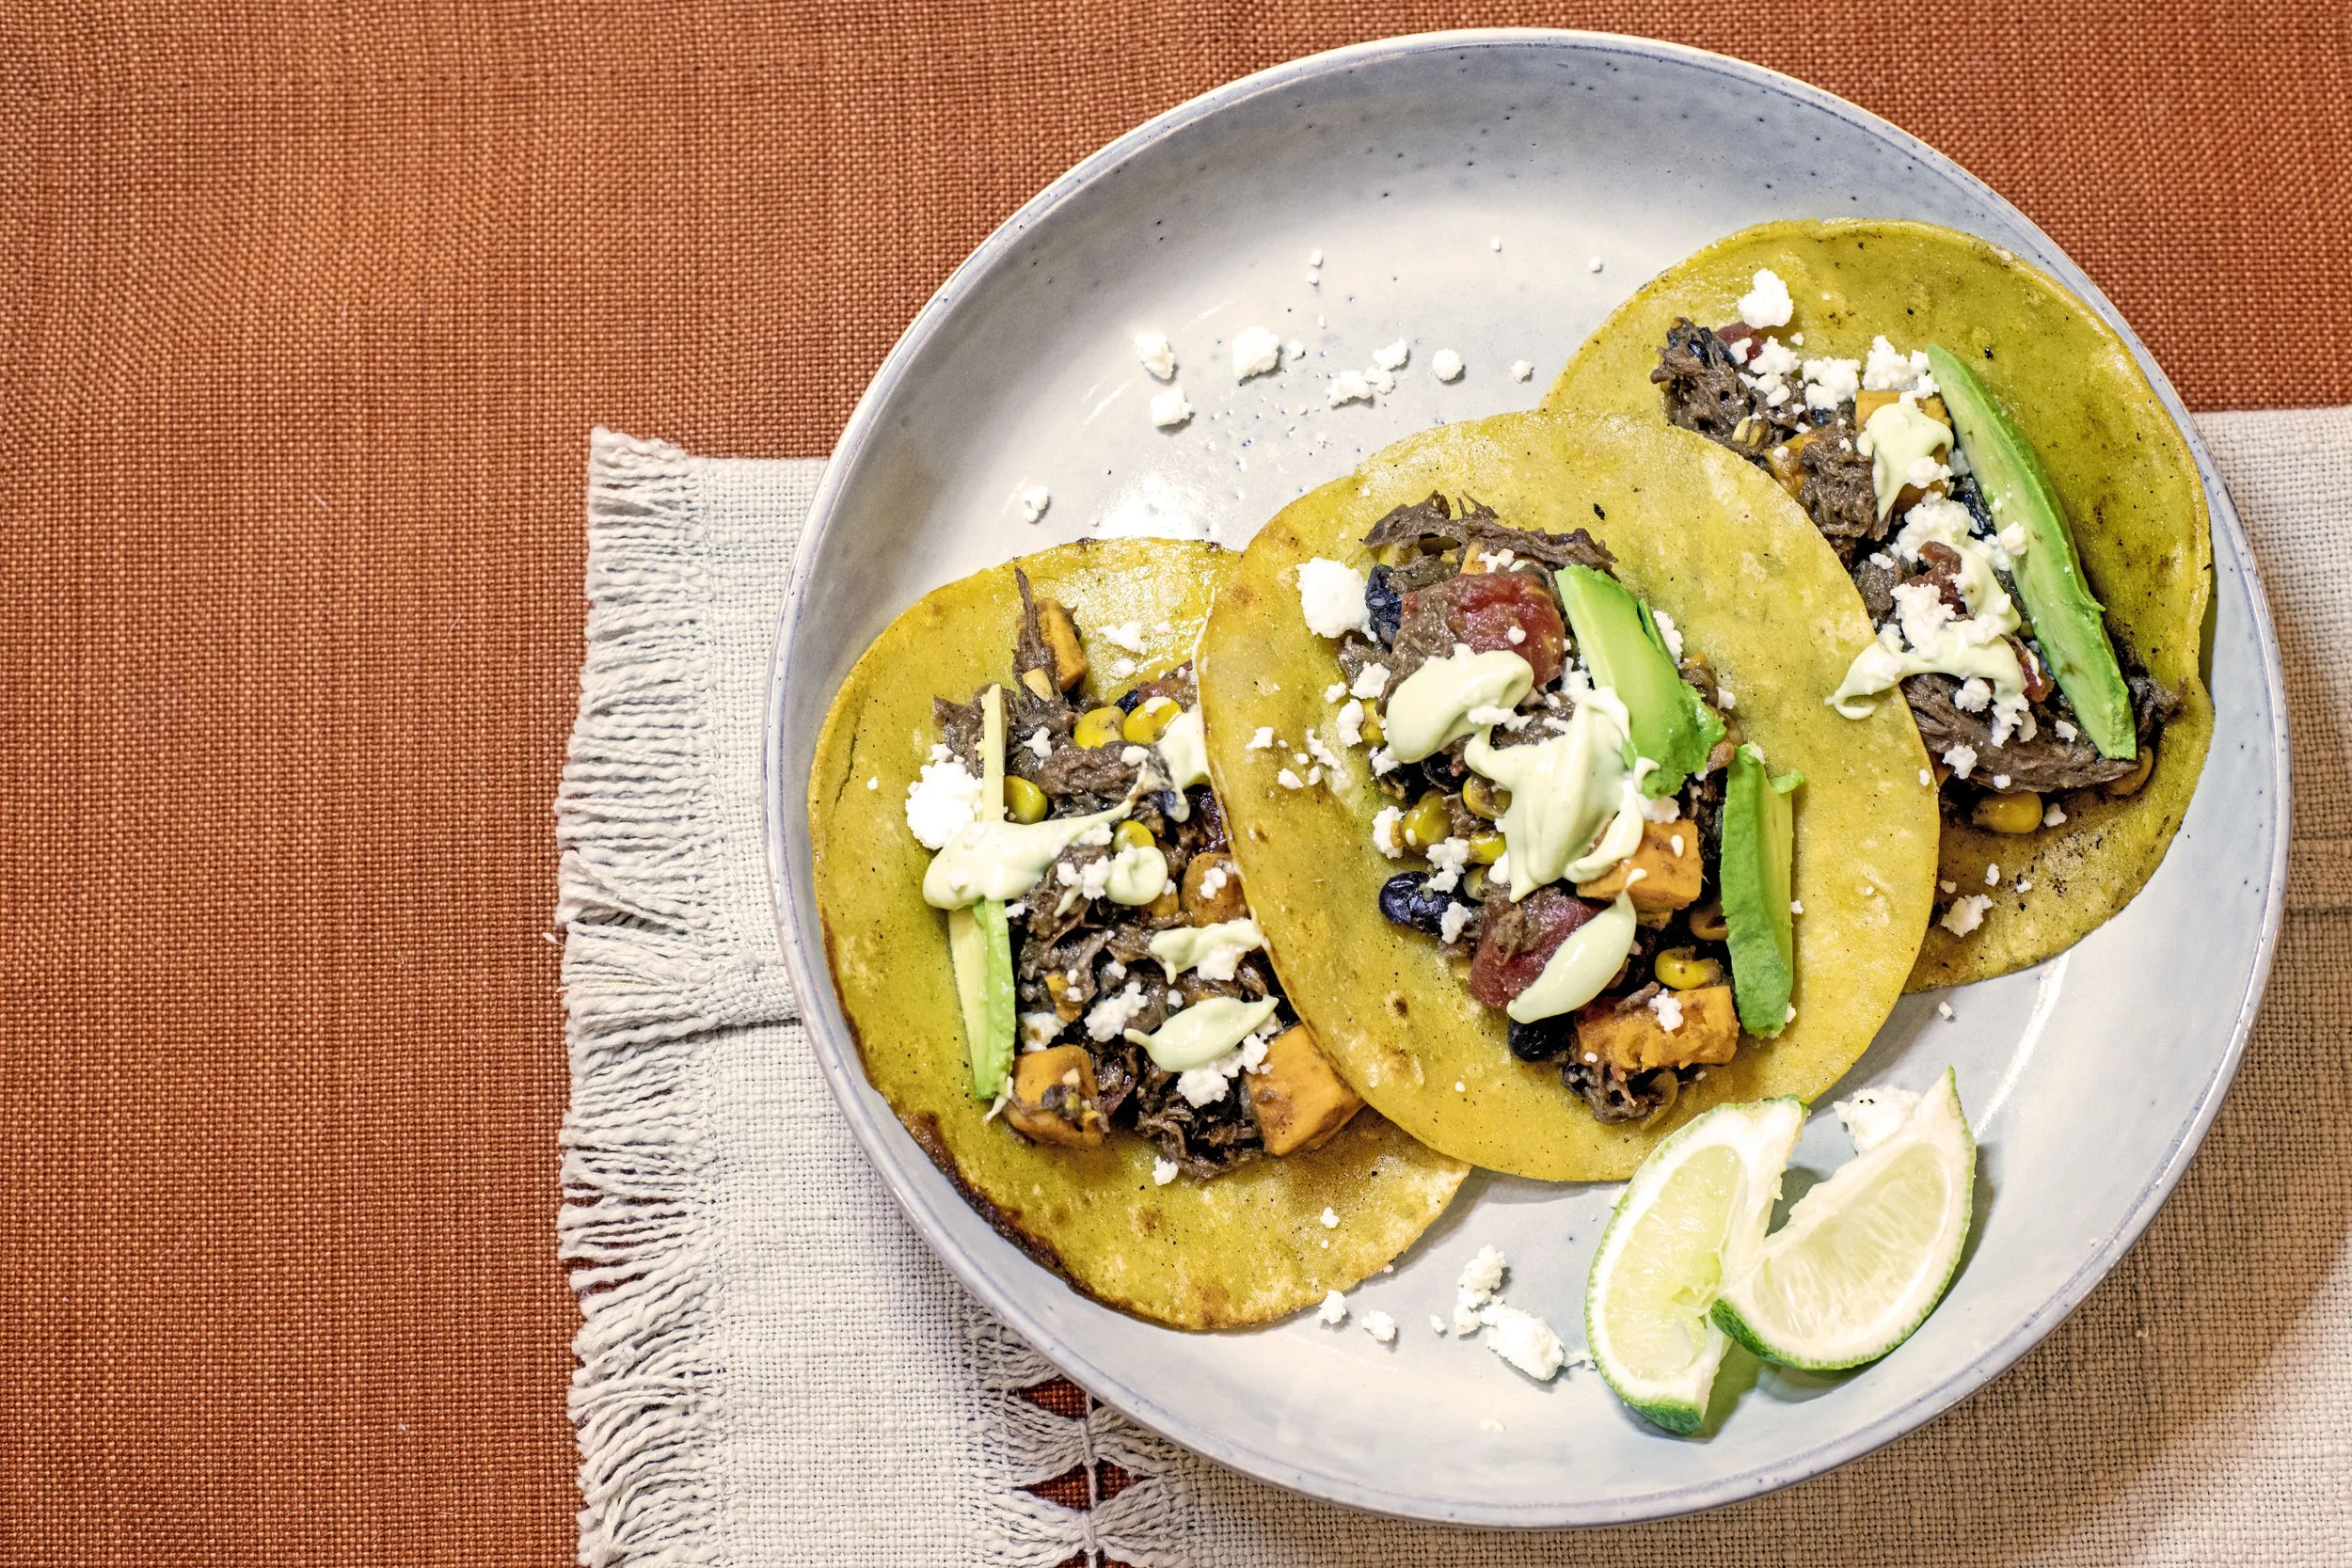
How delicious is this plate of Venison Sweet Potato and Black Bean Tacos?
Tacos are my go-to meal, especially when the freezer is packed full of wild game. They just seem to lend themselves as the correct answer to any question. What should we make with this trout we just caught? Fish tacos! I wish I could think of a new way to prepare this pheasant—any ideas? Oh, how about adobo pheasant tacos! Man, I sure am feeling lazy and don’t want to cook—any ideas on a quick meal? Uh, duh, deer tacos!
See what I mean? Tacos are always the answer. And I can’t be the only one who knows it. We have nationwide celebrations dedicated to them! October 4th marks the official single day honoring the taco, but we also dedicate every single week to them with my favorite day: Taco Tuesday. So, if you’re interested in celebrating the taco every Tuesday like I am, I suggest you give this Venison, Sweet Potato, and Black Bean Taco dish a run in your kitchen.
Pressure cooking the venison
A tougher cut of meat is actually perfect for a shredded taco recipe. The generic term for this cut is a chuck roast, which comes from the heavily worked neck or shoulder region of the animal. Because the shoulder is a high-movement area, the meat is tough and packed with connective tissue. While these qualities are not desirable for a quick-cooking steak, they are absolutely ideal for slow-cooking methods that break down the fibers into tender, juicy taco meat.
For this recipe, I used my pressure cooker. I easily could have used a slow cooker—which is actually my preference for shredded meats— but I decided mid-day instead of in the morning I wanted tacos. Since I didn't have the six to eight hours required for a low-and-slow braise, the pressure cooker saved the day.
Begin by roughly cutting the roast into two-inch chunks. Perfection isn’t required here, but keeping the pieces relatively consistent in size ensures they cook evenly. Season the chunks with a little salt and pepper, and add them to the pressure cooker. Pour a quart of vegetable stock over the top, close the lid, and make sure the pressure release valve is set to the sealing position.
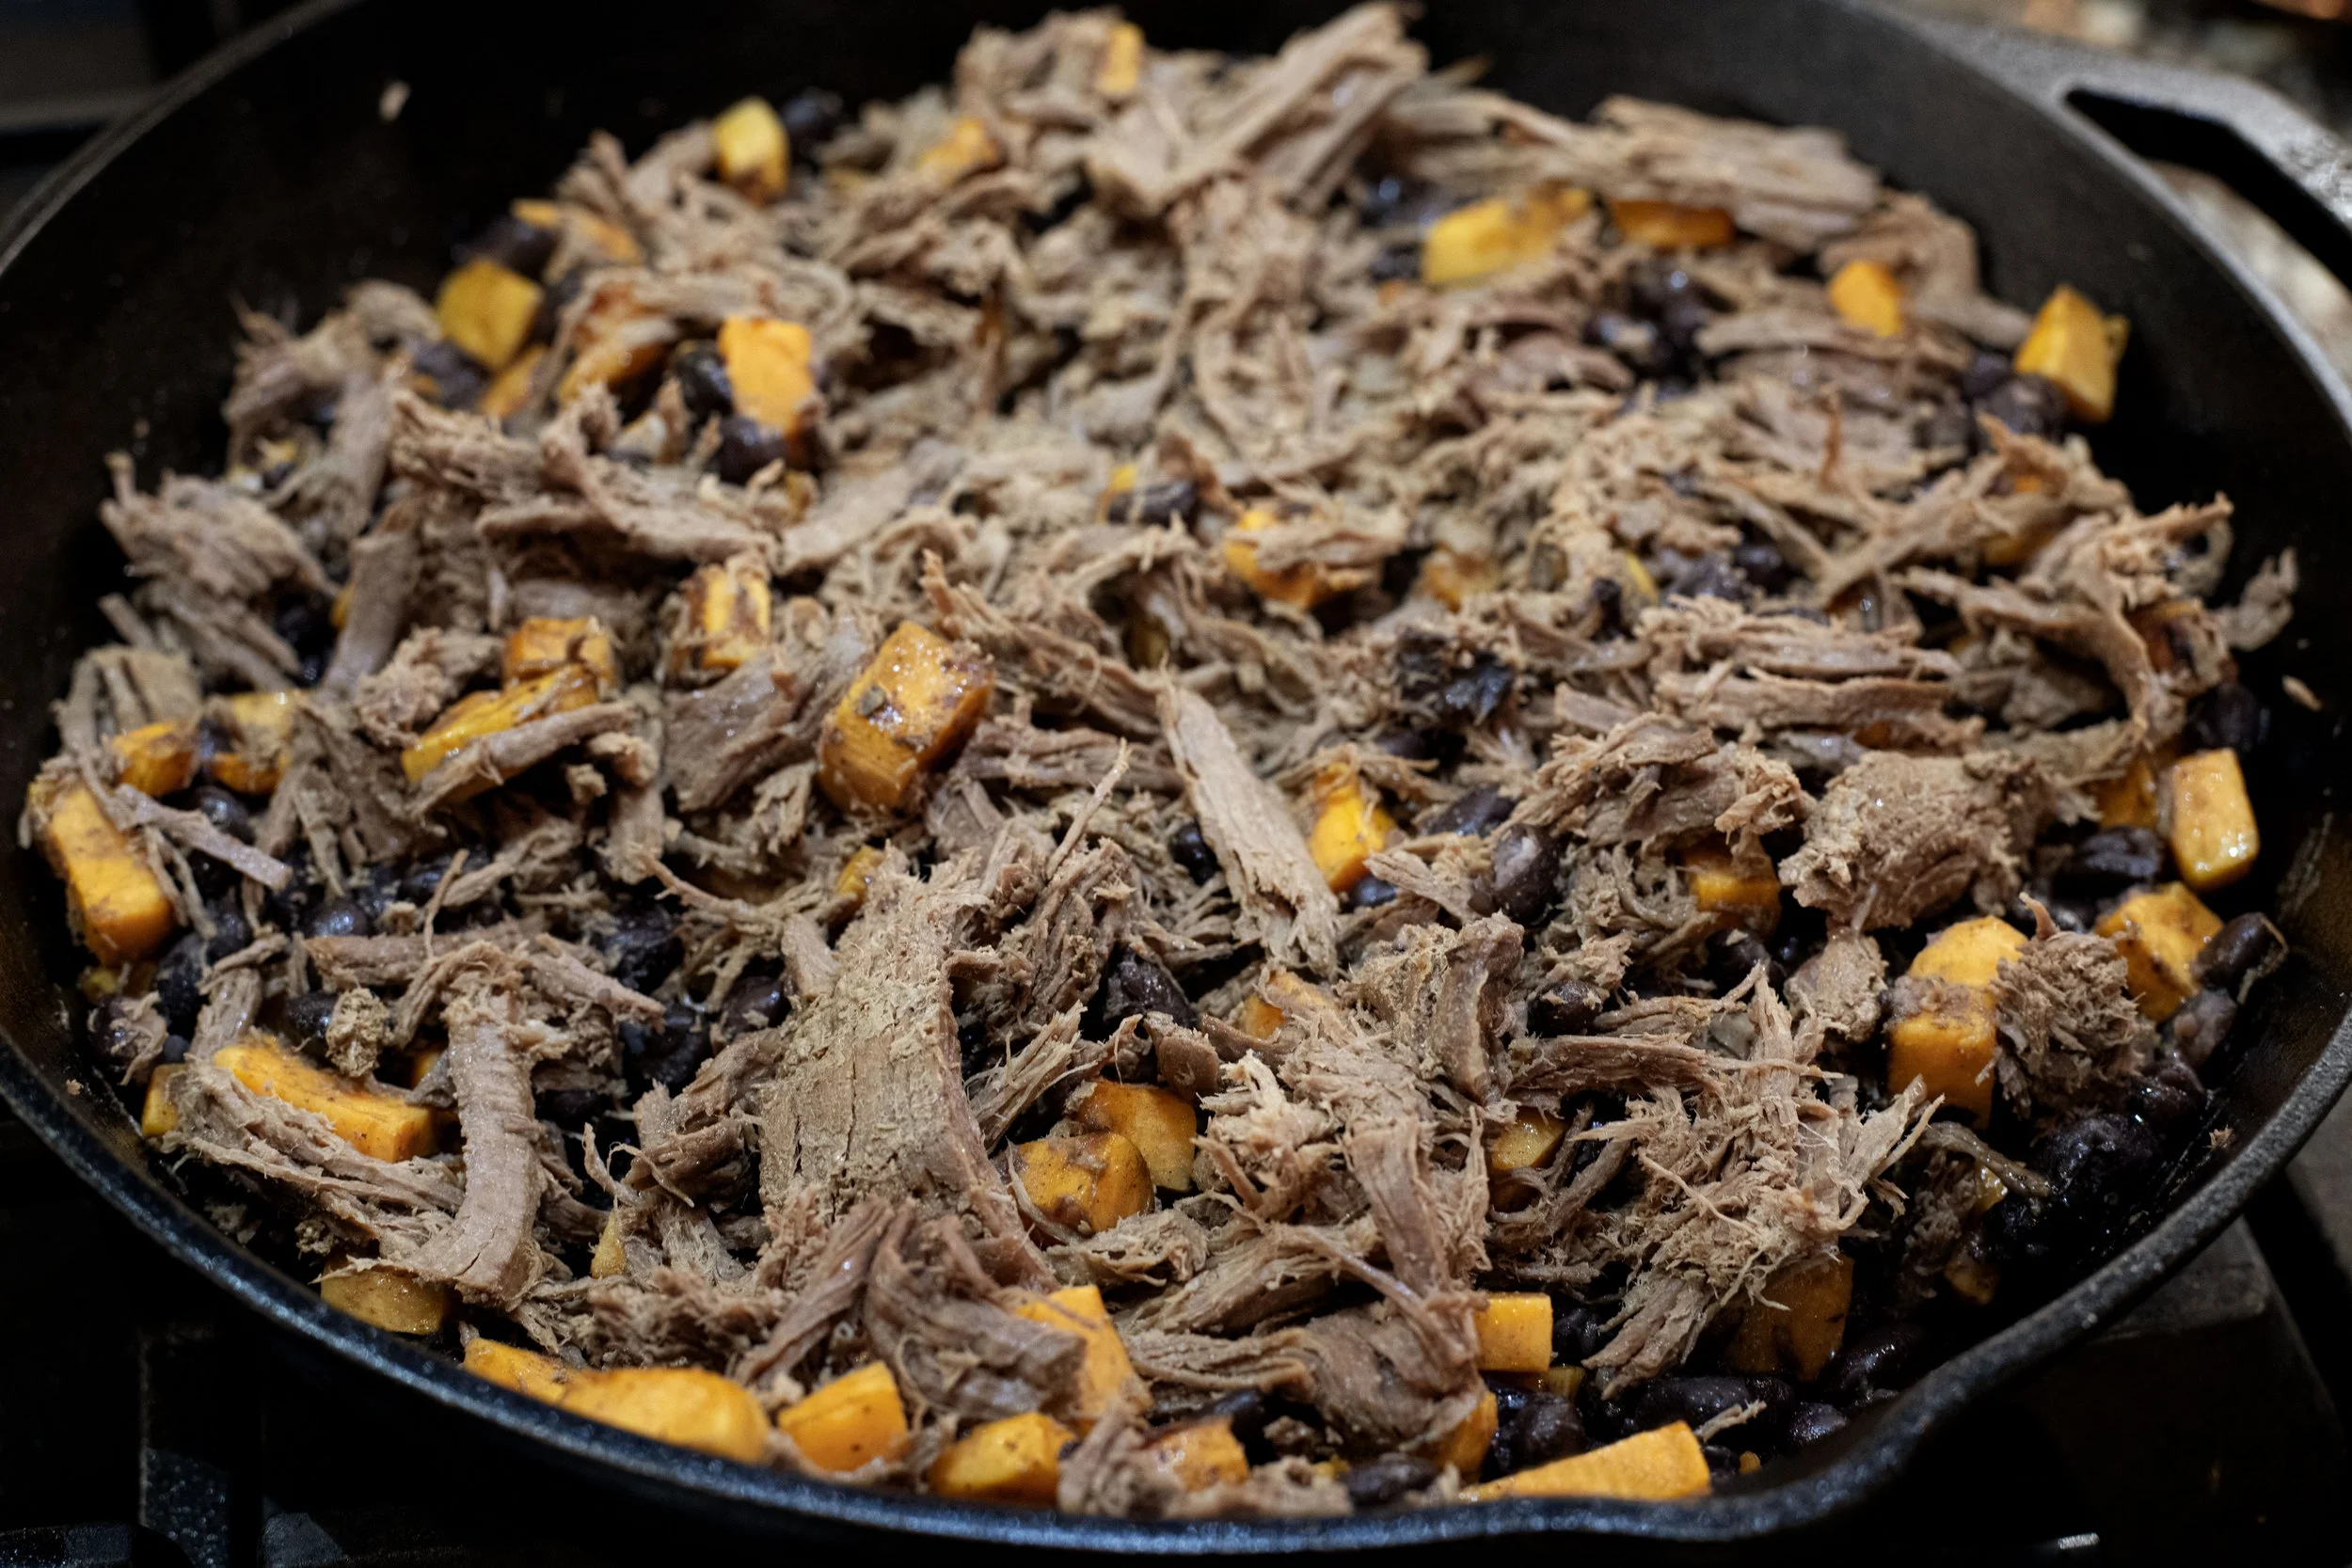
Set the cooker to high pressure for 45 minutes. When the timer indicates that the cooking time is up, allow the machine to naturally release its pressure for 15 minutes before opening the venting valve. Once the cooker has fully depressurized, carefully open the lid and transfer the meat to a cutting board. The chunks should be incredibly tender and already starting to fall apart. Simply use two forks to shred the meat into bite-sized pieces, and set it aside.
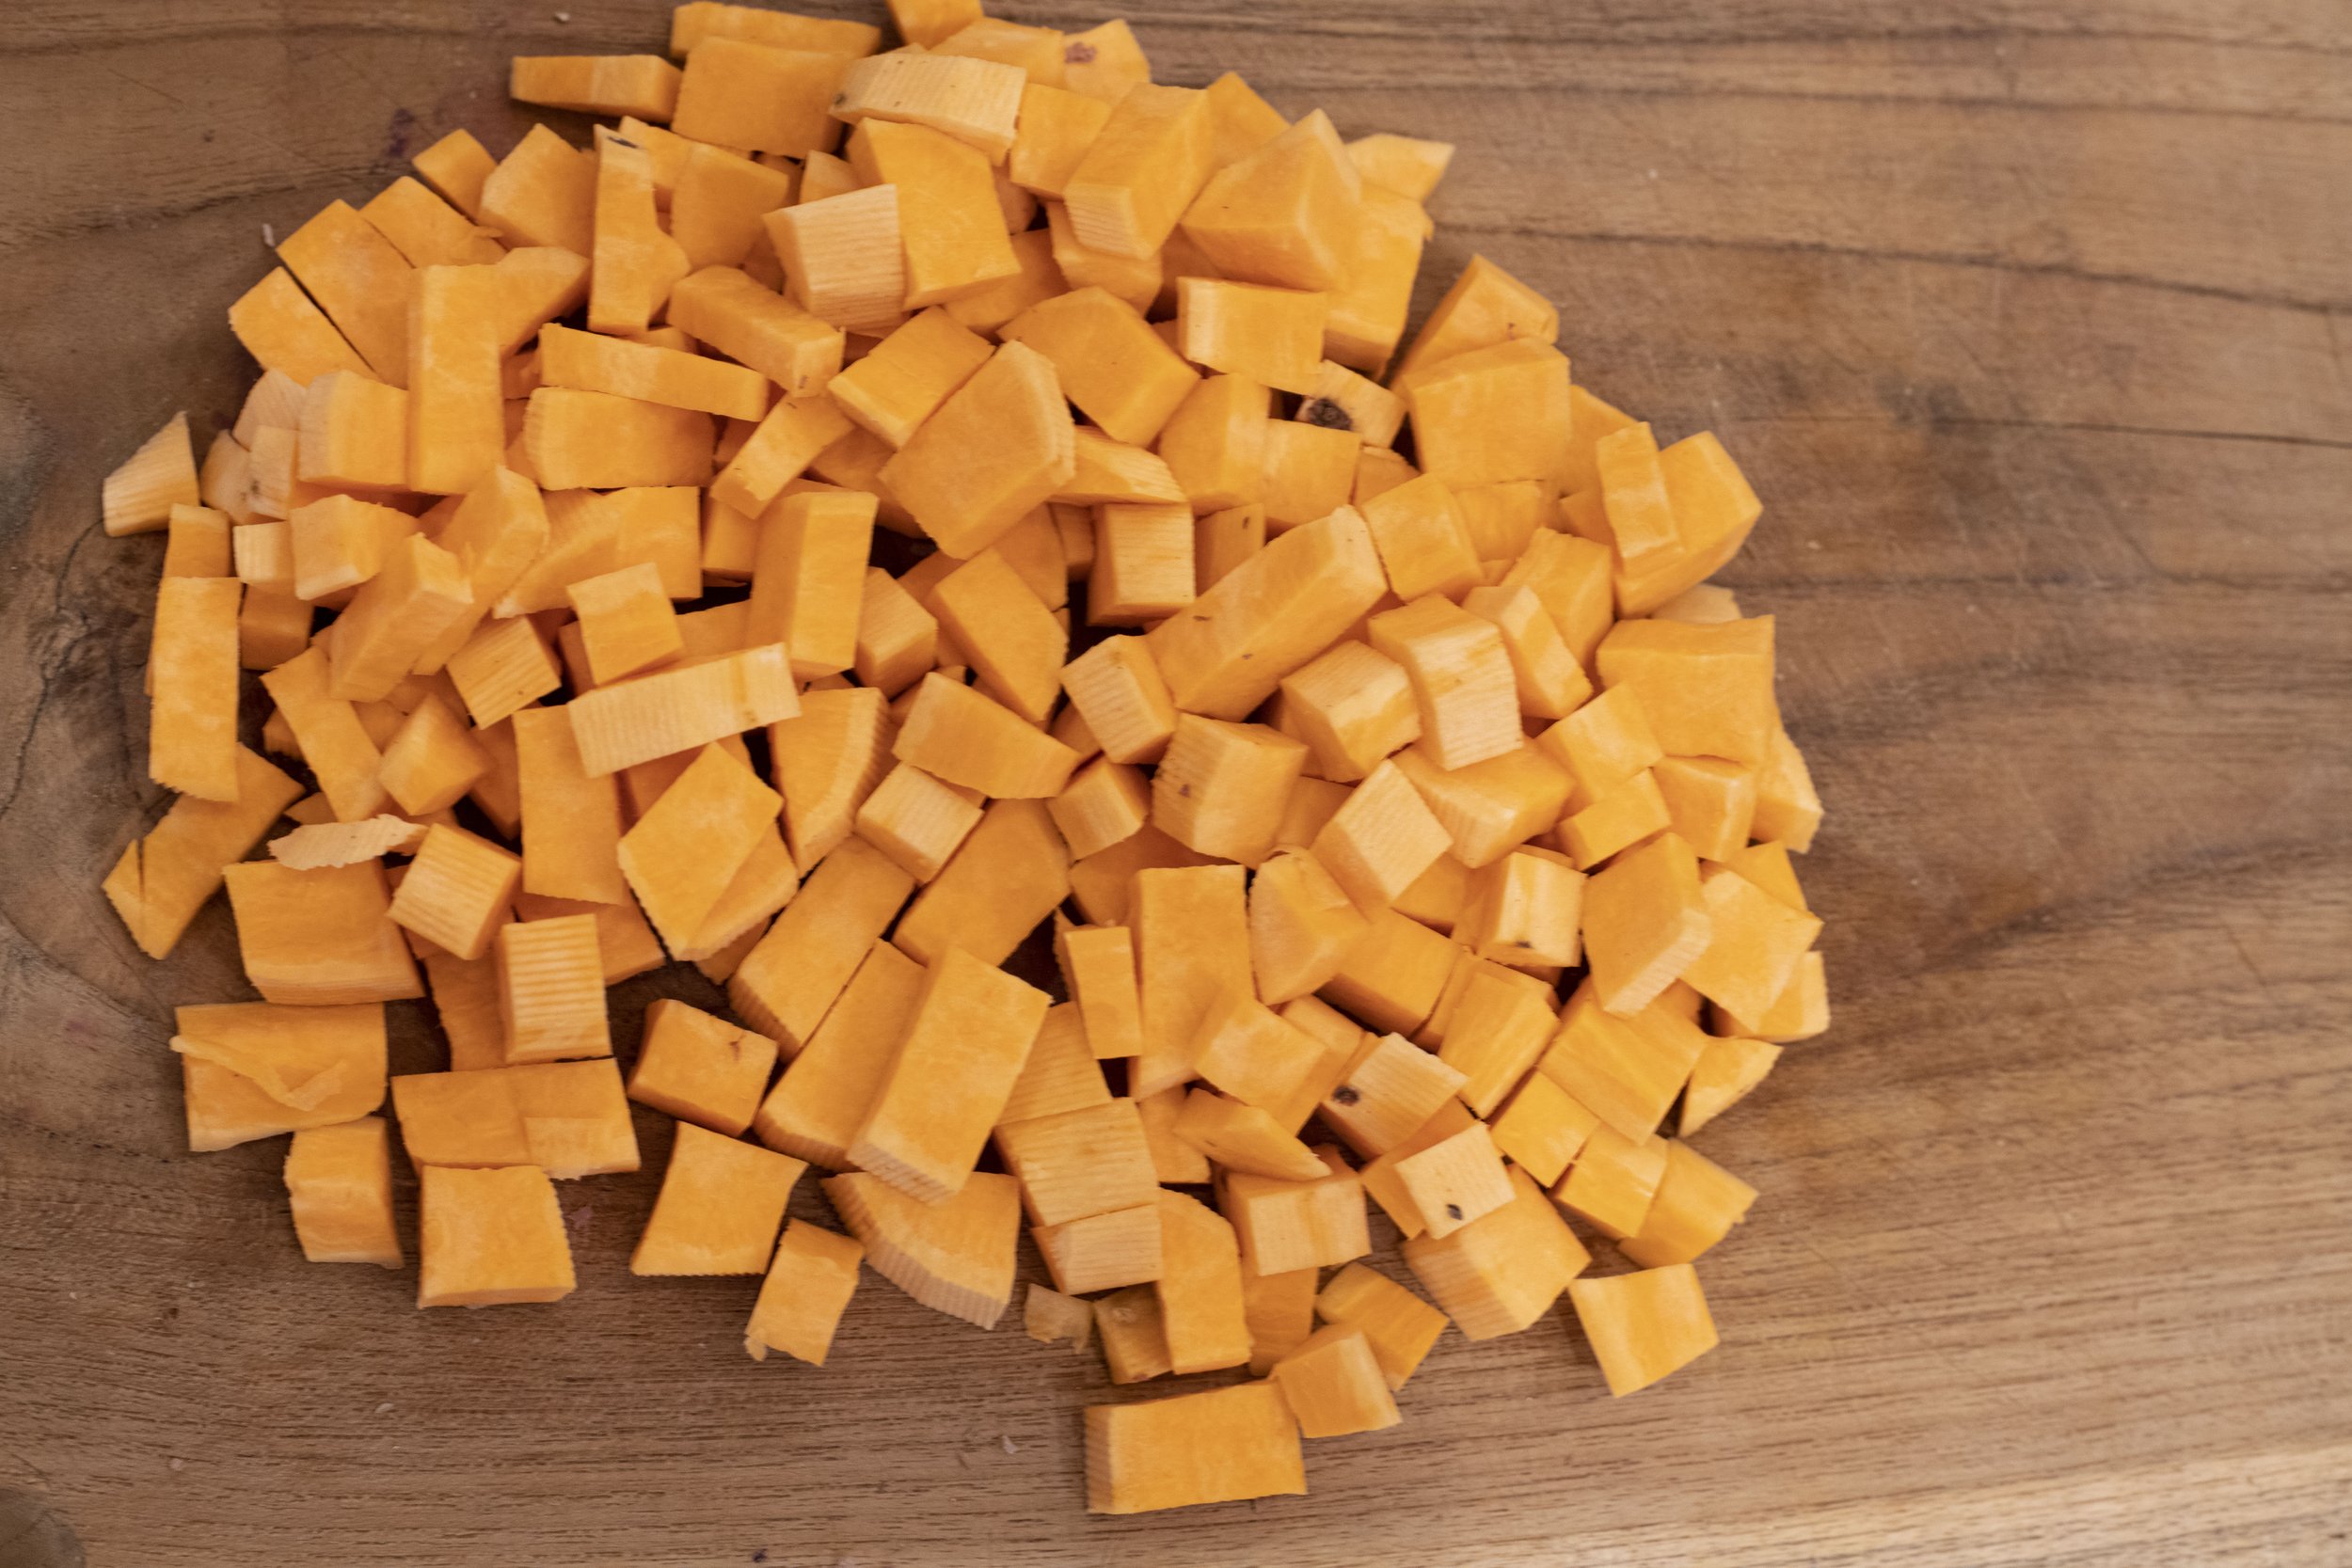
Prep the Sweet Potatoes
Heat a large skillet over medium-high heat. You will want to grab the biggest skillet you own, because between the shredded meat, sweet potatoes, and black beans, this makes a massive amount of taco filling!
Add a tablespoon of cooking oil to the skillet to preheat. I like to use avocado oil because it has a high smoke point, but other great options include canola oil, vegetable oil, or even rendered bear fat. Once the oil is hot, toss in your diced sweet potato. When prepping the sweet potato, try to keep the cubes relatively uniform in size so they all finish cooking at the same time.
Let the sweet potatoes soften on their own for about five minutes before stirring in the drained black beans. After the beans and sweet potatoes have cooked together for about three minutes, slide your shredded venison into the mix. Things are starting to get good, huh?
Deglaze and season
I have a handful of cooking moments that I absolutely indulge in when the time comes. One is sautéing onions in butter. It smells so good that every single time, I spend a few zen moments just breathing in the sweet steam. A second one is deglazing a pan. I have no preference on the liquid—whether it’s beer, wine, stock, or water—I just love the sound of the cool liquid clashing against the hot pan and watching as it bursts into tiny, simmering bubbles.
Anyway, not to get too far off-topic here, but the next step is to use a can of beer to deglaze your skillet. The actual beer choice is up to the chef. I highly recommend a crisp lager, but really whatever you have on hand will work. If you prefer not to cook with alcohol, some chicken or vegetable stock will do the job perfectly. Pour it in, and be sure to use a spatula to scrape the bottom of the pan for any browned goodies left over from the potatoes or beans.
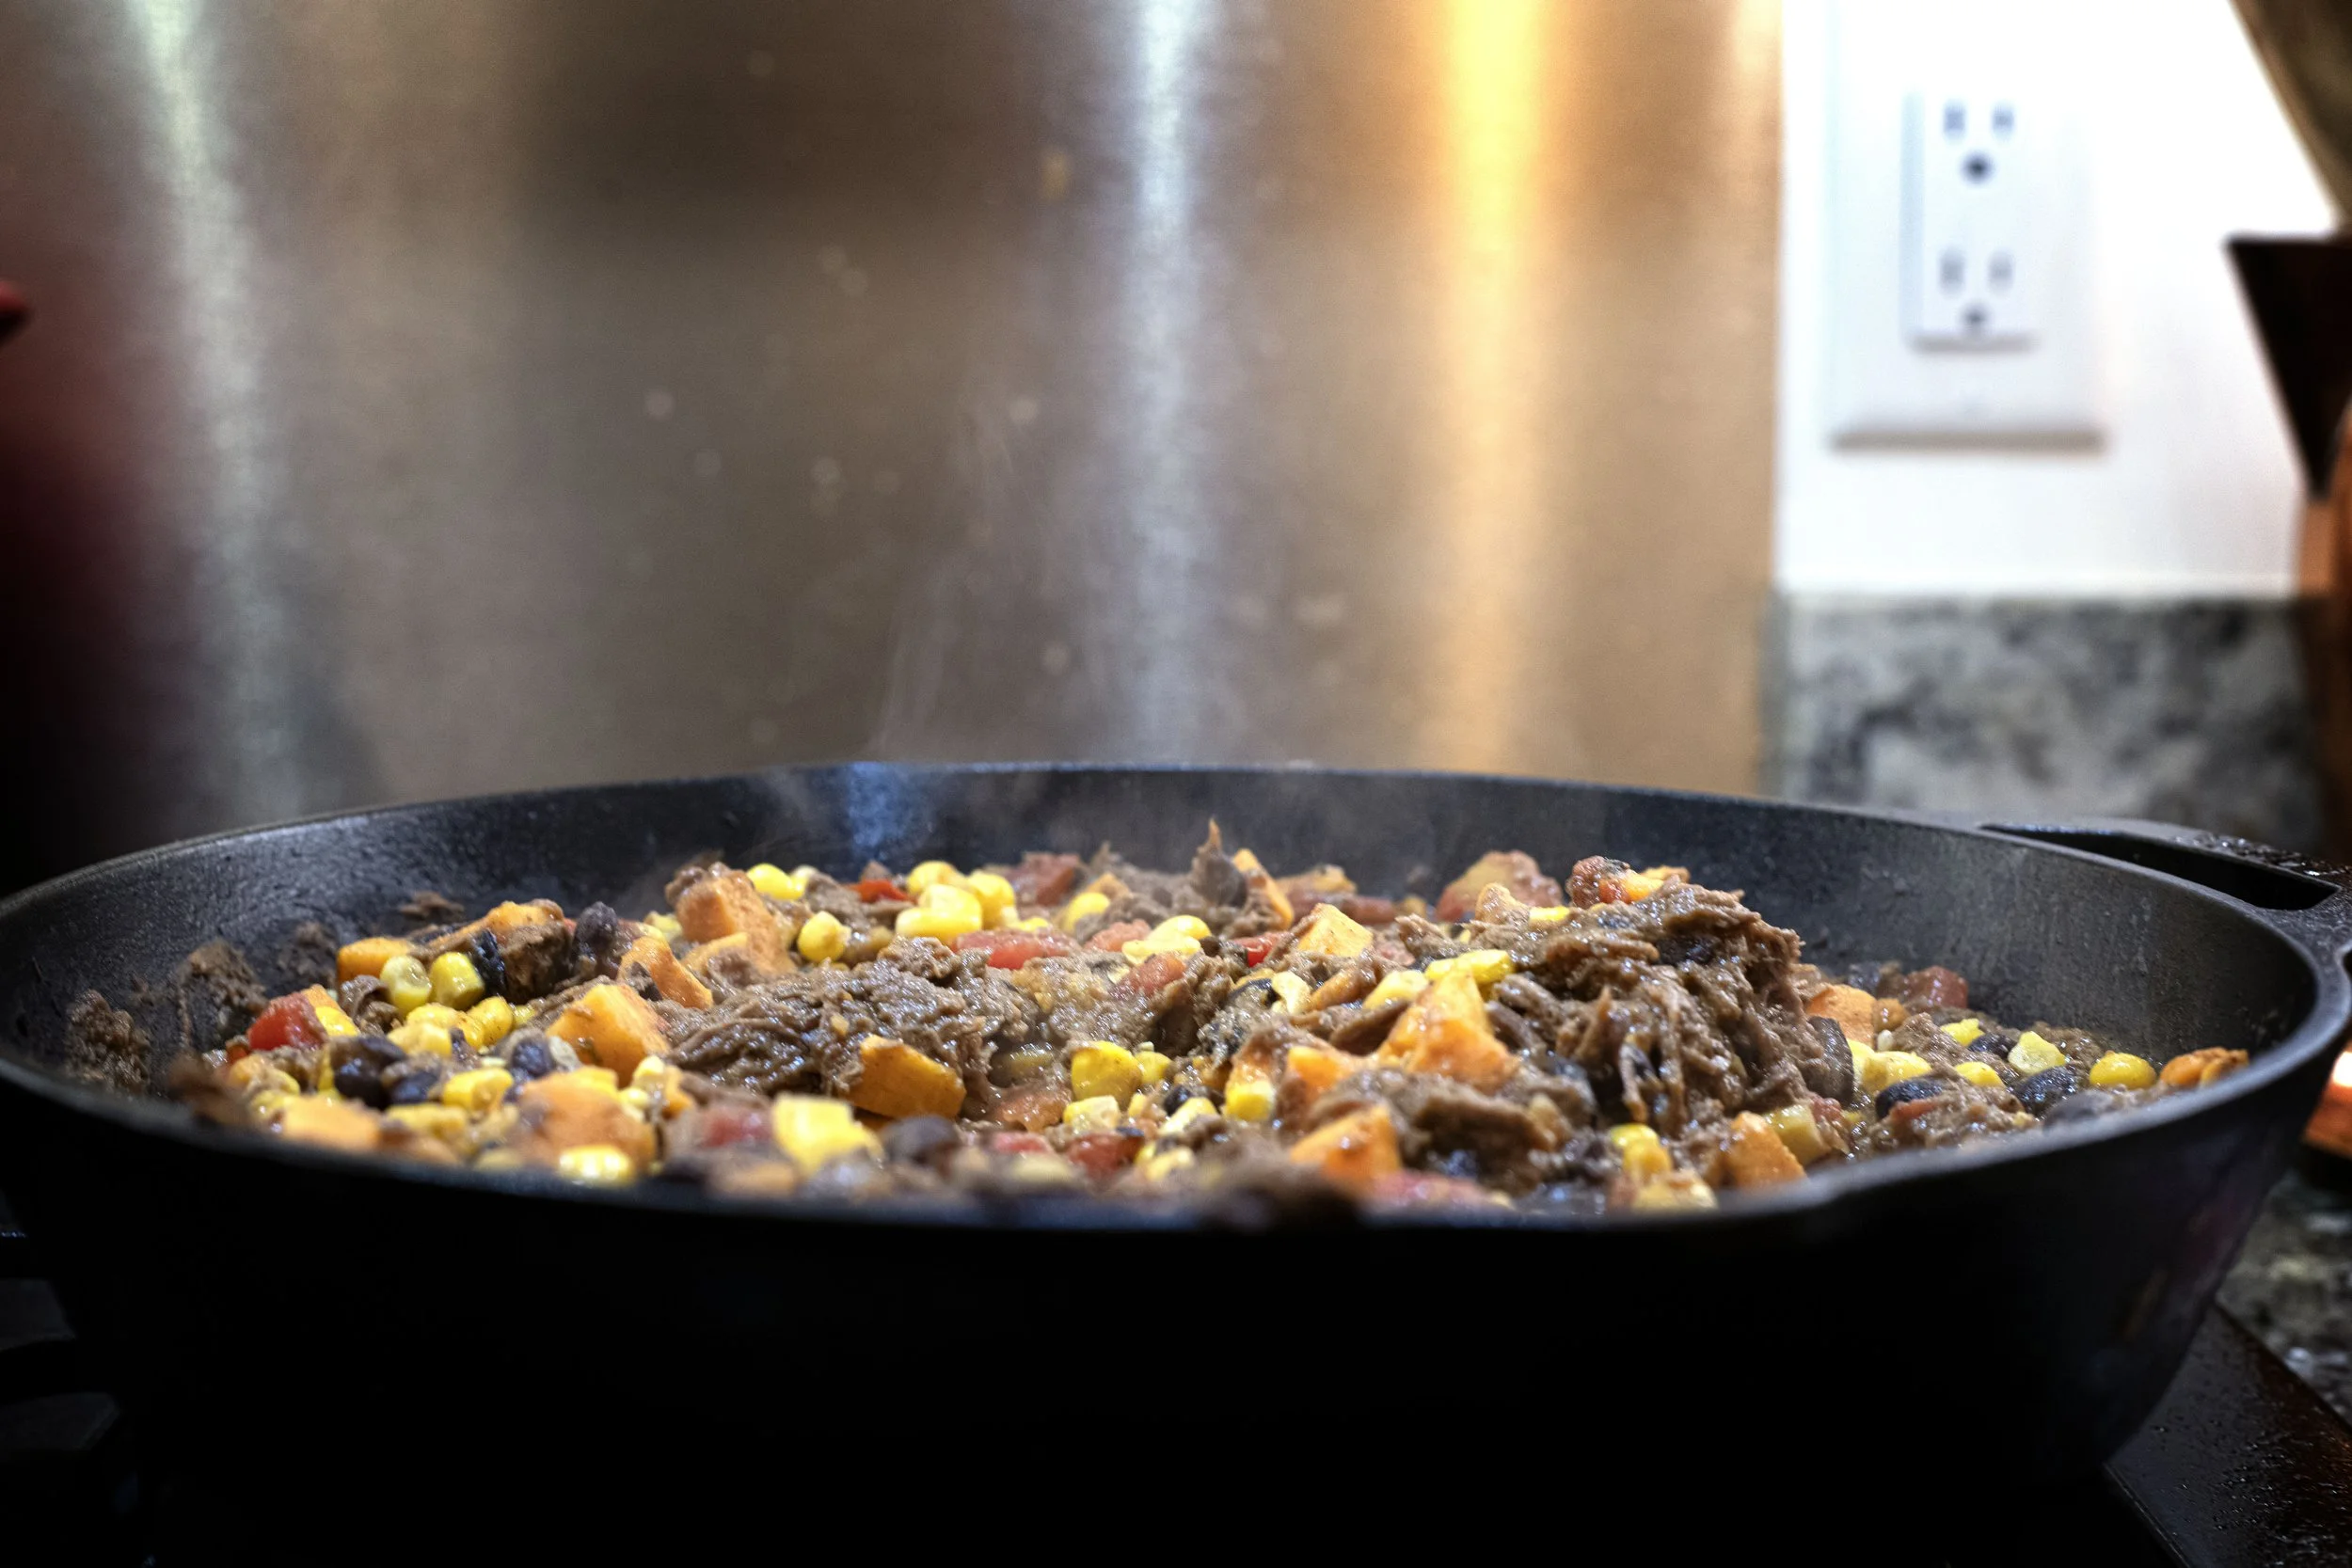
Once deglazed, season the taco mixture with the tomato paste, cumin, and chili powder. Let the beer simmer for about three to five minutes, or until the liquid has reduced by half.
While the beer is reducing, you can multi-task by prepping the avocado crema. Using a fork, smash your avocado into a smooth mash. Transfer it to a small bowl and mix vigorously with the Mexican crema. Sour cream or even plain Greek yogurt will also work beautifully here. Add the juice of one lime, a pinch of cumin, and a little chili powder. Whisk everything together into a smooth sauce and set it aside for plating.
Another quick task to knock out during the reduction phase is charring the corn. To remove the kernels from the cob, I use a handy trick I saw on a cooking show. Place a small bowl upside down inside a much larger bowl. Use the "island" created by the bottom of the smaller bowl to stand your corn cob upright. Then, simply run your knife down the sides of the cob; the kernels will fall safely into the larger bowl for mess-free collection. Toss the kernels into a separate small skillet over medium-high heat and char them for a few minutes, taking care to stir often so they don't burn.
Once the beer in your main skillet has sufficiently reduced, stir in the can of roasted diced tomatoes and your beautifully charred corn. Cook for three minutes more, and just like that, your taco meat is ready to go!
Assembly Time
When it comes to serving these tacos, a proper delivery vessel is required—which means it is time to warm up a few tortillas. I always prefer corn tortillas for my tacos, but you can absolutely use flour if you prefer (and I promise not to judge you too much!).
Wipe out that small skillet you just used to char the corn, add a light dusting of cooking oil, and set it over medium heat. Warm each tortilla for a minute or two per side until soft and pliable.
To plate, pile a generous scoop of the venison, sweet potato, and bean mixture right into the center of your warm tortilla. While garnishes are always a personal decision, I found that crumbled cotija cheese, freshly minced cilantro, and a couple of thin slices of fresh avocado pair beautifully with the flavors in the meat. Drizzle your homemade avocado crema over the top, finish it all off with a bright squeeze of fresh lime juice, and enjoy!

Venison Sweet Potato Taco
Try these Venison Sweet Potato Tacos with black beans, charred corn, and avocado crema. A fast pressure cooker meal with slow-roasted flavor!
Ingredients
- One pound venison chuck roast
- Quart vegetable stock
- One tablespoon avocado oil
- One large sweet potato, peeled and diced into 1” pieces
- One can (15oz) can black beans
- One can lager beer
- One tablespoon tomato paste
- Two teaspoons cumin
- Two tablespoons chili powder
- One can (14.5oz) roasted diced tomatoes
- Two ears sweet corn, kernels removed from cob (can be substituted for a 15oz can of corn)
- Salt and pepper
- Corn tortillas
- Garnishes: cotija cheese, avocado slices, minced cilantro, lime wedges, diced jalapeno
- One avocado
- ½ cup crema
- Juice one lime
- One teaspoon cumin
- Salt and pepper
Instructions
- Step 1: Pressure Cook the Venison
- Roughly cut the venison chuck roast into two inch chunks and season with salt and pepper. Add the seasoned venison chunks and quart of vegetable stock to the pressure cooker.
- Secure pressure cooker lid and ensure pressure release valve is closed. Set cooker to high pressure for 45 minutes.
- Once the timer goes off, allow pressure cooker to naturally release for 15 minutes before turning the pressure valve to venting. Once fully released, transfer venison to a cutting board and shred meat using two forks.
- Step 2: Prep the Sweet Potatoes
- Heat a large skillet over medium-high heat with a tablespoon of cooking oil. Once heated, add the diced sweet potato chunks and cook for five minutes.
- Drain liquid from the can of black beans and then add beans to the skillet and cook for three minutes.
- Add shredded venison to the sweet potato and bean mixture and continue to heat for three more minutes.
- Step 3: Deglaze and Season
- Deglaze the skillet with the beer and let liquid reduce by half, or about three to five more minutes.
- Meanwhile: While the beer is reducing, remove the sweet corn kernels from the cob and lightly toast for three to five minutes over medium heat in a small skillet. Be sure to stir the corn kernels often to prevent burning.
- Season the meat mixture by mixing in the tomato paste, cumin, and chili powder.
- Add the can of roasted diced tomatoes and simmer the mixture for three more minutes.
- Add the corn to the venison and sweet potato mixture. Stir and let warm for a few minutes.
- Step 4: Make the Avocado Crema
- Make the avocado crema in a small bowl. Mash the avocado with a fork. Mix avocado together with the crema, juice from a lime, a teaspoon of cumin and salt to taste.
- Step 5: Assemble and Serve
- Lightly warm the corn tortillas in a dry skillet or with a splash of oil, if desired.
- Place a generous scoop of the venison and sweet potato filling onto each warmed tortilla.
- Drizzle with the homemade avocado crema.
- Top with additional fresh avocado slices, crumbled cotija cheese, and minced cilantro.
- Serve immediately with fresh lime wedges and optional jalapeño slices for heat. Enjoy and happy hunting!
Nutrition Facts
Calories
687Fat (grams)
31 gCarbs (grams)
68 gFiber (grams)
18 gProtein (grams)
36 gNutritional values are rough estimates based on standard ingredients and will vary depending on your specific cut of wild game, brands used, and actual serving sizes.