Pheasant Recipes

Pheasant Shakshuka Breakfast Tacos: Wild Game Morning Recipe

From the first time those warm, vibrant, and comforting spices of shakshuka hit my tastebuds I was a fan. I was vacationing at a bed and breakfast in Santa Fe, New Mexico. I’m not a big fan of bed and breakfasts, I tend to shy away from dining with strangers and that is basically the goal of a bed and breakfast. The timidness I quickly develop with the introduction of unknowns also carries into unfamiliar foods. And I don’t know if there is much more foreign a breakfast experience than a spaghetti-looking egg dish for breakfast.
JUMP TO RECIPE

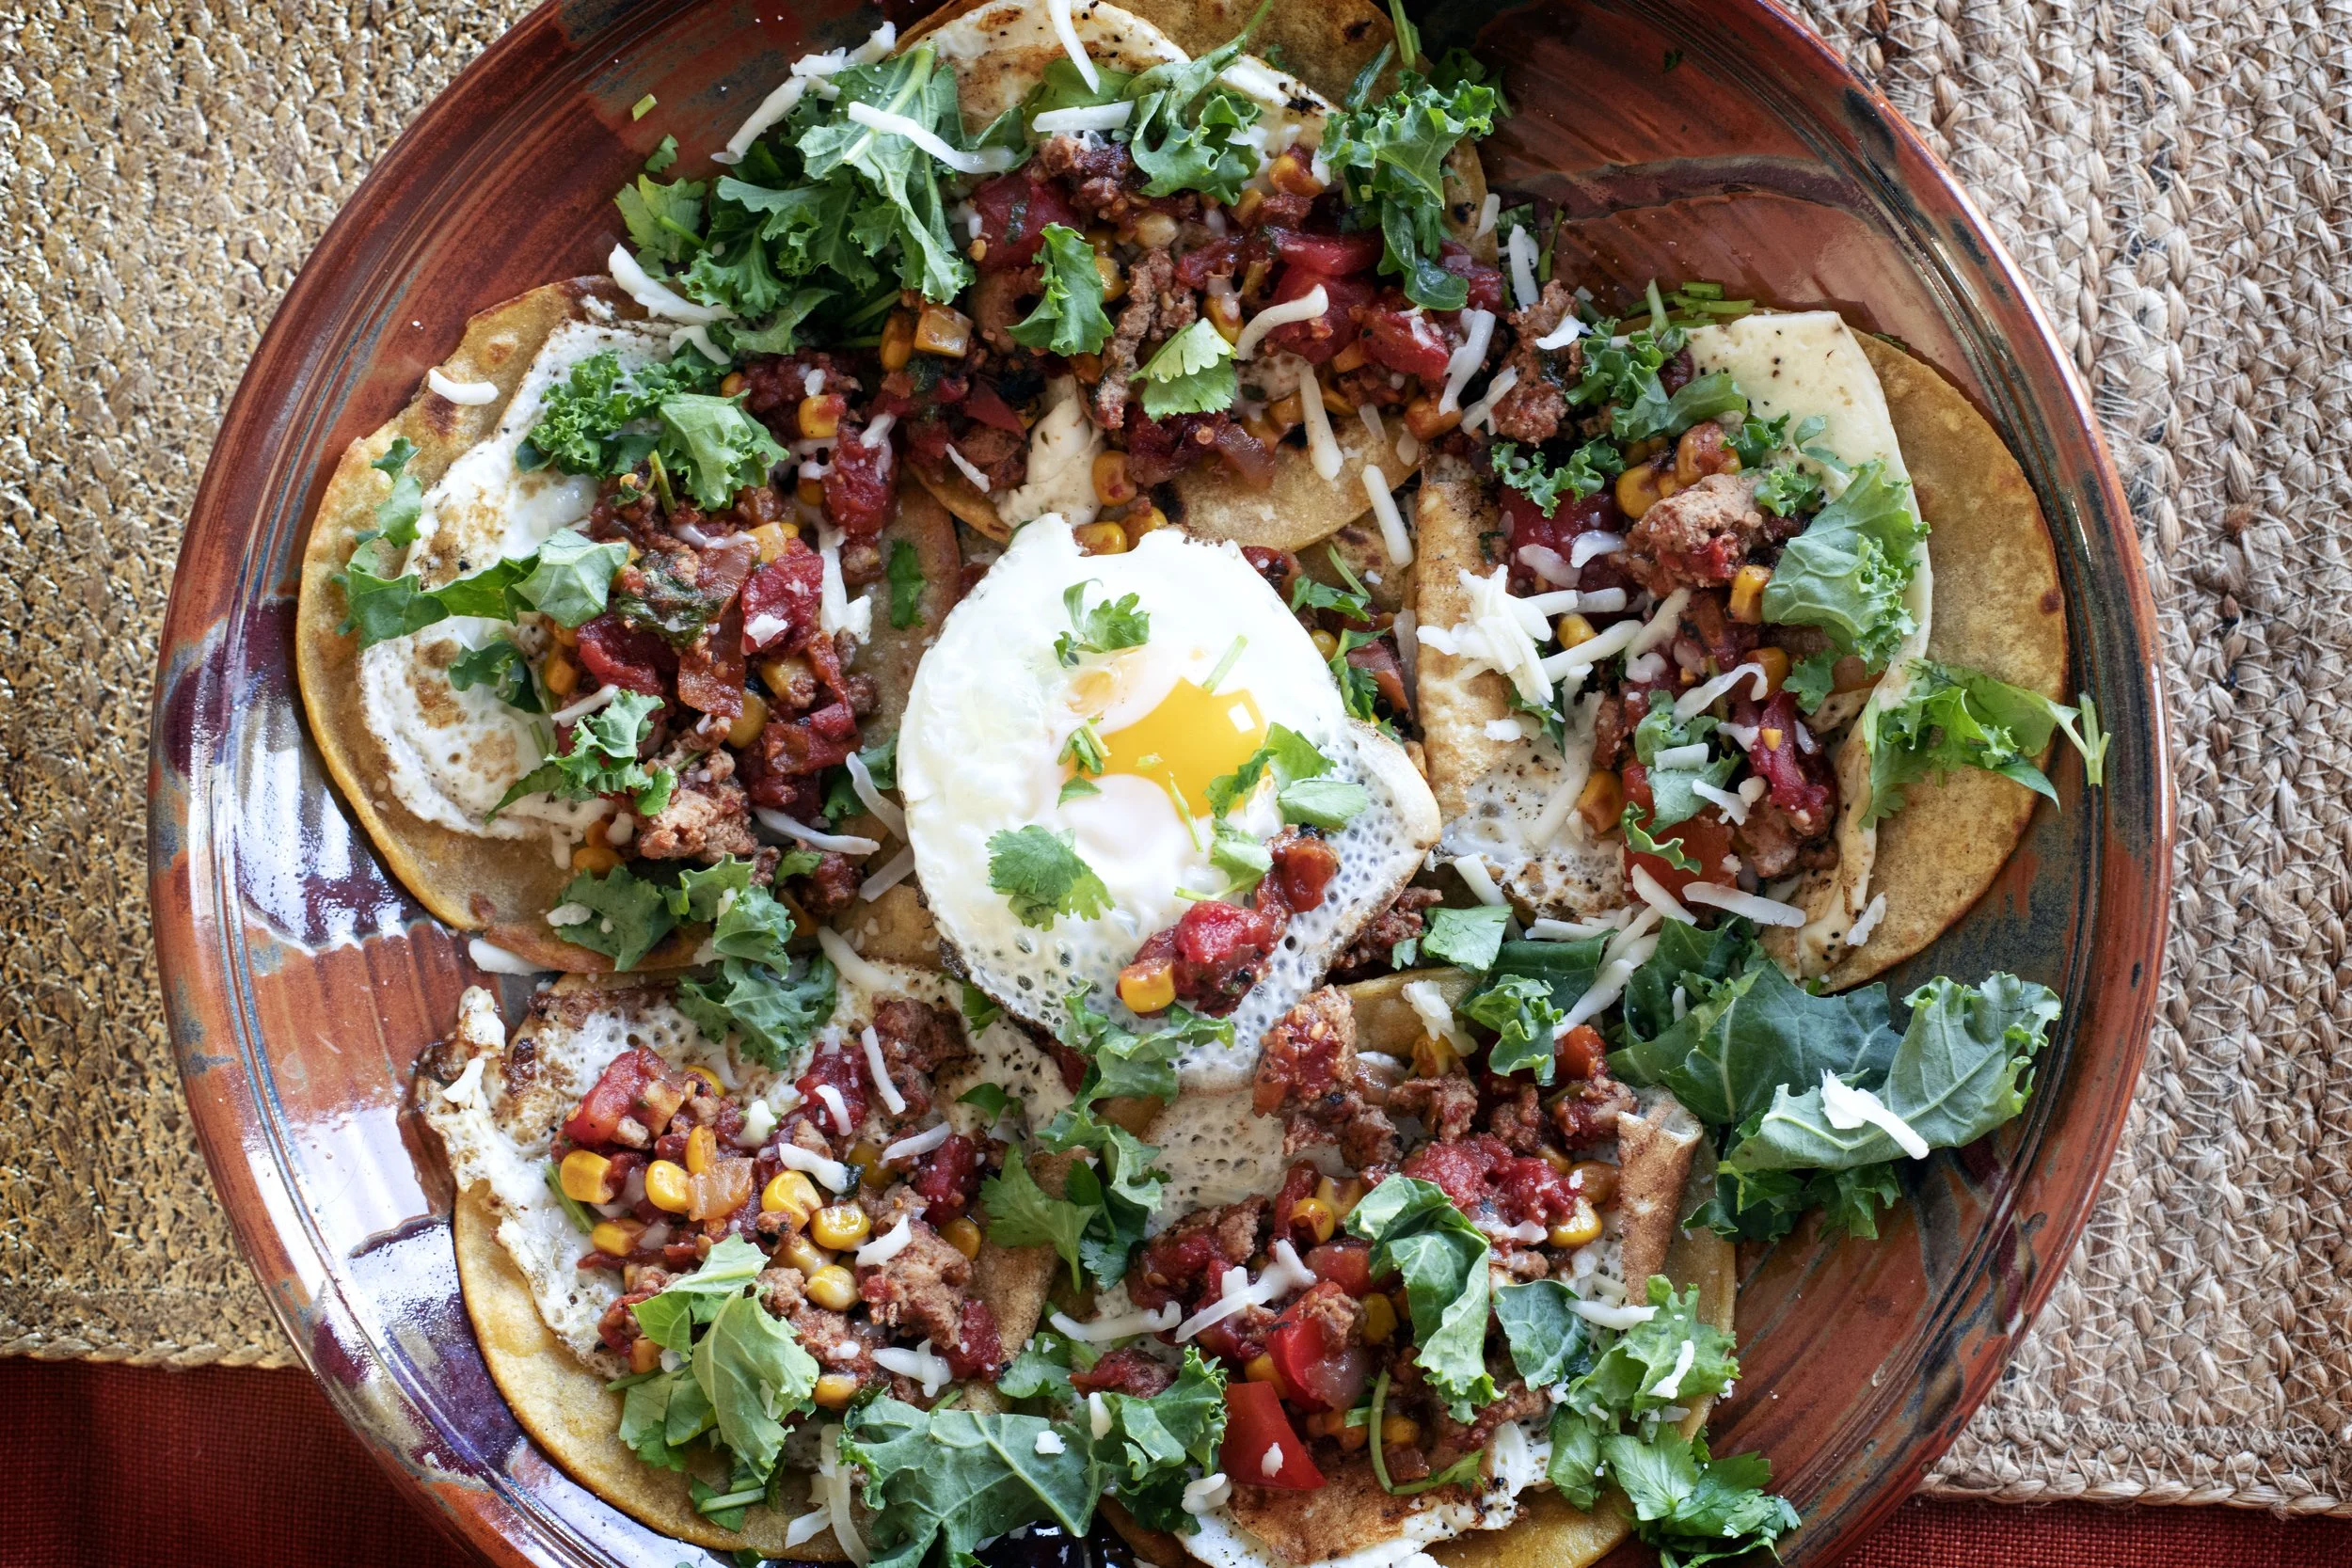
plate of shakahuka breakfast tacos with yellow corn tortillas, fried eggs, aromatic tomato stew, and homemade pheasant sausage

Don’t get me wrong, I do enjoy trying new things. I just find I am highly critical of the experience, and default to negative expectations. Even though my expectations tend to be proved wrong, my baseline mindset seems to rest at critical and negative. So, when the bed and breakfast host placed a large, heavy cast-iron skillet in the center of the table, steam still rising from the stewed tomatoes and bright, vibrant yellow yolks bathing in the crimson liquid, I was very skeptical.

 And of course, as always, those negative expectations evaporated with each bite. I was quickly convinced tomato stew should be nominated for inclusion on the list of breakfast staples. I also started thinking about how I could incorporate the comfy, roasted, rich egg dish into other recipes. I have been tossing the idea around on how to do just that for a few years, and I finally landed on this Pheasant Shakshuka Breakfast Taco. 

Making Ground Pheasant Sausage

Traditionally, shakshuka is a vegetarian dish, filled with tomatoes, peppers, onions, spices, and poached eggs; however, adding meat to the dish is easy and introduces another layer of flavor to the dish. I sat in front of my freezer for quite awhile debating protein choices and ultimately landed on pheasant this time around, but I think lots of other meats would work as well.

I always mix up my own sausage when working with wild game. I like to be in charge of the spices, the added fats, and the overall finished product. Making your own breakfast sausage is very easy. Start with selecting your protein, in this case pheasant, and running it through a meat grinder. I have this user-friendly electric meat grinder at home and use it anytime I want to make sausage, burger, or other ground meat varieties: Electric Meat Grinder

I didn’t add any fat to this sausage. I have gotten used to very lean meat and don’t miss the addition of a fat source; however, incorporating a fat can increase moisture, create a more pleasant textured meat, and enhance flavor. If you are interested in adding fat, I suggest using pork fat. 

First, decide the percentage of fat you want in your final product. So, if you want  20% fat content in your sausage, weigh out 3 ounces of pork fat and 13 ounces of pheasant, and you will end up with a one pound batch of ground sausage. Run both through the meat grinder, add them to a mixing bowl, sprinkle in your seasonings of choice, and thoroughly incorporate everything by hand. If you opt out of a fat source like I did, add a tablespoon or two of cold water to help bind the ingredients together

Creating the Pheasant Shakshuka Base for the Taco

The secret to a great shakshuka is the flavorful tomato stew that the other ingredients reside in. One key tip for amping up the flavor is to do all the cooking in a single, large, heavy cast-iron skillet. I like to use this one: Lodge Cast Iron Skillet

Begin by browning the pheasant sausage in the skillet. Once the sausage is cooked through, remove the meat and set it aside, but leave the drippings in the skillet. They will enhance the depth of flavor you are building for the tomato base.  
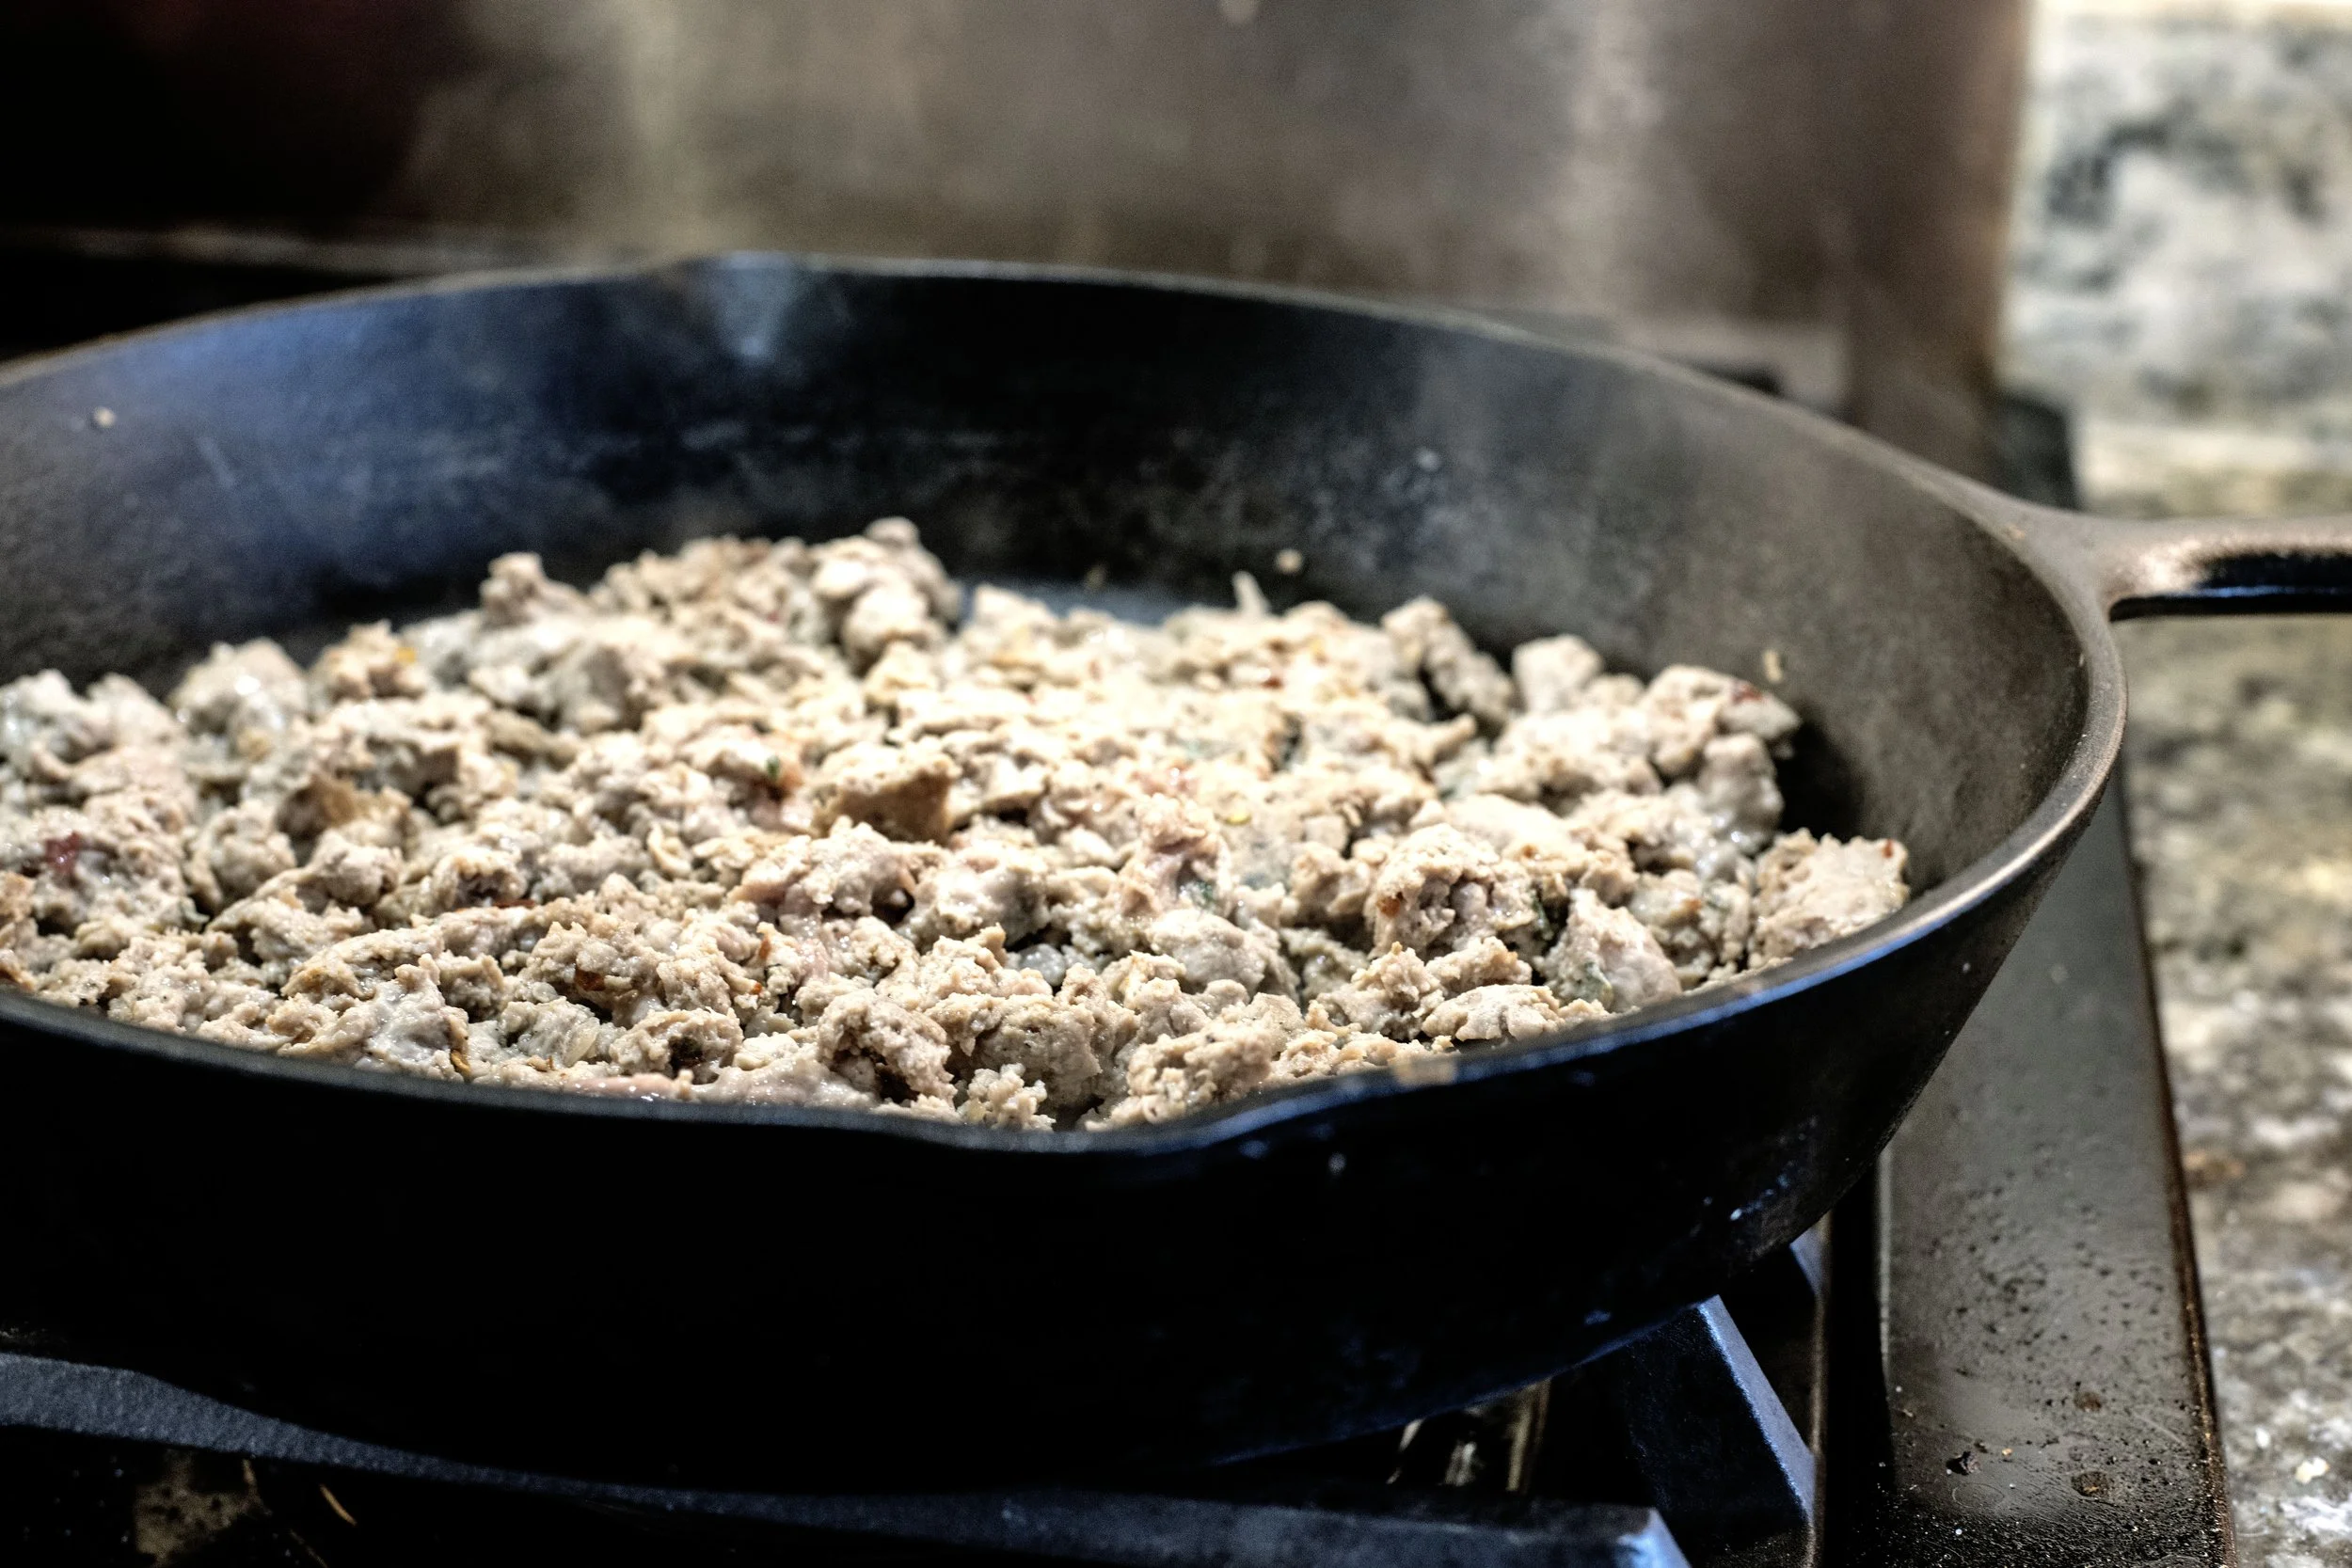
Ground Pheasant sausage browning in a heavy cast iron skillet

Next, add a tablespoon of cooking oil to the skillet, and saute the diced onions for three or four minutes before adding the red bell pepper. The color of the bell pepper isn’t important here. I went with red because I think they’re just a little bit sweeter, but orange, yellow, or green are all fine. Cook the bell pepper for three more minutes, and then stir in the minced garlic.
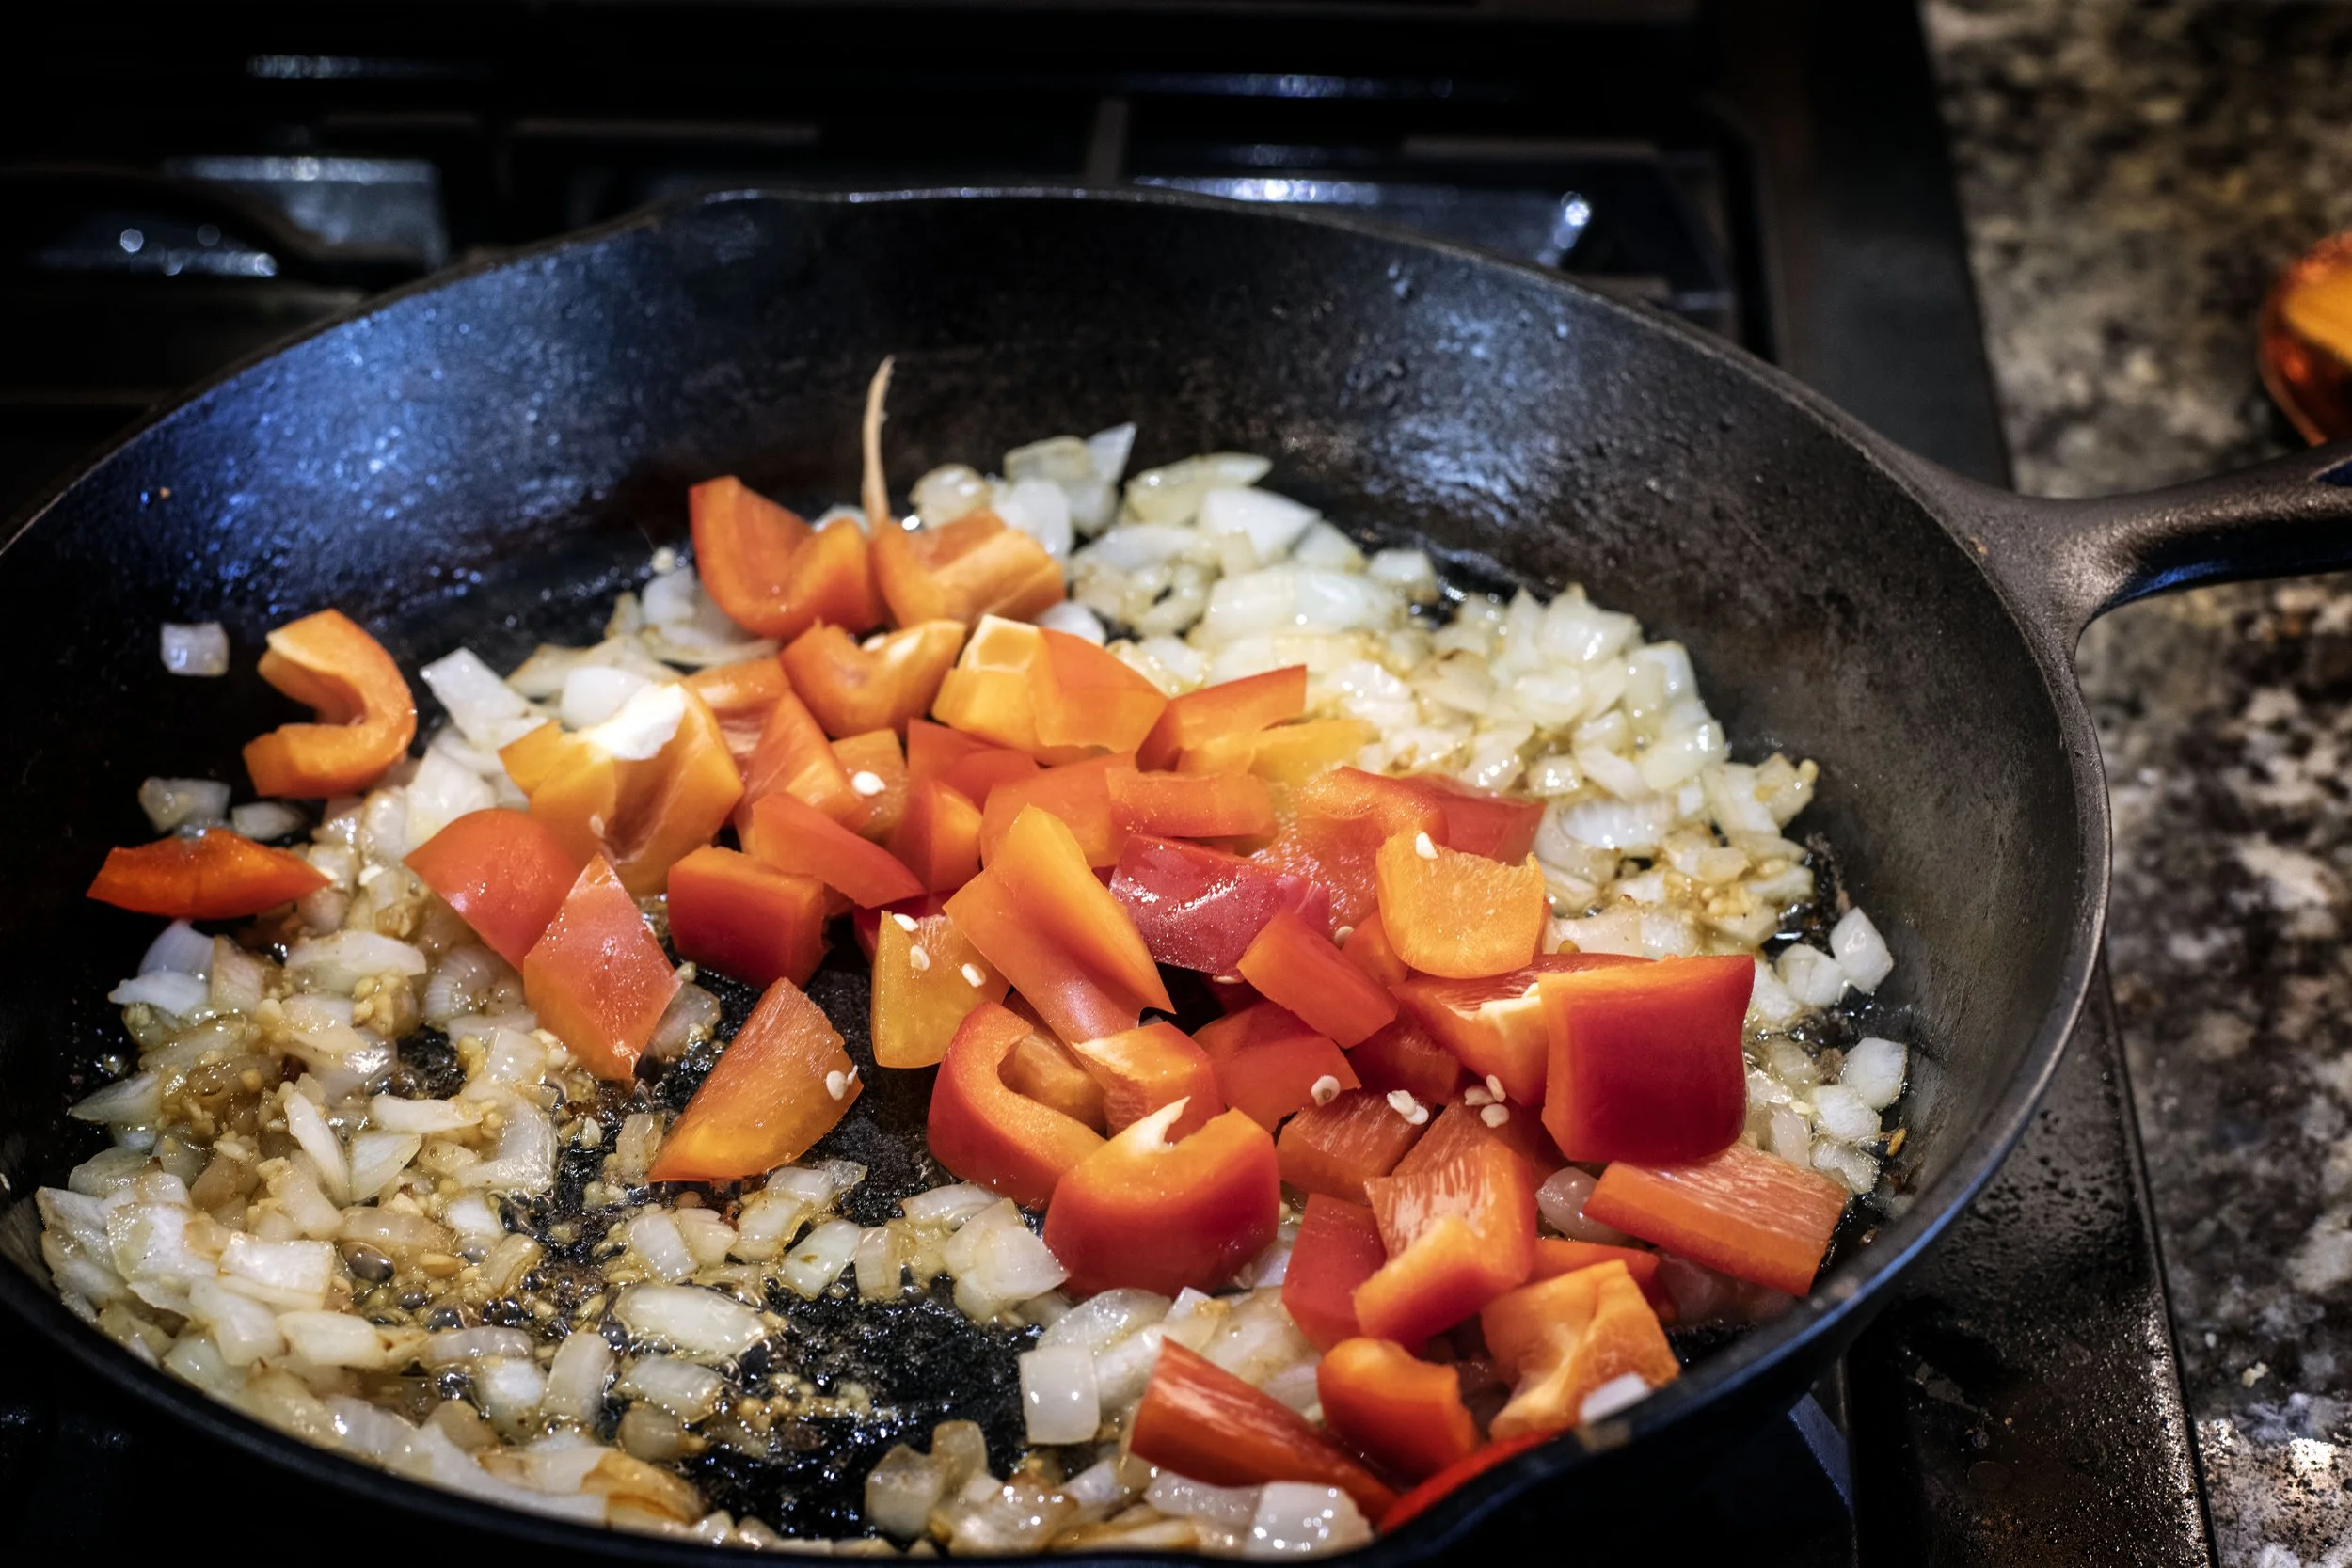
softened white onions and red bell peppers cooking in a heavy cast iron skillet

Return the browned pheasant sausage to the skillet and start adding in your shakshuka seasonings: a little chili powder (not too much, you aren’t making chili), some cumin, a decent amount of paprika (smoked or sweet both work), some floral-y coriander, and salt. Stir everything up real good - making sure to get the spices all over everything! - and then add the can of fire-roasted tomatoes.

If you want to really up the ante, you could roast fresh tomatoes in the oven and crush them before adding them to the skillet. But these are tacos! And tacos are notorious for being a quick meal, so I have no regrets on going with canned, roasted tomatoes.
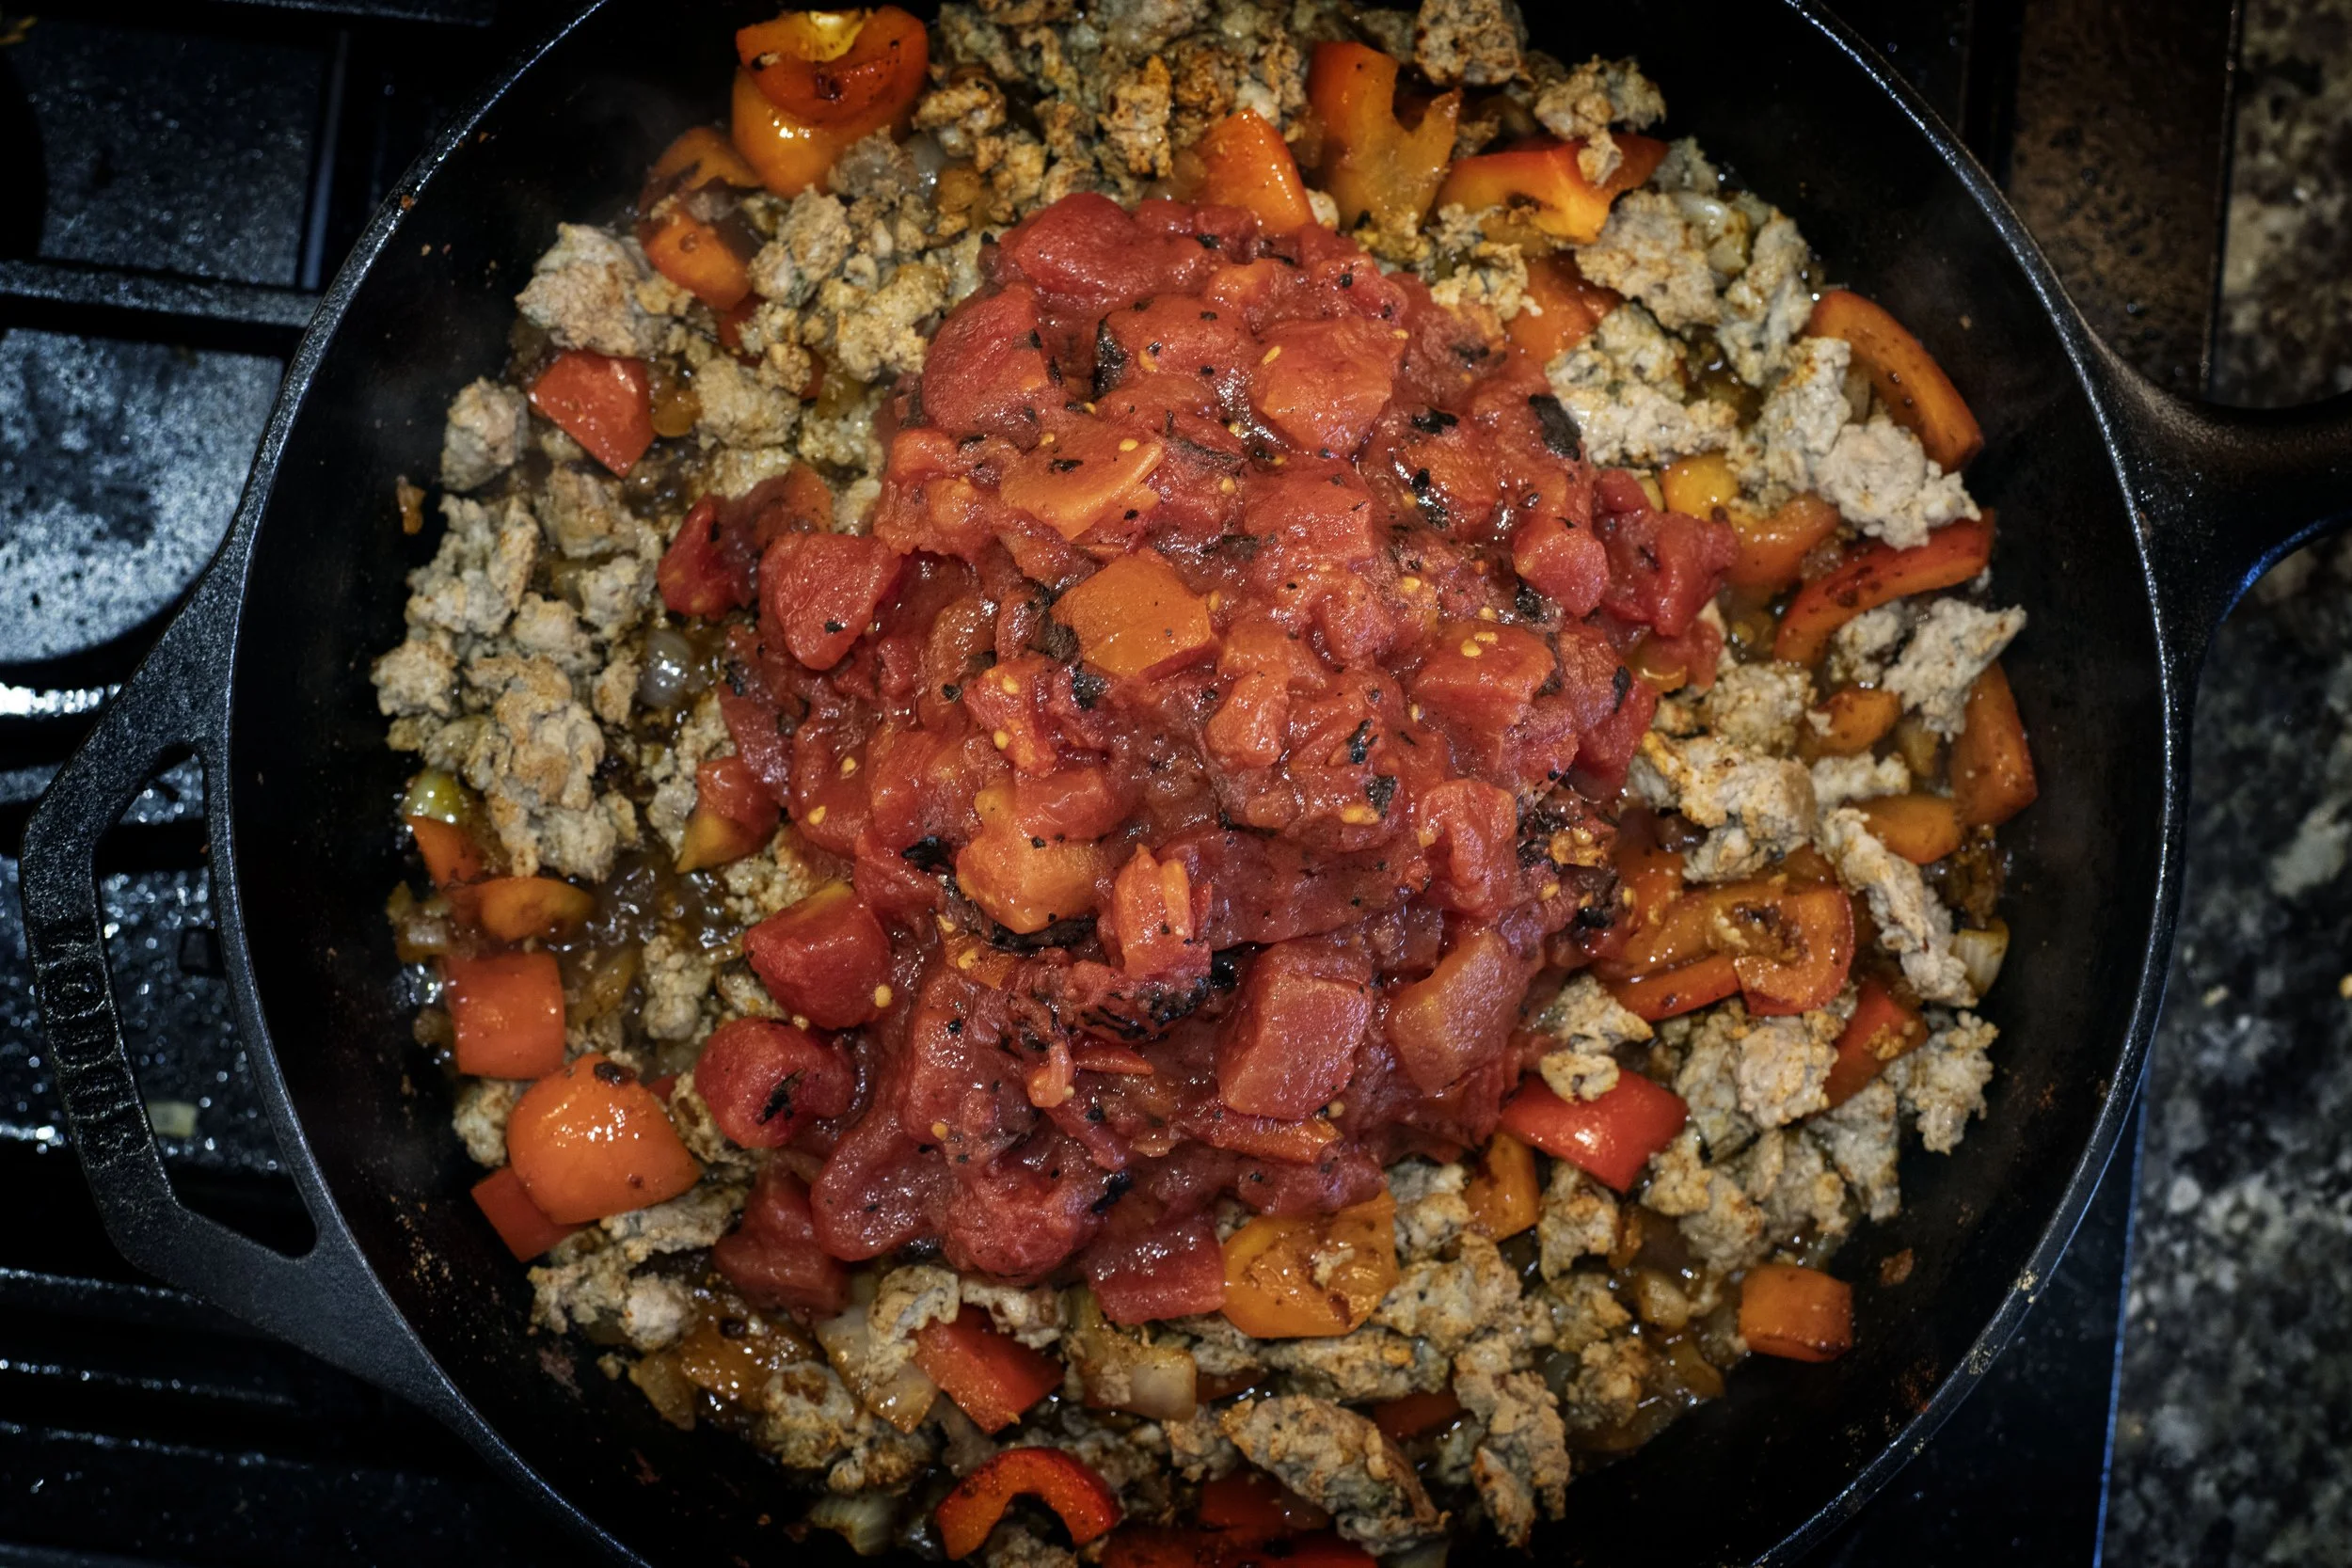
fire-roasted tomatoes on top of ground pheasant in cast iron skillet

Whatever tomato decision you reach, allow the mixture to simmer and reduce for five to seven minutes. 

Prep the Toppings

These wouldn’t be shakshuka, or breakfast, tacos if there wasn’t the lead actor of the show: the egg. Shakshuka eggs are traditionally poached directly in the tomato stew, but that wouldn’t work well for a taco. The delicate egg would be too messy for handling in the tortilla. So, I had to go with fried eggs.
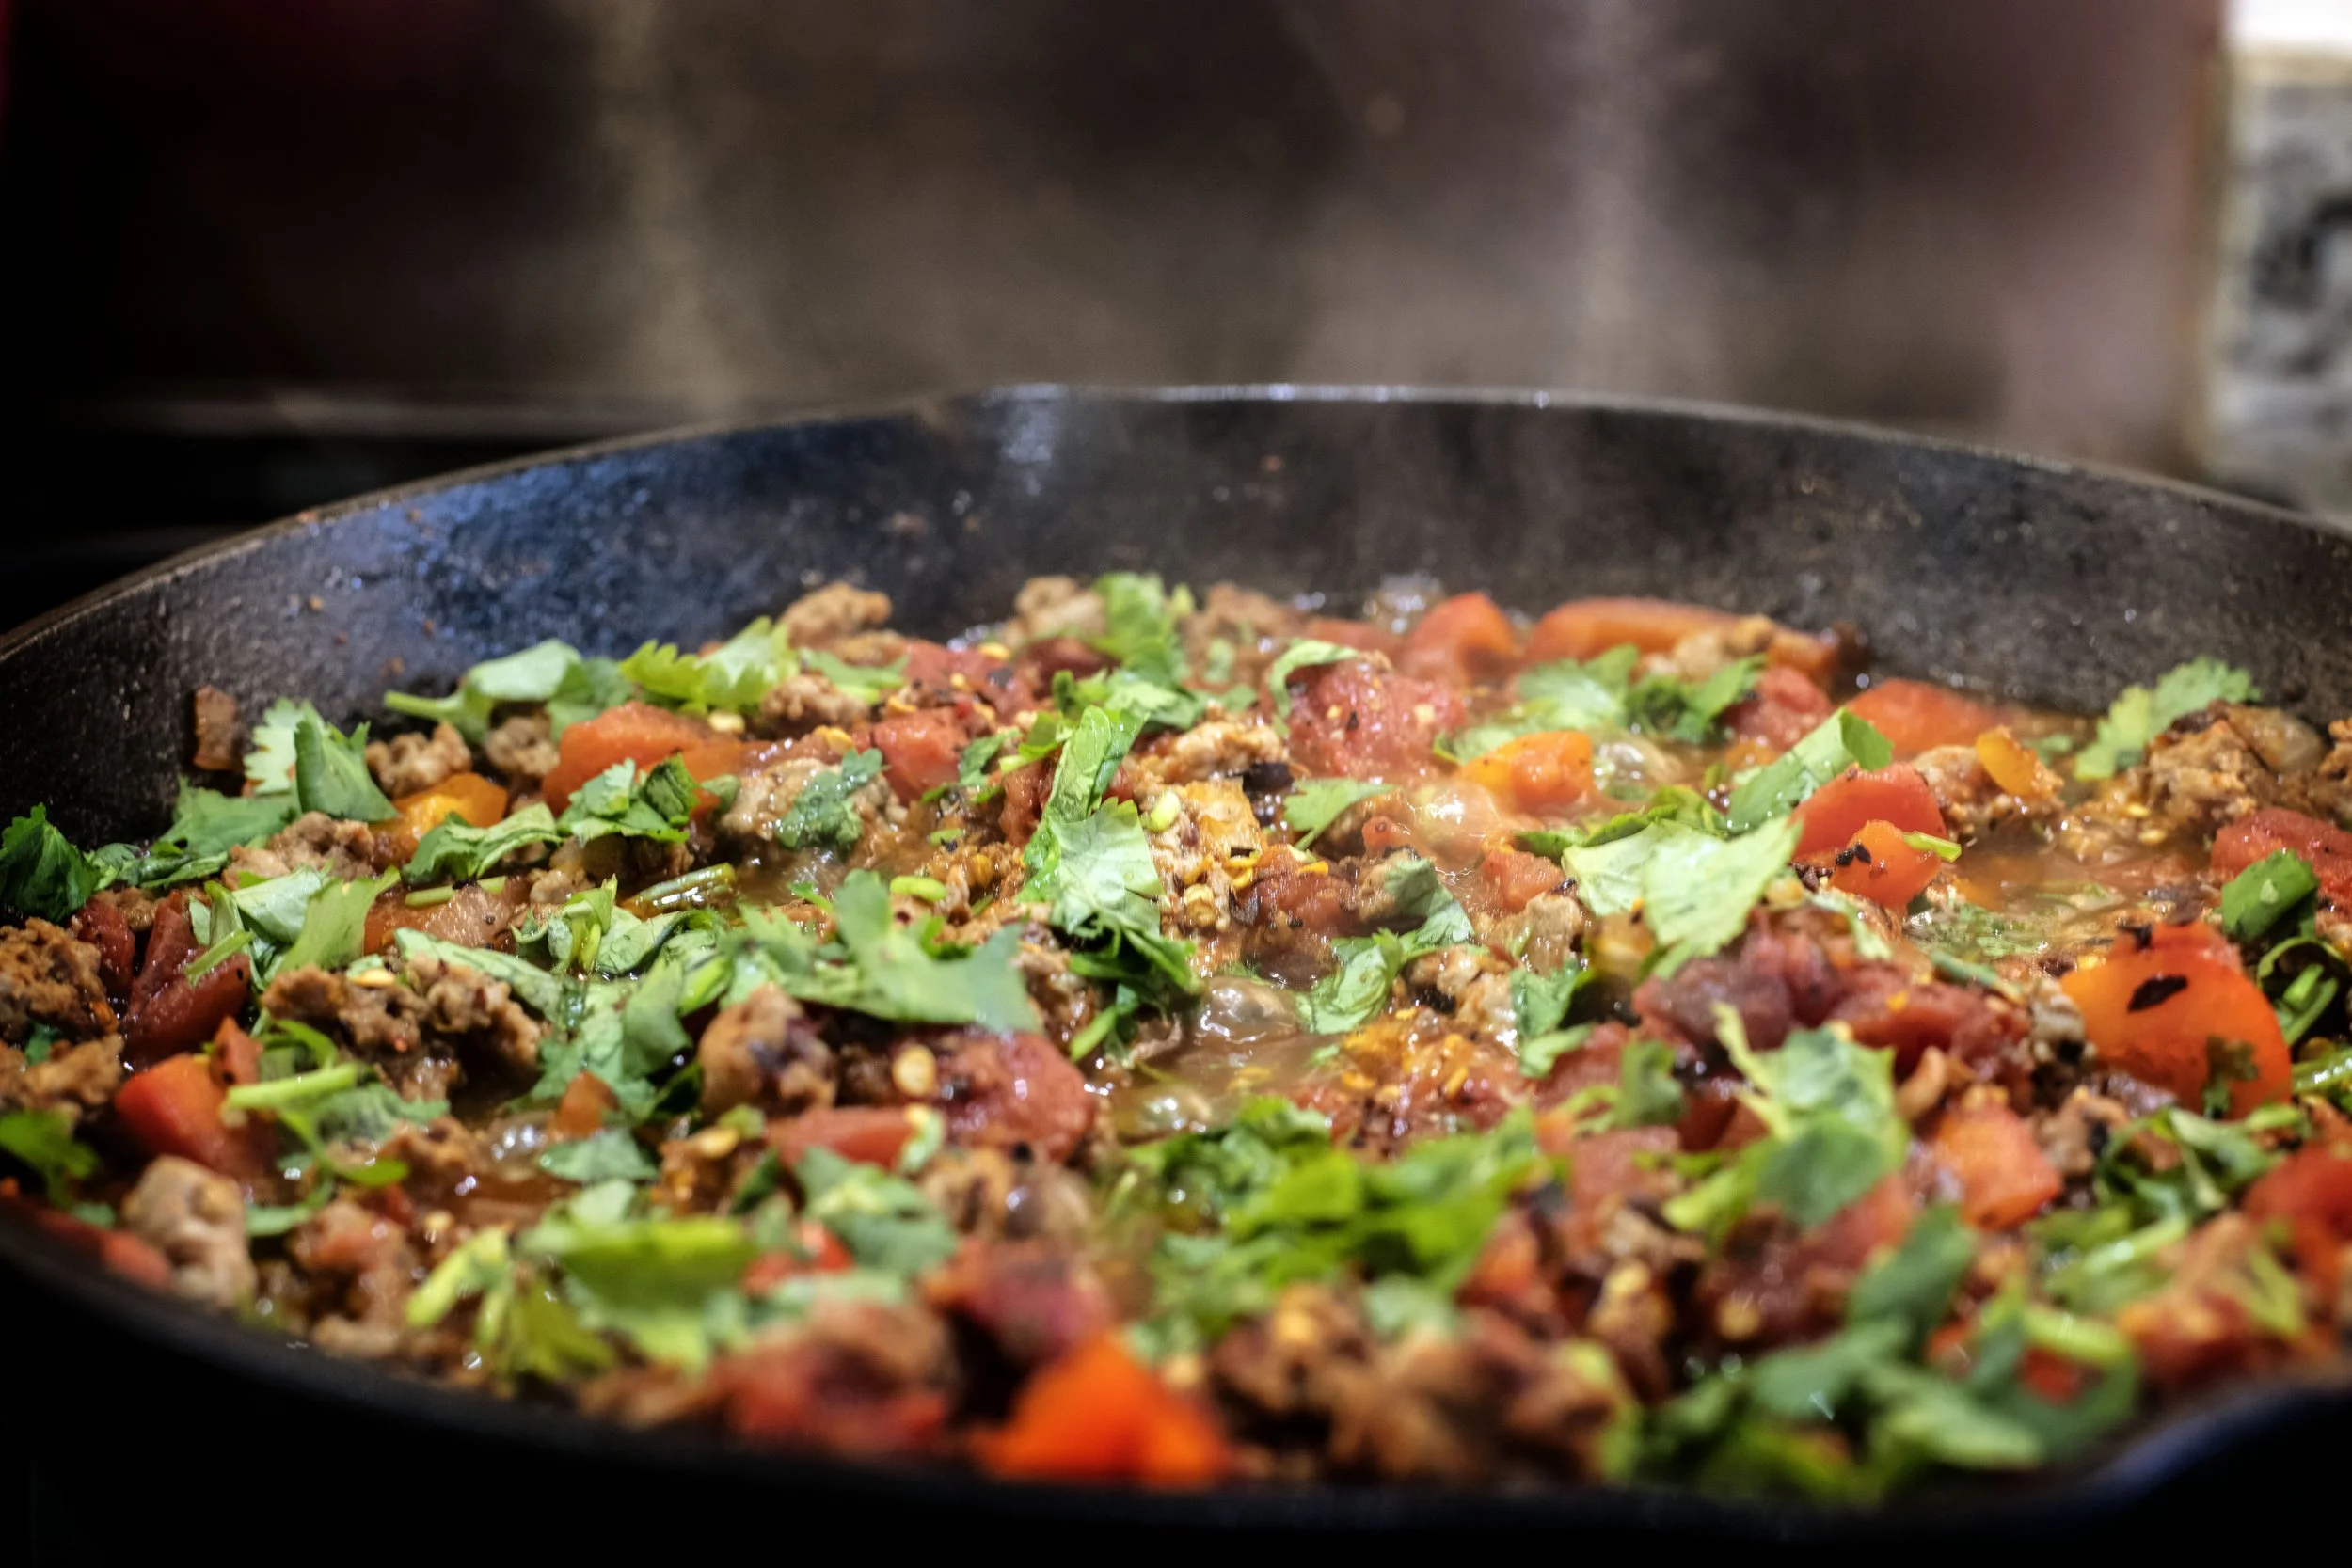
shakshuka taco meat with green kale and cilantro on top and fire roasted tomatoes with red bell pepper

While the taco base is simmering, fry one egg per taco. in a separate pan. At the same time, you can warm your corn tortillas. Other toppings to prepare include finely chopping fresh cilantro and a bit of kale. I loved the addition of kale to this taco. It not only added a crisp, fresh bite to the dish, but the vibrant red and green color contrast was highly appealing.

Finishing up the Tacos and It’s Time to Plate

To finish up the taco base, drain a can of corn and stir it into the mixture. Let the skillet heat for a few more minutes, maybe three or four, so the corn warms up. 
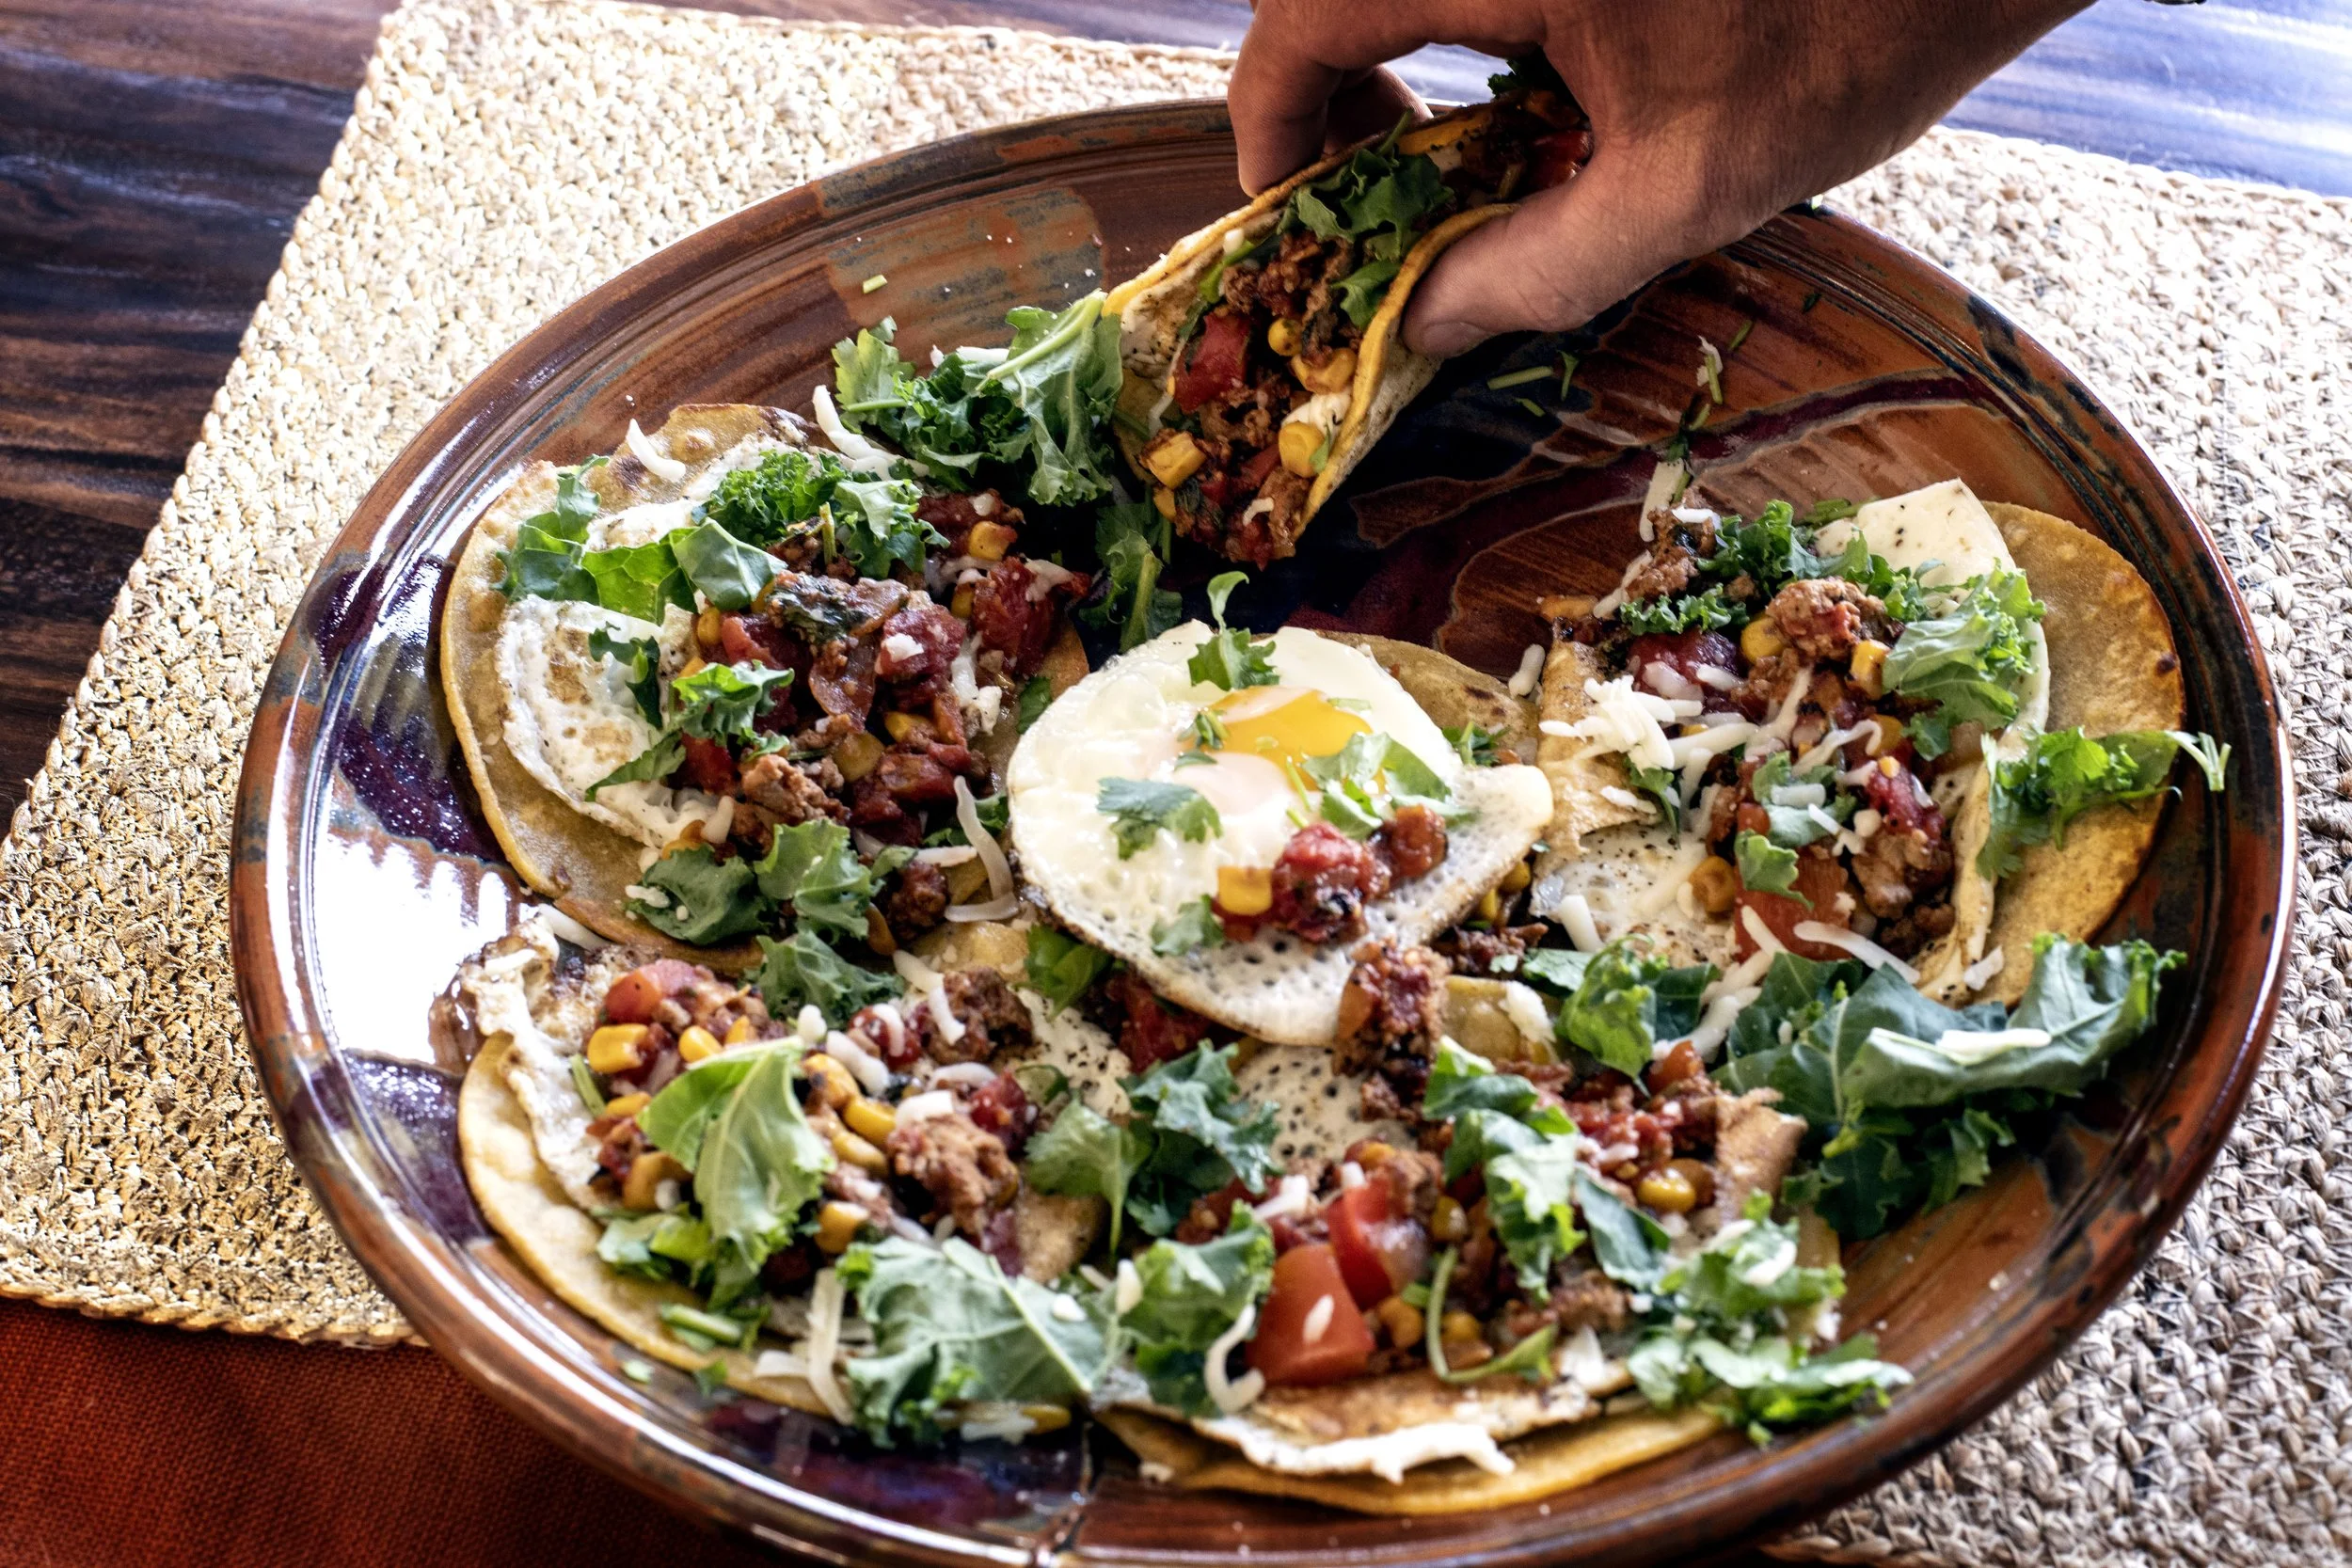
hand grabbing a taco from a plate of shakshuka tacos with corn tortillas, fried eggs, kale, tomatoes, red bell peppers, and ground pheasant sausage

To plate, add a heaping serving of ground pheasant meat mixture to a warmed tortilla. Top with a fried egg, minced cilantro, chopped fresh kale, and mozzarella cheese. 

Happy Hunting!
Yield: 4-6
Author: a 12 Gauge Girl
Pheasant Shakshuka Breakfast Tacos: Wild Game Morning Recipe

Pheasant Shakshuka Breakfast Tacos: Wild Game Morning Recipe

Cook time: 20 MinTotal time: 20 Min

Craving a unique breakfast taco? Try these Shakshuka-inspired ground pheasant tacos! Savory homemade game sausage simmered in fire-roasted tomatoes and sweet corn, topped with a fried egg—delicious for breakfast, brunch, or dinner.

Ingredients

For Ground Pheasant Breakfast Sausage
  • 1 pound ground pheasant
  • 1 teaspoon dried sage
  • 1/2 teaspoon thyme
  • 1/2 teaspoon fennel
  • 1 teaspoon garlic powder
  • 1 teaspoon onion powder
  • 1 teaspoon salt
For Shakshuka Taco Meat
  • 1 tablespoon cooking oil (such as avocado, canola, vegetable, or olive oil)
  • 1 medium onion, diced
  • 1 red bell pepper, seeded and diced
  • 2 cloves garlic, minced
  • 1 teaspoon chili powder
  • 1 teaspoon cumin
  • 2 teaspoons paprika
  • 1 teaspoon coriander
  • salt and pepper to taste
  • 1 can (14.5 oz) can diced roasted tomatoes
  • 1 can (15 oz) can corn
For Serving
  • Eggs, one per taco
  • Corn tortillas, warmed
  • Bunch fresh cilantro, minced
  • 1 bunched kale, chopped
  • Shredded mozzarella cheese

Instructions

  1. Season Pheasant In a large bowl, combine the ground pheasant with sausage seasonings - sage, thyme, fennel, garlic and onion powders, and salt. Use your hands to thoroughly incorporate the seasonings into the meat.
  2. Brown the Sausage Heat a large skillet over medium high. Brown the ground pheasant, breaking it up with a spoon, until meat is no longer pink, about five minutes. Remove the cooked pheasant and set aside.
  3. Saute Other Ingredients Maintaining the temperature in the skillet, add a tablespoon of cooking oil of choice. I used avocado oil, but canola, vegetable, or even olive oil is fine.
  4. Once oil has heated, add the diced onion and cook for three minutes.
  5. Remove seeds from red bell pepper and dice into 1" pieces. Add to skillet with onions and saute for three minutes more, until slightly softened.
  6. Add Garlic Mince garlic cloves and add to onion mixture. Heat for a minute or two. Be sure to stir the mixture so the garlic does not brown, which results in a bitter flavor to the dish.
  7. Simmer Taco Meat Return the ground pheasant to the skillet. Season the mixture with the chili powder, cumin, paprika, coriander, and salt.
  8. Add the can of roasted diced tomatoes, stir, and allow mixture to stew for 5 to 7 minutes, or until the tomato juices reduce and slightly thicken.
  9. Prep the Toppings While the taco meat is simmering, fry one egg per taco. Also heat the corn tortillas.
  10. Drain the can of corn and add to the meat mixture. Cook for three more minutes.
  11. Assemble and Serve To plate, add a heaping serving of ground pheasant meat mixture to a warmed tortilla. Top with a fried egg, minced cilantro, chopped fresh kale, and mozzarella cheese.
  12. Enjoy!

Nutrition Facts

Calories

382

Fat (grams)

18 g

Carbs (grams)

26 g

Fiber (grams)

4 g

Protein (grams)

30 g

 Nutritional values are rough estimates based on standard ingredients and will vary depending on your specific cut of wild game, brands used, and actual serving sizes.

Did you make this recipe?
Tag @a12gaugegirl on instagram and hashtag it #huntingandcooking

????? FREquently asked questions ?????

Pheasant Meatballs with Brandy Apples and Onions

Pheasant Meatballs with Brandy Apples and Onions

Pheasant meatballs filled with fresh parsley, sharp parmesan cheese, and panko bread crumbs swim in a brandy sauce of apples and onions.

Homemade Pheasant Stock

"Be worthy of your game." ~ George Bird Evans

"Be worthy of your game." ~ George Bird Evans

Learning to process game meat has been an eye opening experience.  It is a challenging and ever-evolving labor.  Cleaning a harvest is different, not only for different groups of animals, but even for different species within a specific subgroup of animals.  For example, it is obvious that a fish is cleaned differently than a duck, but it isn't always obvious that a duck may be cleaned differently than a goose, or even another species of duck. Cleaning also varies on how you plan to prepare or use the animal.  I feel I have only touched on the surface of cleaning animals.

Cleaning is just the beginning step of processing game meat too.  Storing and preserving meat is an entirely different story.  And not to mention learning how to use different parts of the animal! We often hear stories of how Native Americans used every part of an animal. Meat was obviously processed and eaten, but hides or feathers were used for shelter creation or clothing, bones could be constructed into tools or weapons, and tendons or sinew could be used to create thread or string.  Of course, those few examples only brush on the surface of how many parts of an animal are useful.

Utilizing the entire animal was definitely a survival tactic for Native Americans, and as a modern day hunter, that drive for survival isn't quite the same.  However, many hunters strive to use as much of an animal as possible.  Whether this desire comes from a simple curiosity as to what you can come up with to use what you have at hand, or is from a deeper desire to use every part of the animal as a form of respect, there are limitless possibilities on what to create or how to utilize an animal in its entirety, and it is definitely a learning process.

So, while this might be a small step in terms of all the possible things I could use a pheasant for, it is a first step and I enjoyed trying something new with a different part of the bird.  After cleaning all the meat from the pheasant, I saved the carcass and made a simple pheasant stock.  While I was excited to find a use for the leftover bones of my pheasant harvest, my primary drive for creating a pheasant stock developed from a nagging feeling I got when using chicken stock in my pheasant recipes.  For some reason, it bothered me when I would create a soup or sauce recipe for my pheasant meal, but had to use chicken stock as the base.  It seemed silly. So, I made a small batch of pheasant stock from the carcass and can now use that as the base for whatever pheasant recipe I work on next.

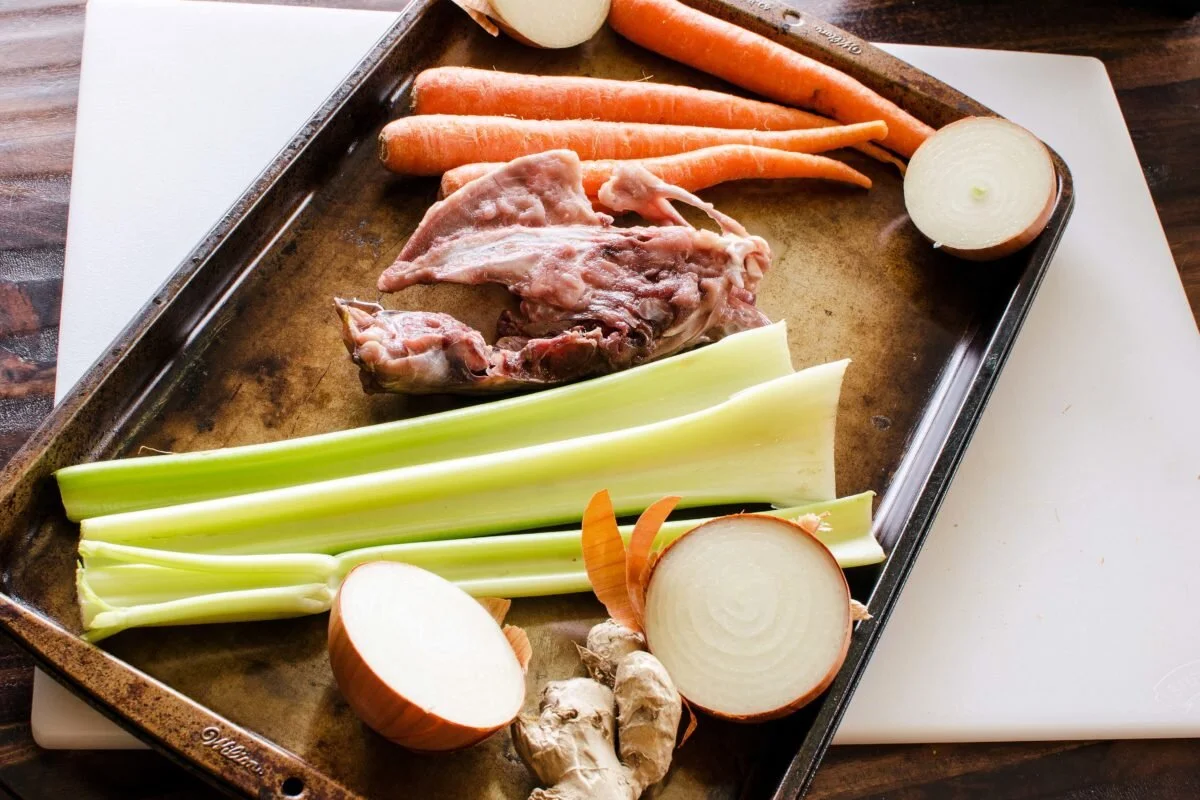
For the stock, a few simple ingredients are necessary to help develop a deeper flavor profile.  Aside from the pheasant carcass, you will need carrots, celery, and onion.  I used around four medium sized carrots, three stalks of celery, and two medium sized onions.  You could also add a few cloves of garlic.  To create a little uniqueness in my stock, I also added in a four inch piece of whole ginger root.

PhesantStockIngredientsSamller-1200x795.jpg

Preheat the oven to 400 Fahrenheit and roast the pheasant carcass, celery, carrots, onion, and ginger root for 20 minutes.  There is no need to cut anything up or do any type of prep work before roasting.  The only step I took was the cut the onions in half.  I did not peel the carrots or even remove the onion skin.  If I had added garlic to this stock, I would have roasted the cloves whole as well.

PheasantStockRoasting-1200x800.jpg

Once the vegetables and pheasant are done roasting, transfer everything to a large pot.  I did remove some of the skin from the ginger root before adding it to the pot, but that was about it.  I left the onions whole and broke the celery in half so it would fit in the pot, but other than that not much work to be done!  At this point, toss in a couple of bay leaves and add enough water to the pot to cover everything by about two inches.  The amount of water needed will vary based on the size of your pot, but it should be somewhere between eight and twelve cups.  I used ten for my pot.  Heat the pot over a medium heat and watch until the water starts to boil.  Once it boils, cover the pot and reduce the heat to a simmer.  Let the stock simmer for a few hours, checking occasionally to make sure there is still enough liquid in the pot and that the pot is still just simmering and not boiling.  I let my stock simmer for about four hours.  The liquid reduced from ten cups to eight by the end of the cooking time.

PheasantStockBoiling-1200x800.jpg

If you are interested in creating a little bit of a different flavor profile for your pheasant stock, instead of using onions you could substitute leeks.  You could also add fennel for a hint of licorice.  Herbs can also be infused into the stock, such as thyme, sage, or basil.  Strain the entire pot through a fine mesh colander, and discard all the vegetables and carcass.  Allow the liquid to cool.  In the end, the stock should be a beautiful auburn color and have a mild savory flavor.

I plan on using my stock within the next couple of days, so I poured it into mason jars and stuck it in the fridge.  It should last in the fridge for about five days.  Canning the stock is another option; however the process for cooking is a bit different.  I prefer to freeze homemade stock that I am not going to use.  I put it in a large Tupperware container and just pop it in the freezer.  It will last indefinitely in the freezer.

This stock has a hint of the richness from the pheasant bones and also a clean, fresh taste from the vegetables.  It is not salty, which took me a minute to get used to.  When using store bought chicken stock, the stock is salted and, for me, that is the main flavor that stands out.  This pheasant stock is a base starting point for any sauces, broths, or soups you might create with it.  Think of the stock as a building block that will enhance and develop flavor in your dish.  This recipe allows you to extract the umami (one of the five basic tastes) to use as an ingredient from a bird carcass or other bones.  It also gives a little more reward to yourself and the animal that provided for you.

Happy Hunting!

Coconut Pheasant Soup

”All really wild scenery is attractive. The true hunter, the true lover of wilderness, loves all parts of the wilderness, just as the true lover of nature loves all seasons. There is no season of the year when the country is not more attractive than…

”All really wild scenery is attractive. The true hunter, the true lover of wilderness, loves all parts of the wilderness, just as the true lover of nature loves all seasons. There is no season of the year when the country is not more attractive than the city; and there is no portion of the wilderness, where game is found, in which it is not a keen pleasure to hunt.” ~ Theodore Roosevelt

Cooking is a continuous learning process, and working with wild game is no exception.  For me, I tend to focus on building harmonious flavor profiles, and concentrating on that one area takes up more time than I have in a day.  However, there are hundreds of aspects in the cooking process that can all be developed, modified, re-evaluated, and maybe even re-invented.  I try to break myself of solely focusing on flavor medleys and try to improve and learn in different areas.  This recipe, coconut pheasant soup, allowed me to not only work on creating a great flavor profile, but also forced me to look at how textures work together, which is equally important in a dish's presentation.

I find pheasant meat to have a unique texture.  Many people compare pheasant to chicken.  I don't think the comparison is accurate when describing pheasant.  Pheasant, like chicken, is a mild flavored meat.  Some meats have very strong and distinct flavors, and working with them can be challenging because they fight with other flavors.  Pheasant is not like that and can be incorporated into a large number of dishes acting as a base for building flavor.

Where I think pheasant differs from chicken is the texture of the meat.  Pheasant is a bit more tough than chicken, which I am sure comes from the differences in how pheasant and chickens live and also how they eat.  Pheasant meat is a bit darker and much leaner than chicken also.  This difference can best be captured by simply pan frying a chicken breast and pheasant breast and comparing the two.  The chicken breast will be moist and light, because of the extra fat in the meat.  The pheasant will be tougher and much drier.  Because pheasant meat can dry out so quickly when cooked, it is commonly marinated, cooked low and slow, or even wrapped in a fat source, such as bacon, to create moisture and tenderness.

CoconutPheasantSoupIngredients.jpg

I find myself making a lot of meatball recipes because I think the slight toughness that develops when quickly cooking pheasant works well in meatball form.  However, after making a few meatball recipes, I decided that I wanted to try something else with the breast meat.  I am a big fan of Thai food, and especially a hot cup of tom kha gai.  A coconut based soup, tom kha gai is a spicy soup found in Thai and Lao cuisines.  Traditionally, it is prepared using galangal, kaffir lime leaves, lemon grass, thai chili peppers, mushrooms, and fish sauce.  While chicken is the main protein source for the soup, many restaurants also offer shrimp or tofu options.  Besides having a deliciously sweet and spicy broth, one of my favorite attributes of tom kha gai is how it uses textures to enhance the soup.  The mushrooms are soft and tender, while the chicken, since it is boiled, has a meatier, tougher texture.  A little crunch can also be added with a sprinkling of green onions.  The broth is very thin and silky.

The last time I had tom kha gai, I made a mental note to try and create a version at home using pheasant, since pheasant has that meatier texture that I love in the soup.  So, here the recipe is! And I found it to be a great use of my pheasant.

To a large stock pot, add a tablespoon of cooking oil and heat over medium heat.   I used coconut oil for my cooking oil, but you could use vegetable, canola, olive, or whatever oil you prefer.  Add in the minced garlic, lemon grass, and grated ginger root.  Heat for two minutes, being careful not to burn the garlic.  If the garlic starts to brown, turn the heat down.  There are three different options for the lemon grass with this soup.  I used two tablespoons of lemon grass paste, which is found by the fresh herbs in a tube.  You could also use a stalk of fresh lemon grass.  The stalk can either be added whole to the soup and removed at the end, or you could mince it up and leave it in the soup.  The paste or minced stalk both add a bit of crunch to the soup, which some people may not like.  If you do not want the bits of crunchy lemon grass, I would suggest just adding the stalk.  I like the crunch, so I went with the paste.  It is really a personal preference on textures, so go with whatever method you find most appealing.

CoconutPheasantSoupCurryPaste.jpg
CoconutPheasantSoupBase.jpg

To the garlic and ginger, add one tablespoons of red curry paste.  Stir and coat everything with the paste.  Once incorporated, add a cup of the pheasant stock and dissolve any leftover chunks of the paste.  You also want to break up any thing sticking to the bottom of the pot, as this will add even more flavor to the soup base.  For the stock of this soup, I used homemade pheasant stock.  The recipe for it can be found here: Homemade Pheasant Stock.  You could also use chicken or vegetable stock.

Once the red curry is fully dissolved, add the rest of the pheasant stock, three tablespoons of fish sauce, and a tablespoon of honey.  If you don't have honey on hand, any sweetener of your choice will do, such as brown or white sugar.  Stir everything and bring to a light boil.  Once the soup base reaches a slow, rolling boil, reduce the heat to a simmer and allow to cook for twenty minutes.  This will reduce the soup base down and concentrate the flavors of the lemon grass, ginger, and red curry.  The lemon grass, which is a culinary herb commonly found in Asian style cuisines, adds a subtle citrus flavor to the soup while the ginger gives a spicy, fresh crisp flavor, and the red curry adds a hint of heat.

After the twenty minutes, bring the heat back to medium and add the three cans of coconut milk.  The milk will create the smooth and silky texture found in the soup, and you can adjust how creamy you want the soup to be based on which coconut milk combination you use.  I used two cans of full fat coconut milk and one can of lite.  You could do three full fat, all three lite, or a combination of the two.  The more full fat cans you use, the thicker and creamy the soup base will be.  Bring the soup base back up to a gentle, rolling boil and add the pheasant meat chunks.  In order for the meat to cook correctly, make sure they are cut into bite size pieces all roughly the same size.  Allow to cook for five minutes.

Add the sliced mushrooms to the pot and allow the cook an additional five minutes.  With the mushrooms, I used white button mushrooms, but you can substitute in other types.  A lot of recipes use shitakes, which add a nutty element to the soup.  Baby portabellas or crimini would also be great in this soup, as both have an earthy flavor and a slightly meaty texture.

CoconutPheasantSoupMushrooms.jpg

Turn the heat off from the pot and add the final ingredients to the soup: the fresh squeezed lime and orange juices, and the torn Thai basil.  I sometimes struggle with finding Thai basil at my grocery store.  They don't always carry it.  I tried to substitute in Italian basil, and I didn't like the way it worked with the curry flavor.  Thai basil has more of a spicy bite to it, while Italian basil can almost be described as sweet.  They are two very different flavors.  If you can't find Thai basil at your store, I would actually suggest substituting cilantro or green onions instead of Italian basil.

CoconutPheasantSoupFinal.jpg

Well, that is it for this coconut pheasant soup recipe!  This soup is easy to put together and has a unique flavor profile of spicy and sweet with a hint of citrus, but it also has great textures and is beautiful to look at!  Enjoy!

Happy Hunting!

Pheasant Carbonara: Creamy, Hearty, and Delicious!

Pheasant Carbonara: Creamy, Hearty, and Delicious!

A quick and easy recipe for creating a delicious pheasant carbonara from your wild harvested pheasant or other upland game bird!

Pheasant Groundnut Stew

Pheasant Groundnut Stew

Pheasant Groundnut Stew is a hearty, savory stew full of coriander, ginger, mace, and cayenne. Almond butter gives this wild game dish a silky texture.