
Meaty pike skewers are marinated in zesty lemon and aromatic fresh rosemary, resulting in a hearty and rustic grilled fish perfect for serving at the next family barbeque night.

Wild Game Bone Broth French Onion Soup. After the sun has pulled the covers up and tucked itself in for the nigh and the cold starts to set in, does anything sound better than warm soup? I don’t think I feel happier and cozier than when I have my hands wrapped around a steaming bowl of French onion soup topped with gooey, melty gruyere cheese and homemade wild game bone broth.
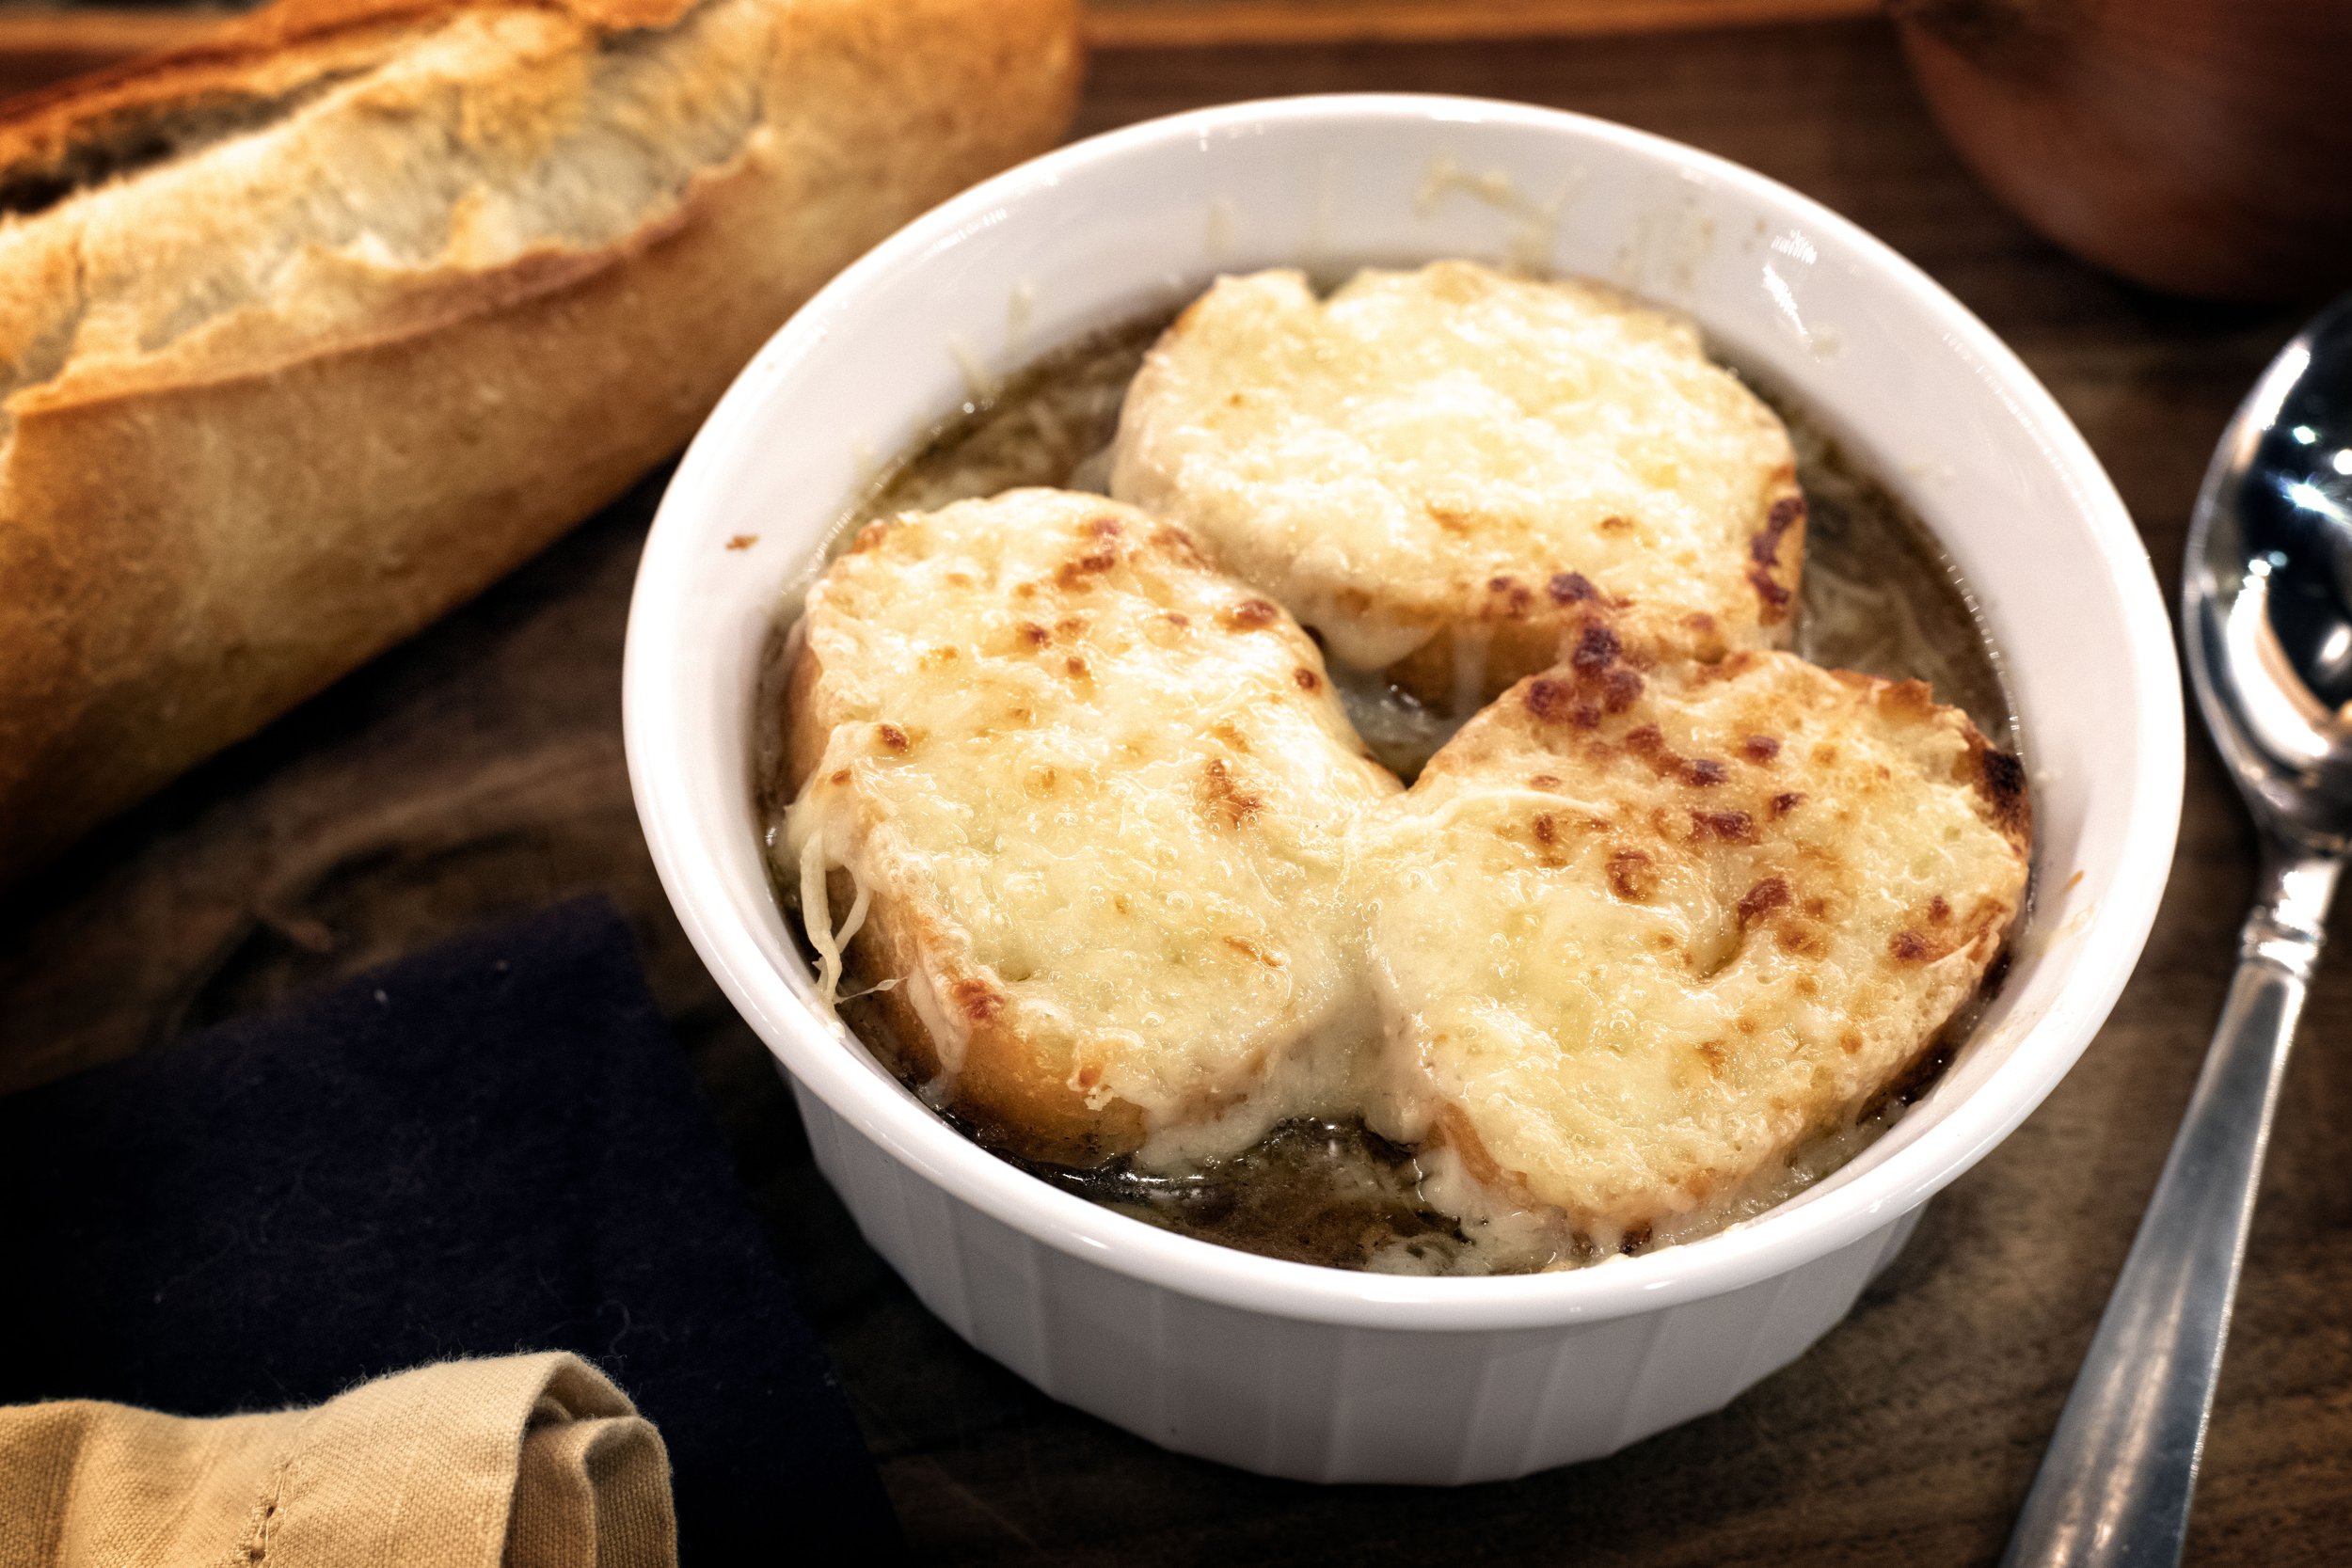
Wild Game Bone Broth French Onion Soup
French onion soup is an OLD dish. Like think 8,000 years old. There are many different versions of how it first came around, but my favorite is the one where King Louis XV returns from deer hunting to bare cupboards. He rounds up some onions, butter, and champagne (which seems odd that his cupboards are bare, but champagne is around, but anyway), throws it all in a pot, and voila, French onion soup is born.
French onion soup was commonly considered the food of the poor because onions were cheap, easy to grow, and plentiful throughout Europe. The soup became popular in the 1960s in America along with the nation-wide trend of French cuisine in general.
To me, if French onion soup is the food of the poor, I don’t want to be rich. It’s one of my favorite meals. The ingredients are simple and easy to find, but the flavor developed from simply simmering caramelized onions in silky bone broth is downright amazing!
So, without wasting more time, let’s make Wild Game Bone Both French Onion Soup!
You can make this recipe with store-bought beef broth, which is fine, but this is a wild game website, so I am going to share really quick (like the condensed, superfast version) how I make homemade wild game bone broth. I make a huge batch at one time from any of the bones I have in the freezer. Many times, the broth will be a combination of elk, deer, and pronghorn bones.
I roast the bones in a 400-degree Fahrenheit oven for one hour. I also do two or three onions, just cut in half and you don’t even have to remove the skin, and a couple of big chunks of ginger, I don’t even peel it.

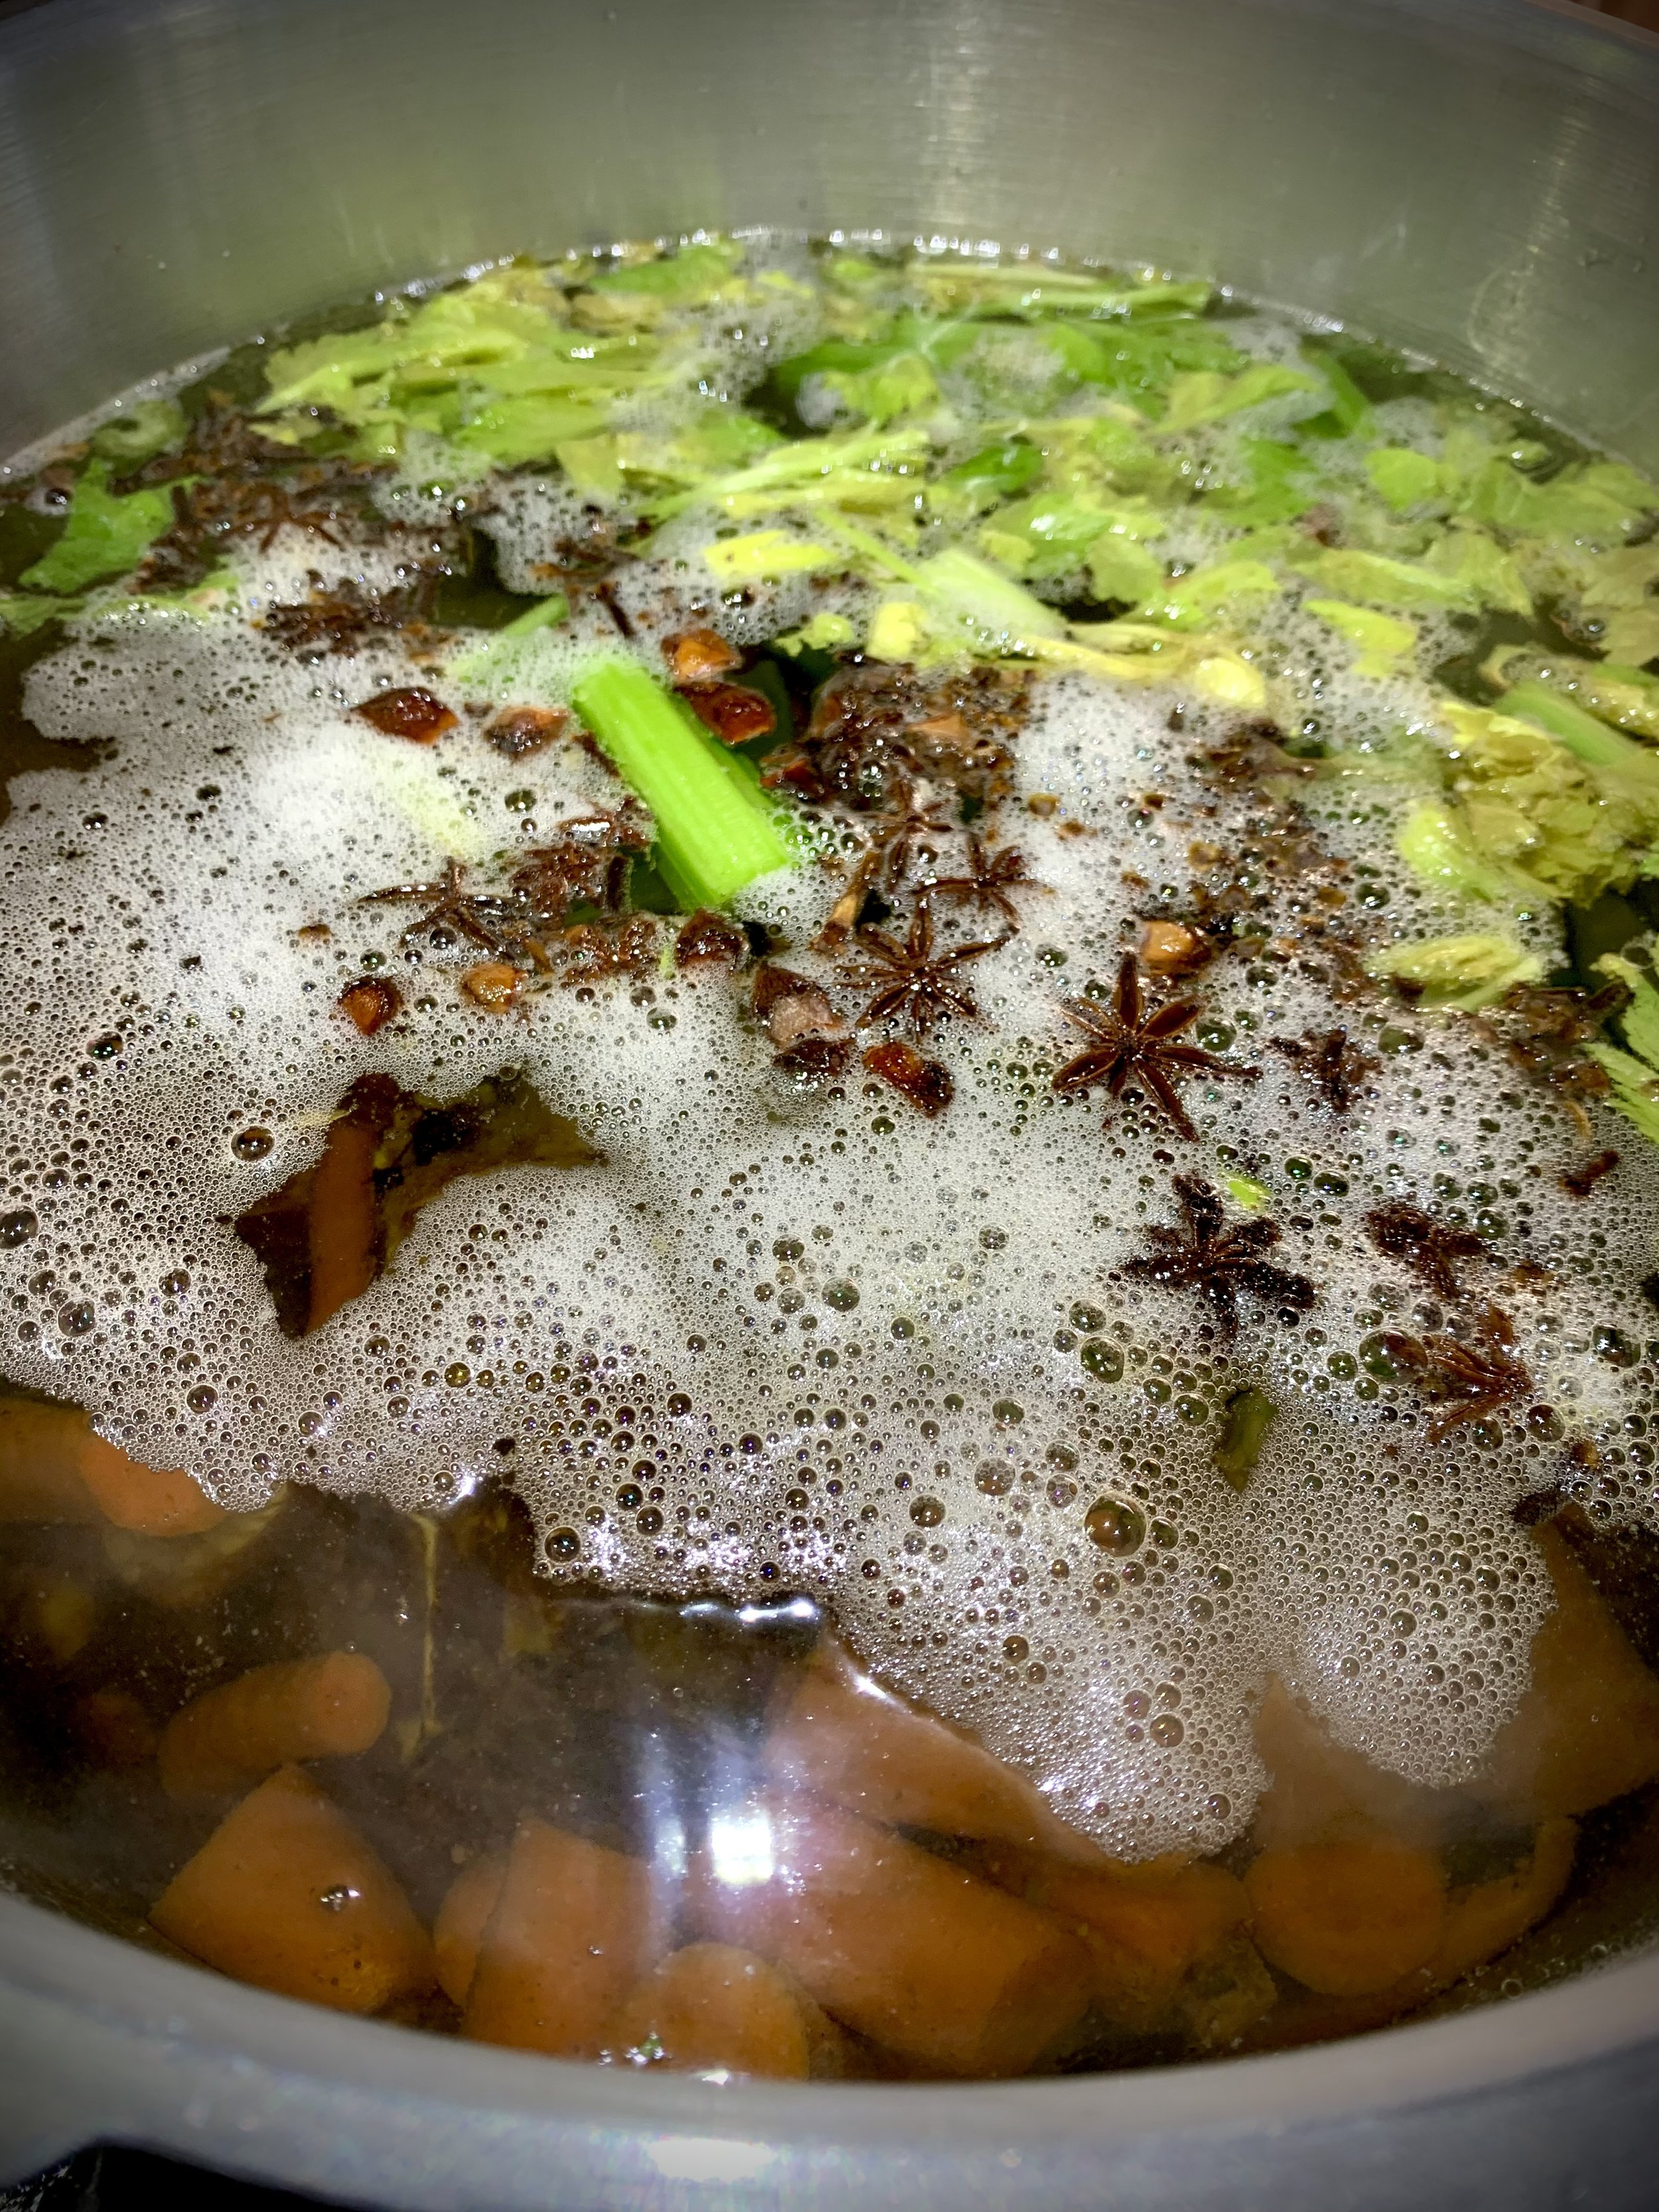
After the bones are roasted, I put them, the onions, ginger, about six carrots, a bunch of celery, a couple of star anise pods, and a handful of whole cloves into a large stock pot. I cover everything with water, so this could end up being up to 24 cups of water if the pot is large like mine, and let it start simmering for hours. When I say hours, I mean like six. I reduce the liquid by about three quarters. Pour through a fine mesh sieve and scrape any fat from the top.
I don’t add salt to my bone broth. I just salt it when I use it so I can get it the way I like. Also, because it is so concentrated after hours of simmering, it doesn’t take up much room in the freezer. I freeze it in little pint-sized containers and then when I use for a recipe later, I add back in the water. So, for a pint of broth, I would add eight to twelve cups of water back in, depending on what I am doing.

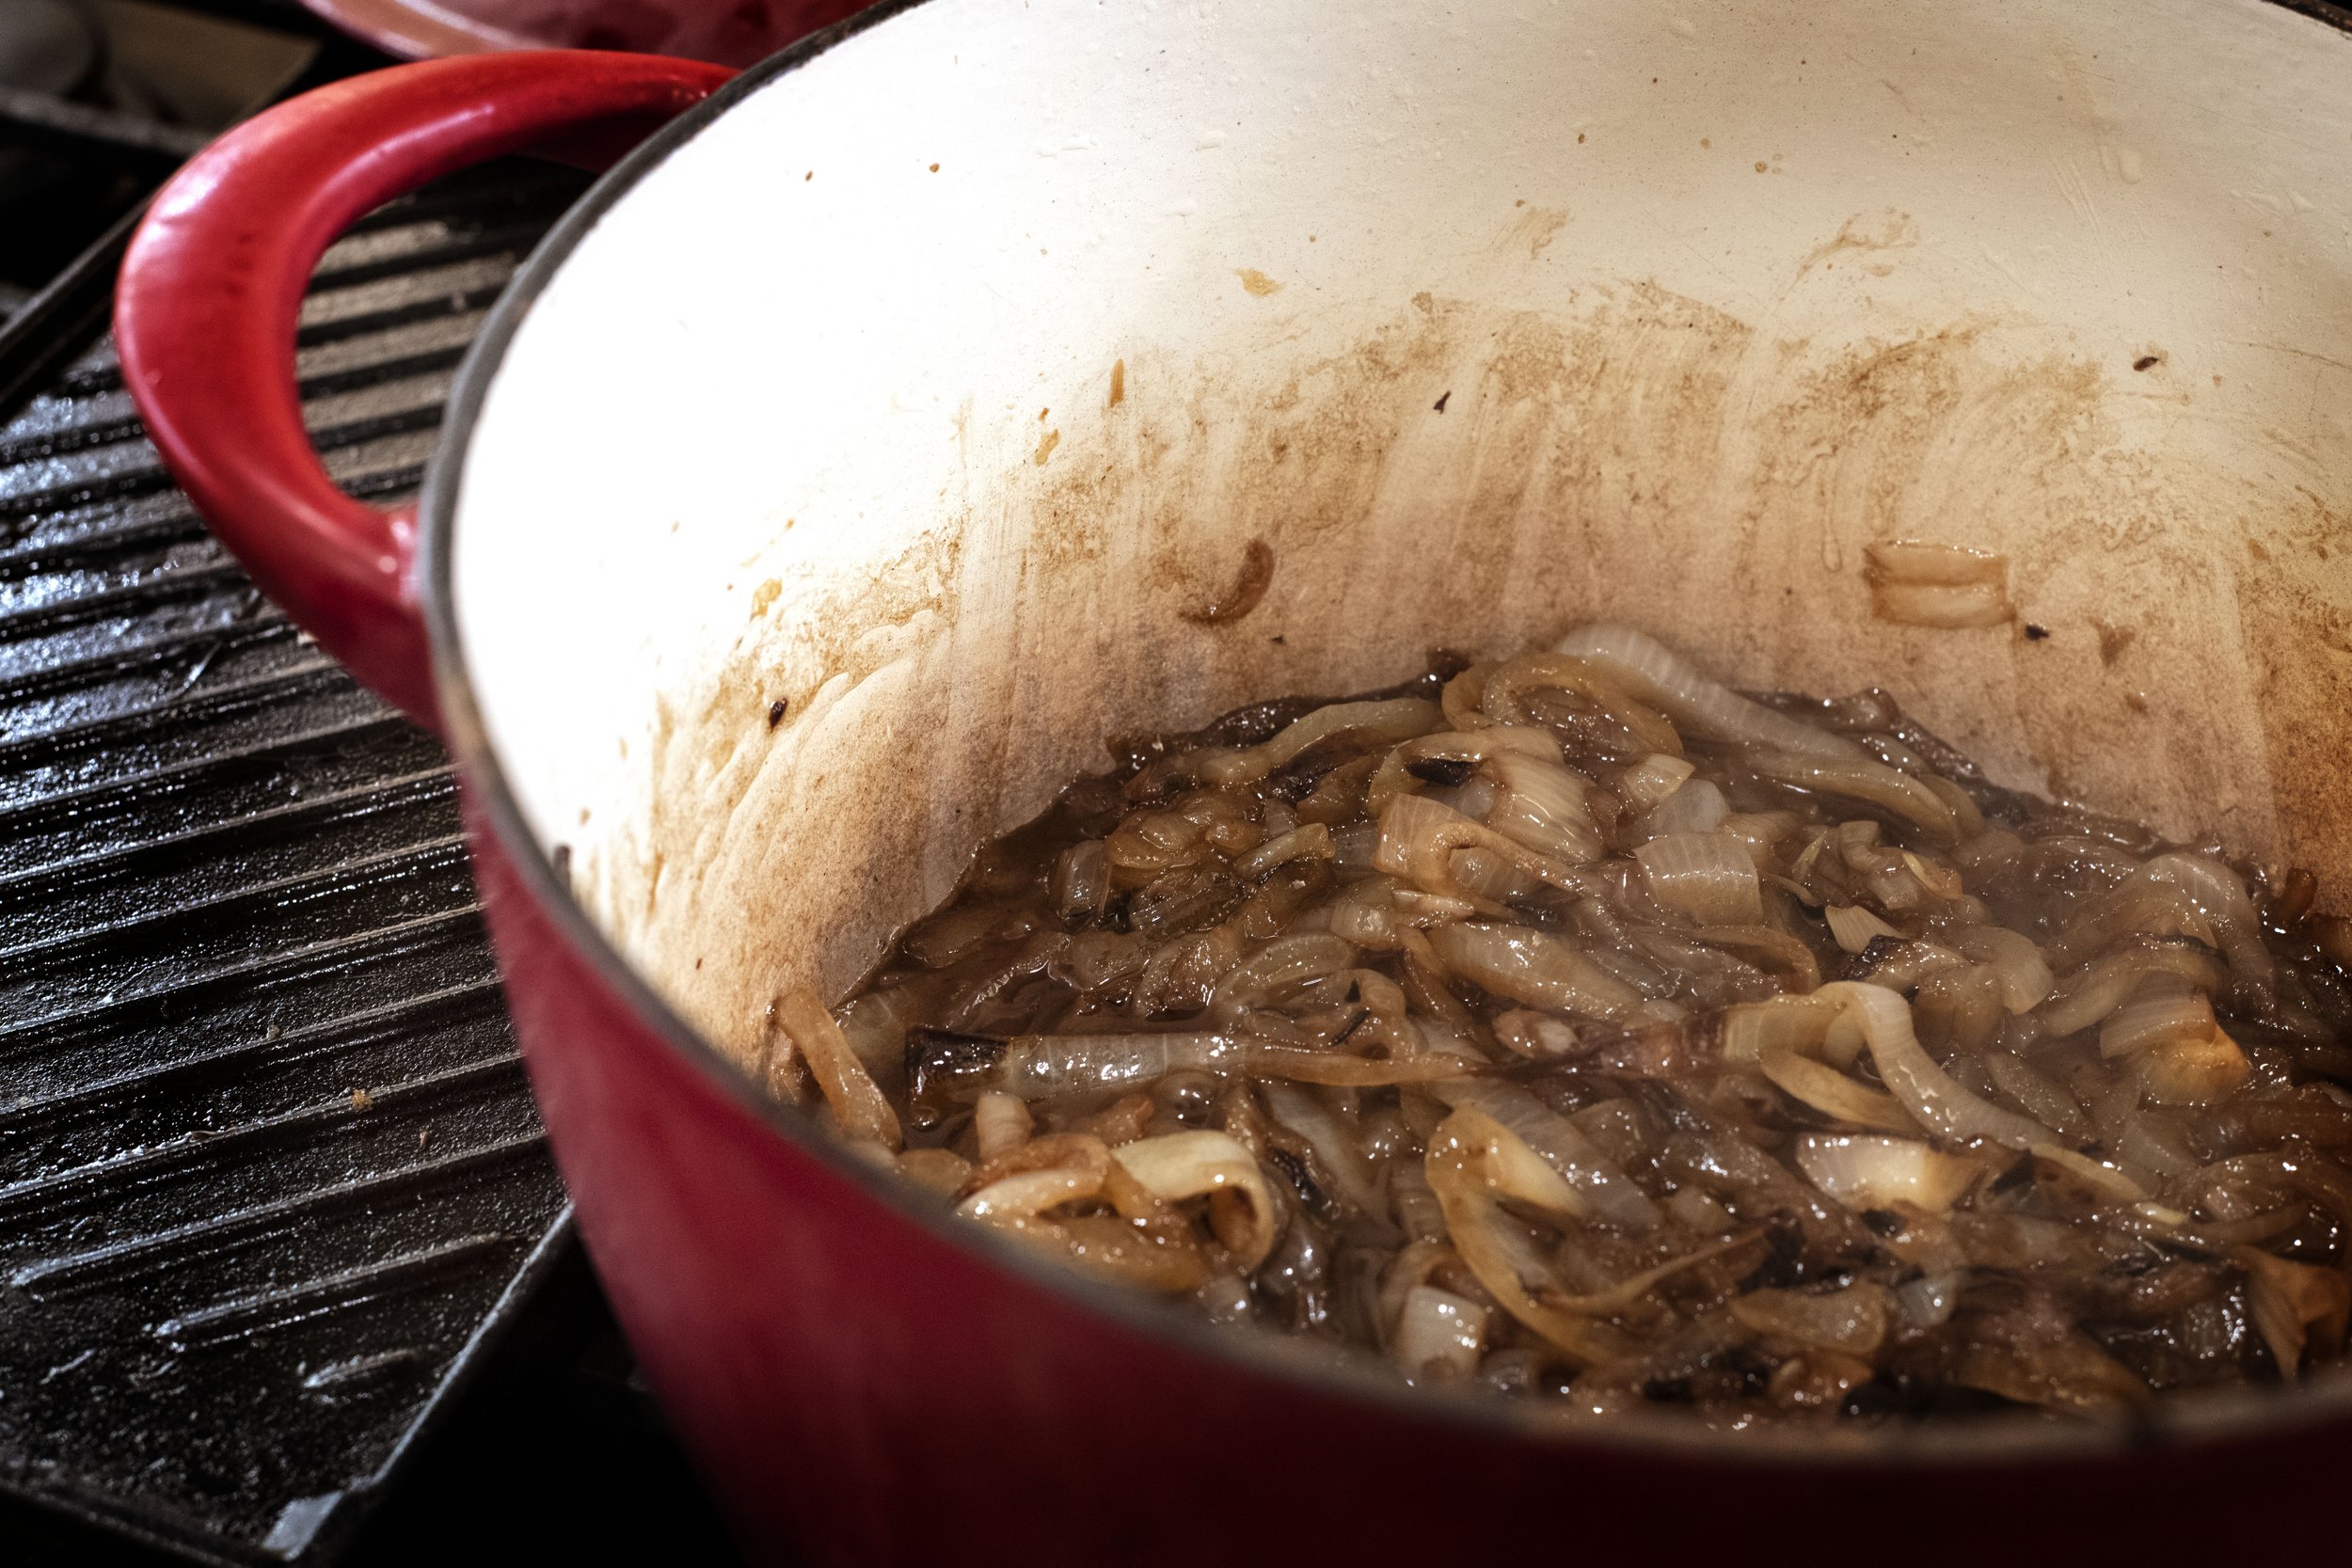
Now that the broth is ready, it is time to start the onions. To a large skillet over medium heat, add a couple of tablespoons of olive oil, enough to coat the entire base of a ceramic dutch oven, and a tablespoon of butter. Once the butter is melted, add the onions. I slice the onion into long strips for this soup.
Spread the onions out and make sure they are coated in the oil. Let them cook for ten minutes, stirring often to keep them from sticking to the pan or burning. If they are cooking too quickly, you may need to reduce the heat a little. You are looking for a slow caramelization here.

After ten minutes, sprinkle a tablespoon of salt over the onions to develop even more flavor. I also add a teaspoon of sugar. It helps with caramelizing. Cook for twenty minutes more.
Once the onions are golden, and caramel-y, and smell like heaven, they are ready. Deglaze the pan with a cup of wine, red or white will work here, and be sure to scrape all that flavorful goodness from the bottom of the pot.
Add the pint of reduce wild game bone broth and eight to twelve cups of water. Bring to a gentle boil, and we will add even more flavor to this dish! Add two tablespoons of Worcestershire sauce, a tablespoon of Italian seasoning, and salt and pepper to taste.
Reduce the mixture for thirty minutes on a simmer. Add a quarter cup of sherry.

While your soup is doing its thing, toast sliced pieces of French baguette in the oven. I toast them under the broiler for five minutes. If you brush them with a little butter or olive oil first, you will get a beautiful, crunchy golden crust.
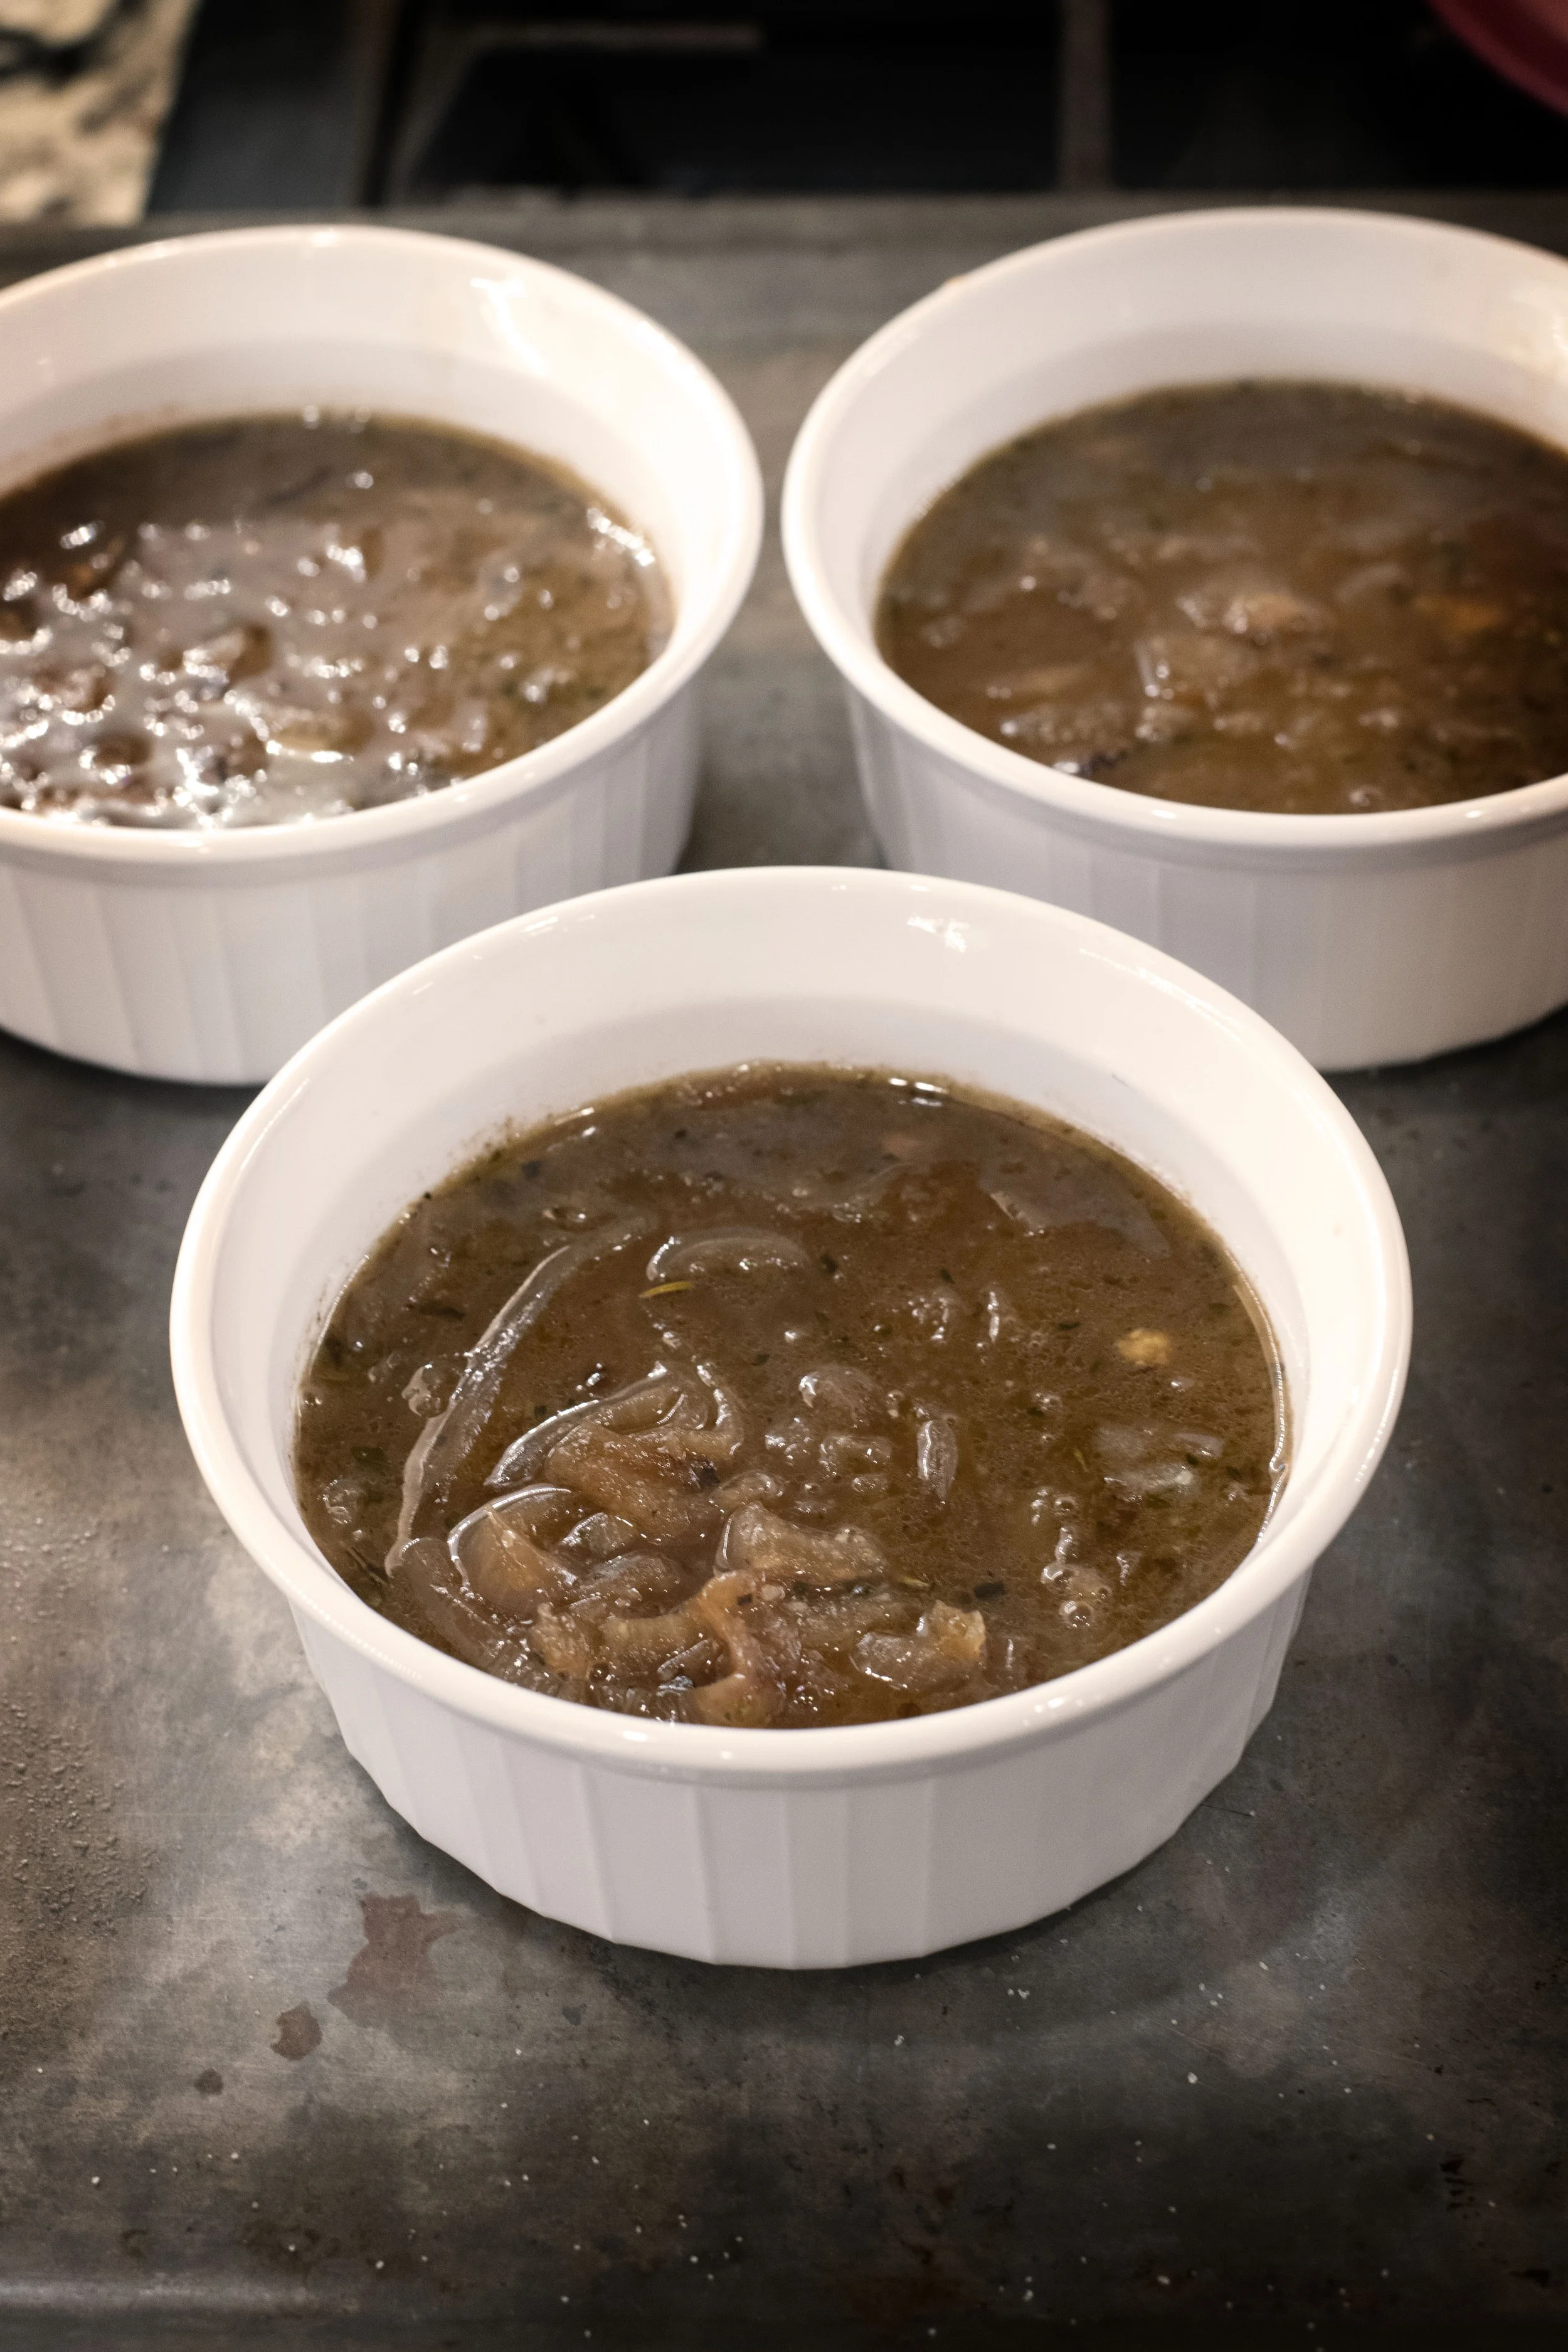
It’s time for the fun part: melting the cheese. Fill an oven safe ramekin with a cup or two of the French onion soup base. Nestle a few pieces of the toasted French bread into the soup, and then top it with shredded gruyere cheese. I do a ramekin per person.

Place the ramekins in the oven at 350 degrees for about ten minutes. The cheese should be melted and slightly browned (cue drool), and the broth slightly boiling. Aaaannnndddd…it’s time to eat!
Happy Hunting!
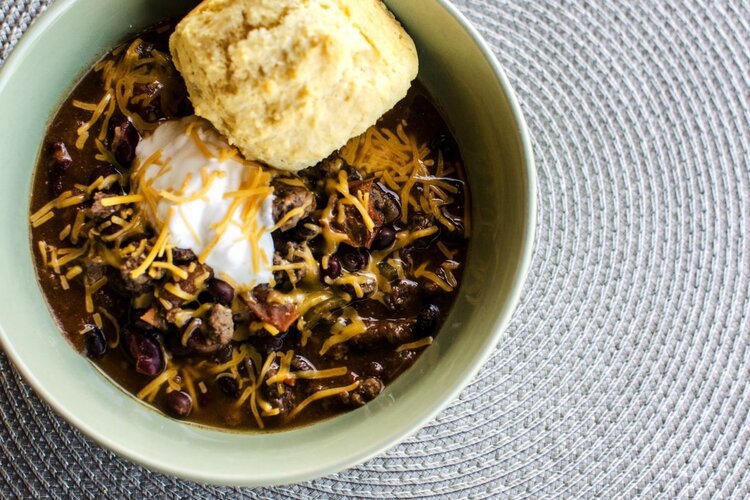
Pronghorn Pumpkin Ale Chili

Venison Real Texas Chili

Elk Guinness Stew
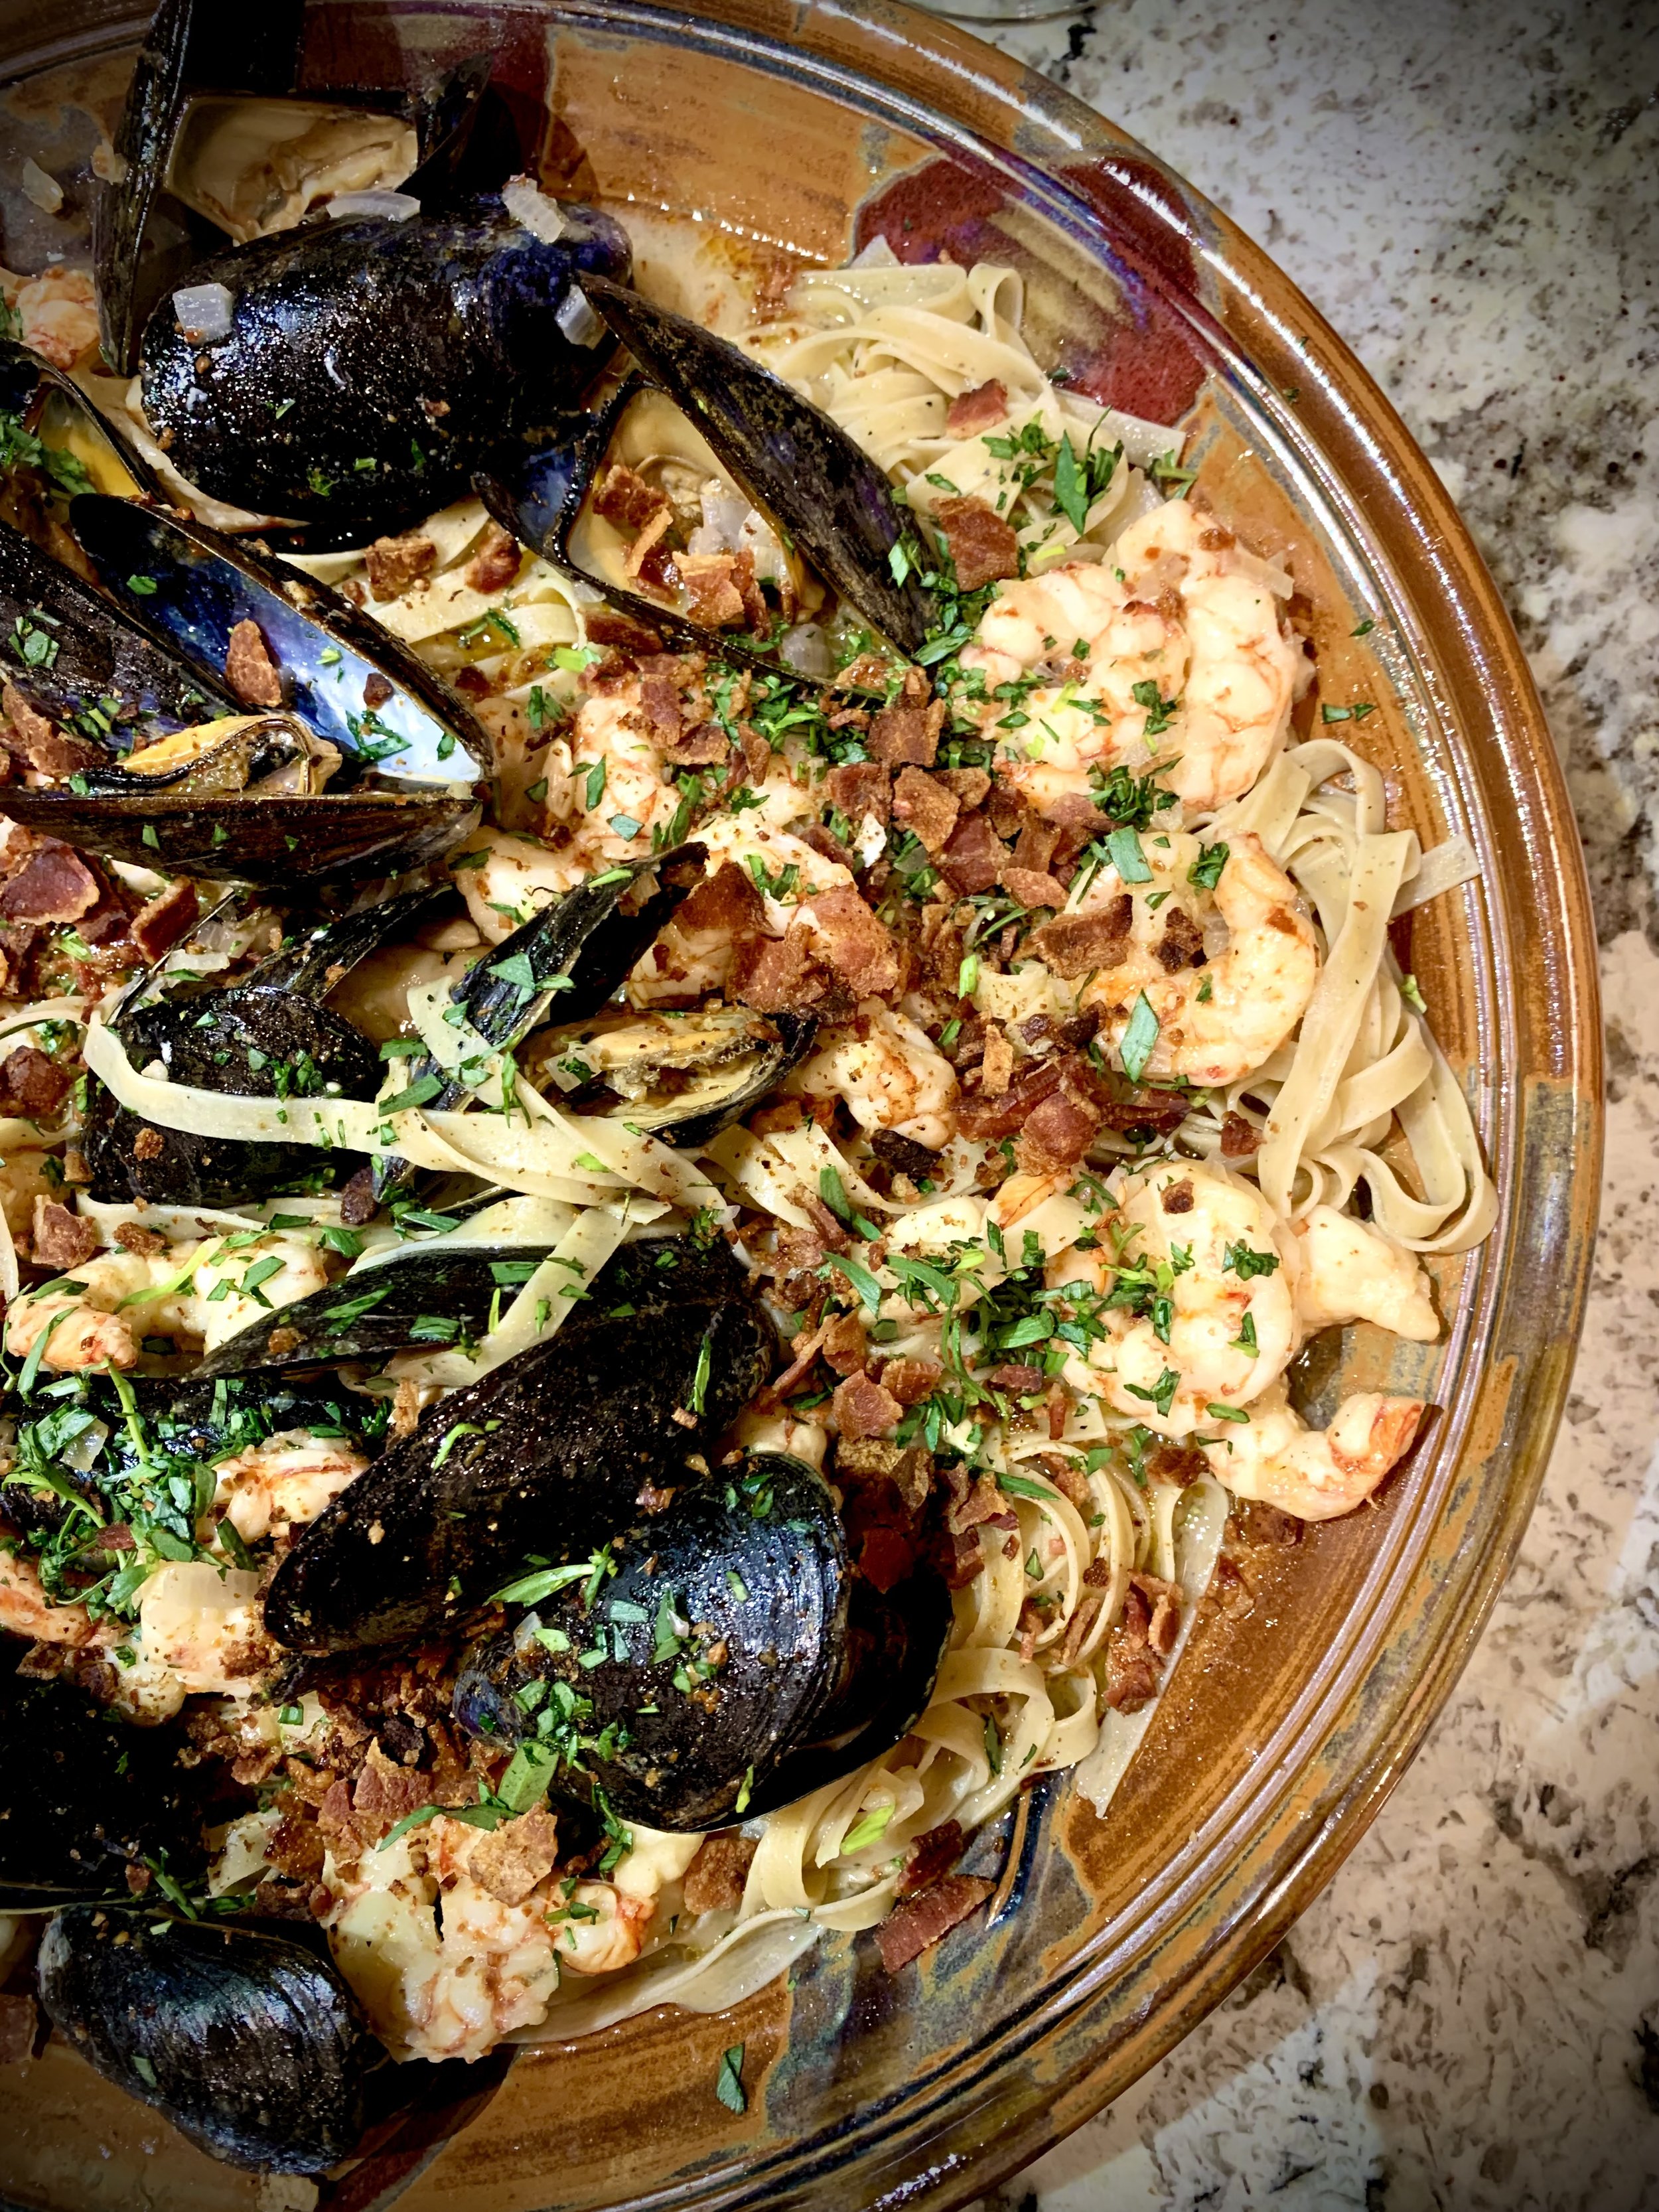
Not living next to the ocean definitely makes seafood a challenge; however, every year, our local small town butcher orders in fresh mussels, clams, and oysters during the last week of December. The mollusks arrive fresh and alive! It is a true desert treat, and I always order my fair share during that time. This year, I used the mussels to make a Mussel and Shrimp Truffle Pasta with a Tarragon Lemon Sauce.
Mussels are a bivalve found in both salt and fresh water. Evidence shows humans have consumed mussels for thousands of years, although steaming up a pot of freshwater mussels for dining on isn’t very popular anymore.
Saltwater mussels are another story. They are prepared many ways, from steaming in white wine and herbs for a seafood feast, to pickled in a salty brine and served on a toasted baguette, to floured and fried on skewers. Like other saltwater bivalves, mussels have that faintly oceanic but sweet taste to them. Their subtle flavor but robust texture makes them a great addition to many different types of meals, whether they are the star of the dish or the understudy.
For this Mussel and Shrimp Truffle Pasta, I decided to let the mussels take on the lead role and showcase all they have to offer. The sauce for dish is simple and understated, but the flavors were all selected for pairing with the mussels.
To start, preheat the smoker or your grill to 500 degrees Fahrenheit. I used a smoker for this recipe so I could impart a little smoked flavor into the mussels, but a grill works perfect for this recipe as well. I used a light wood for the smoking: Apple Wood.
Give your mussels a scrub with a brush under cold running water to remove any sand or rocks from the shells. Discard any mussels that have a broken or cracked shell.
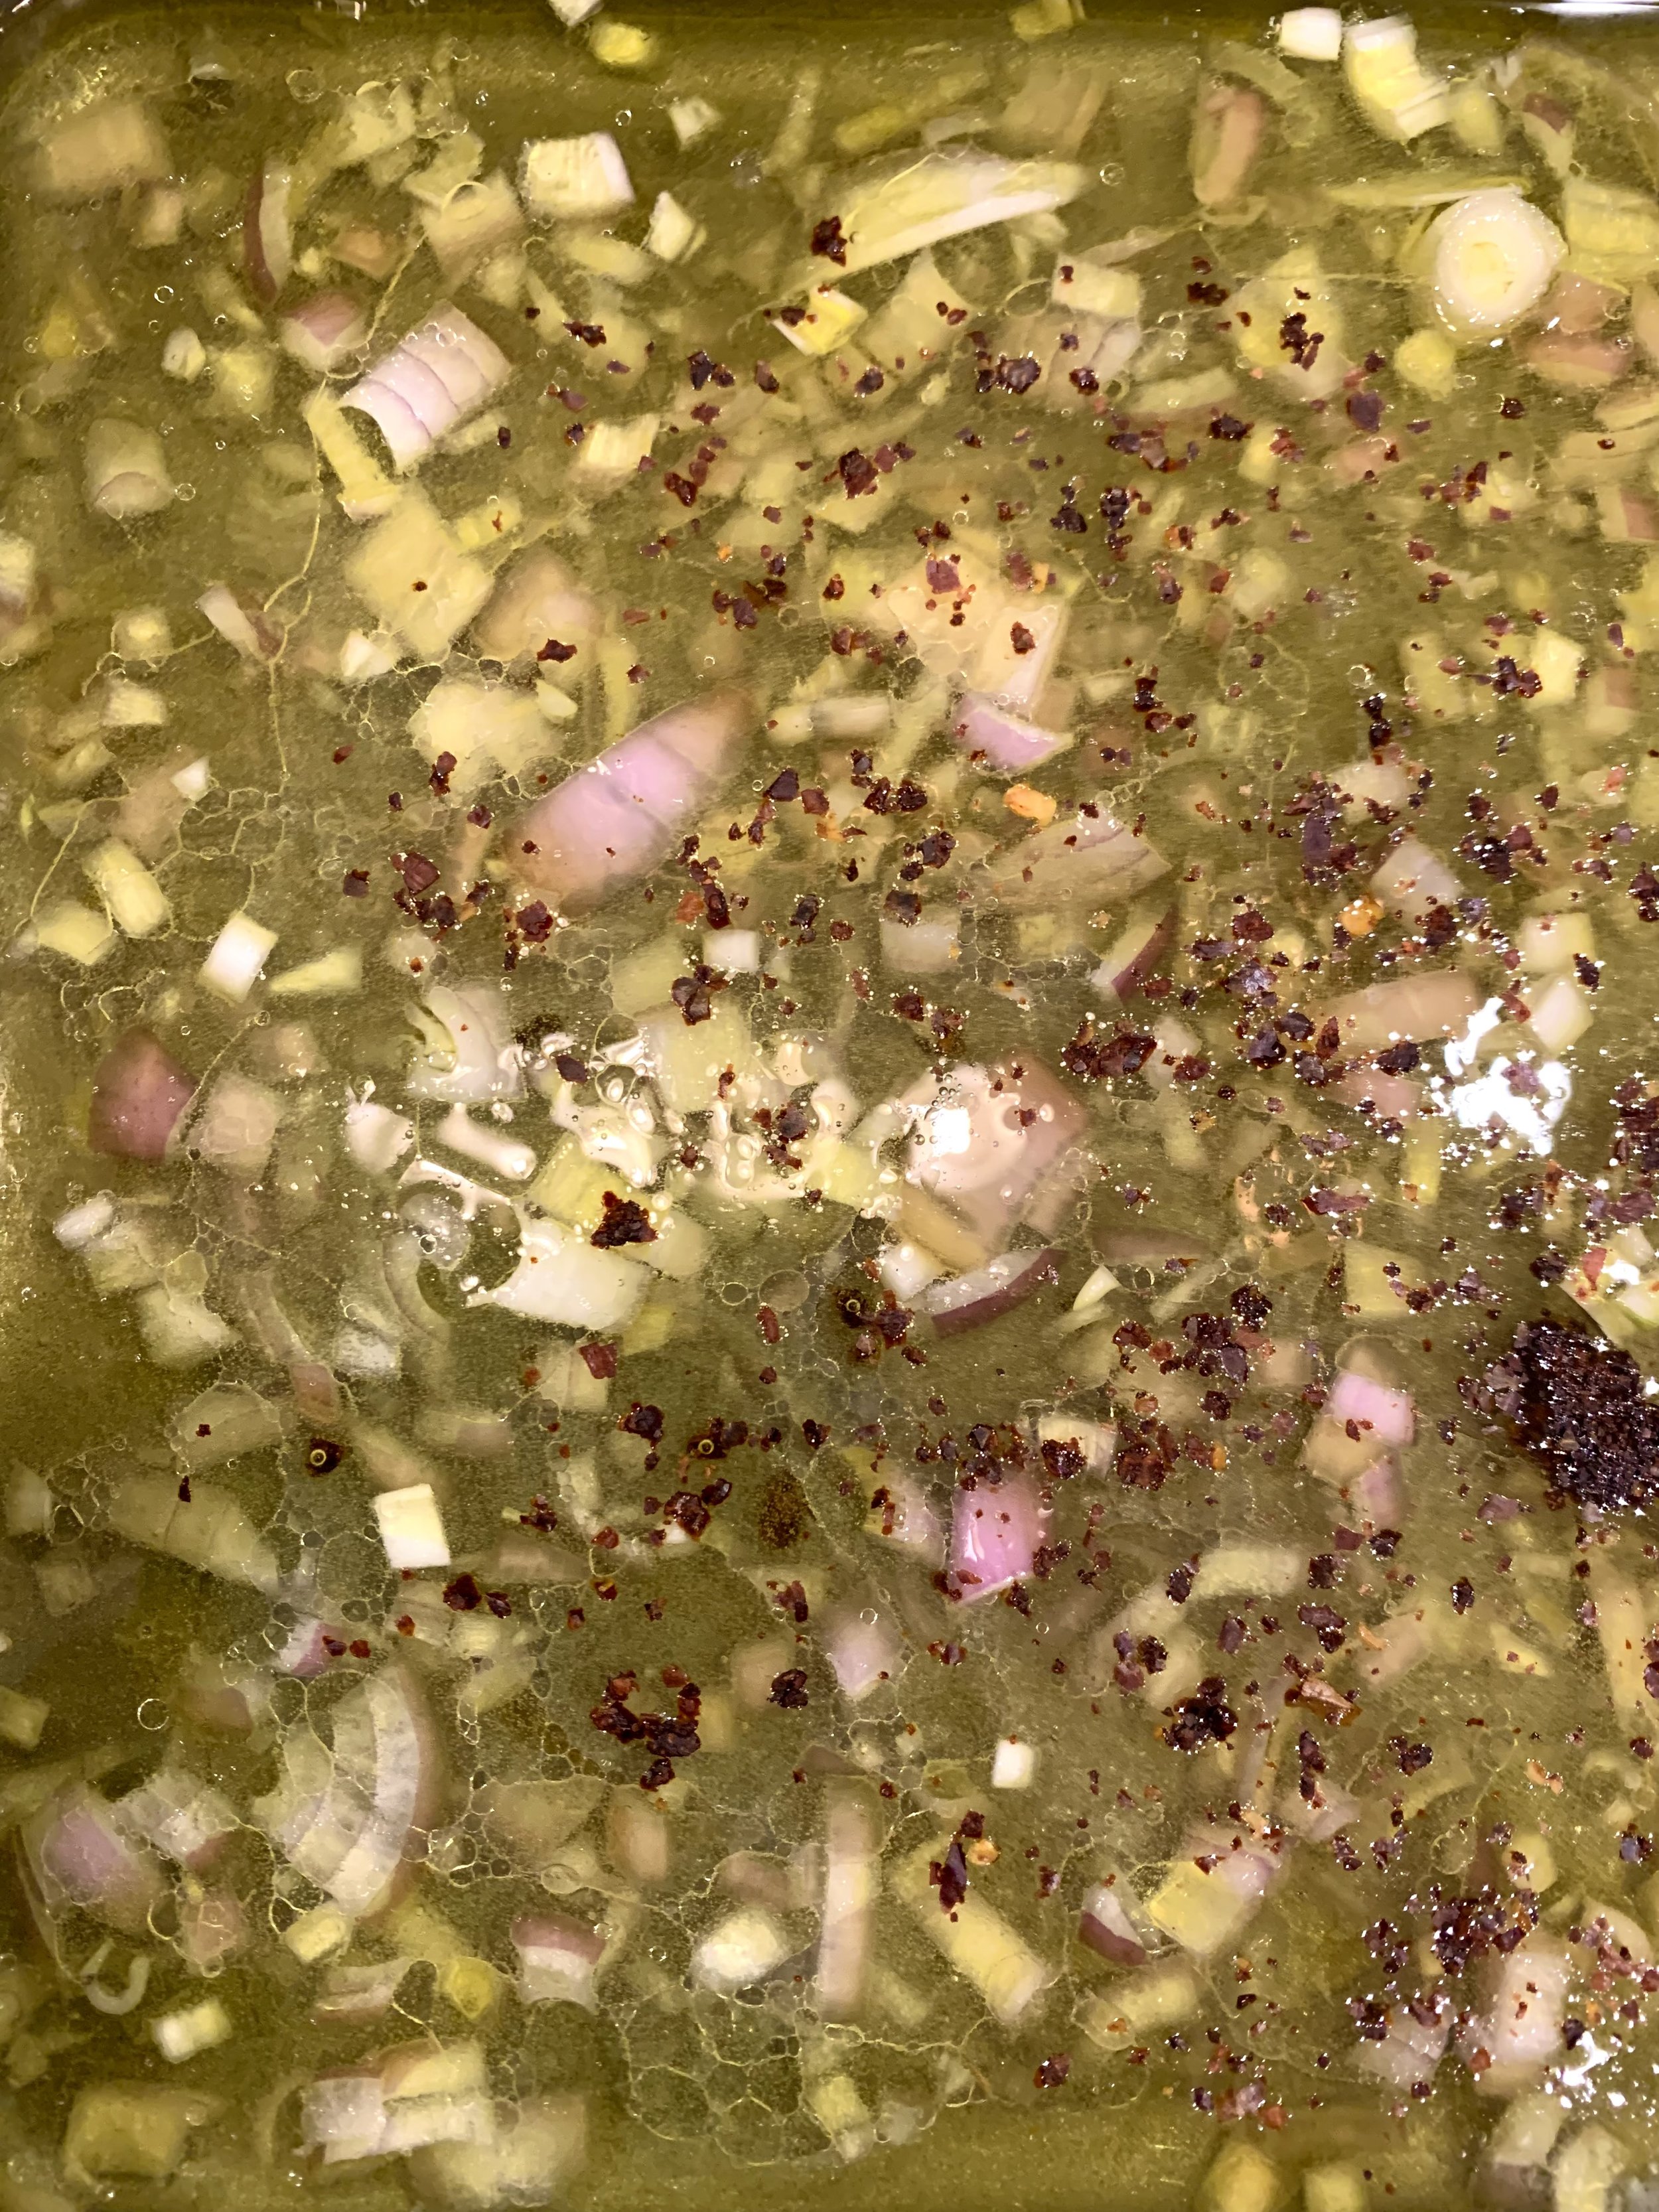
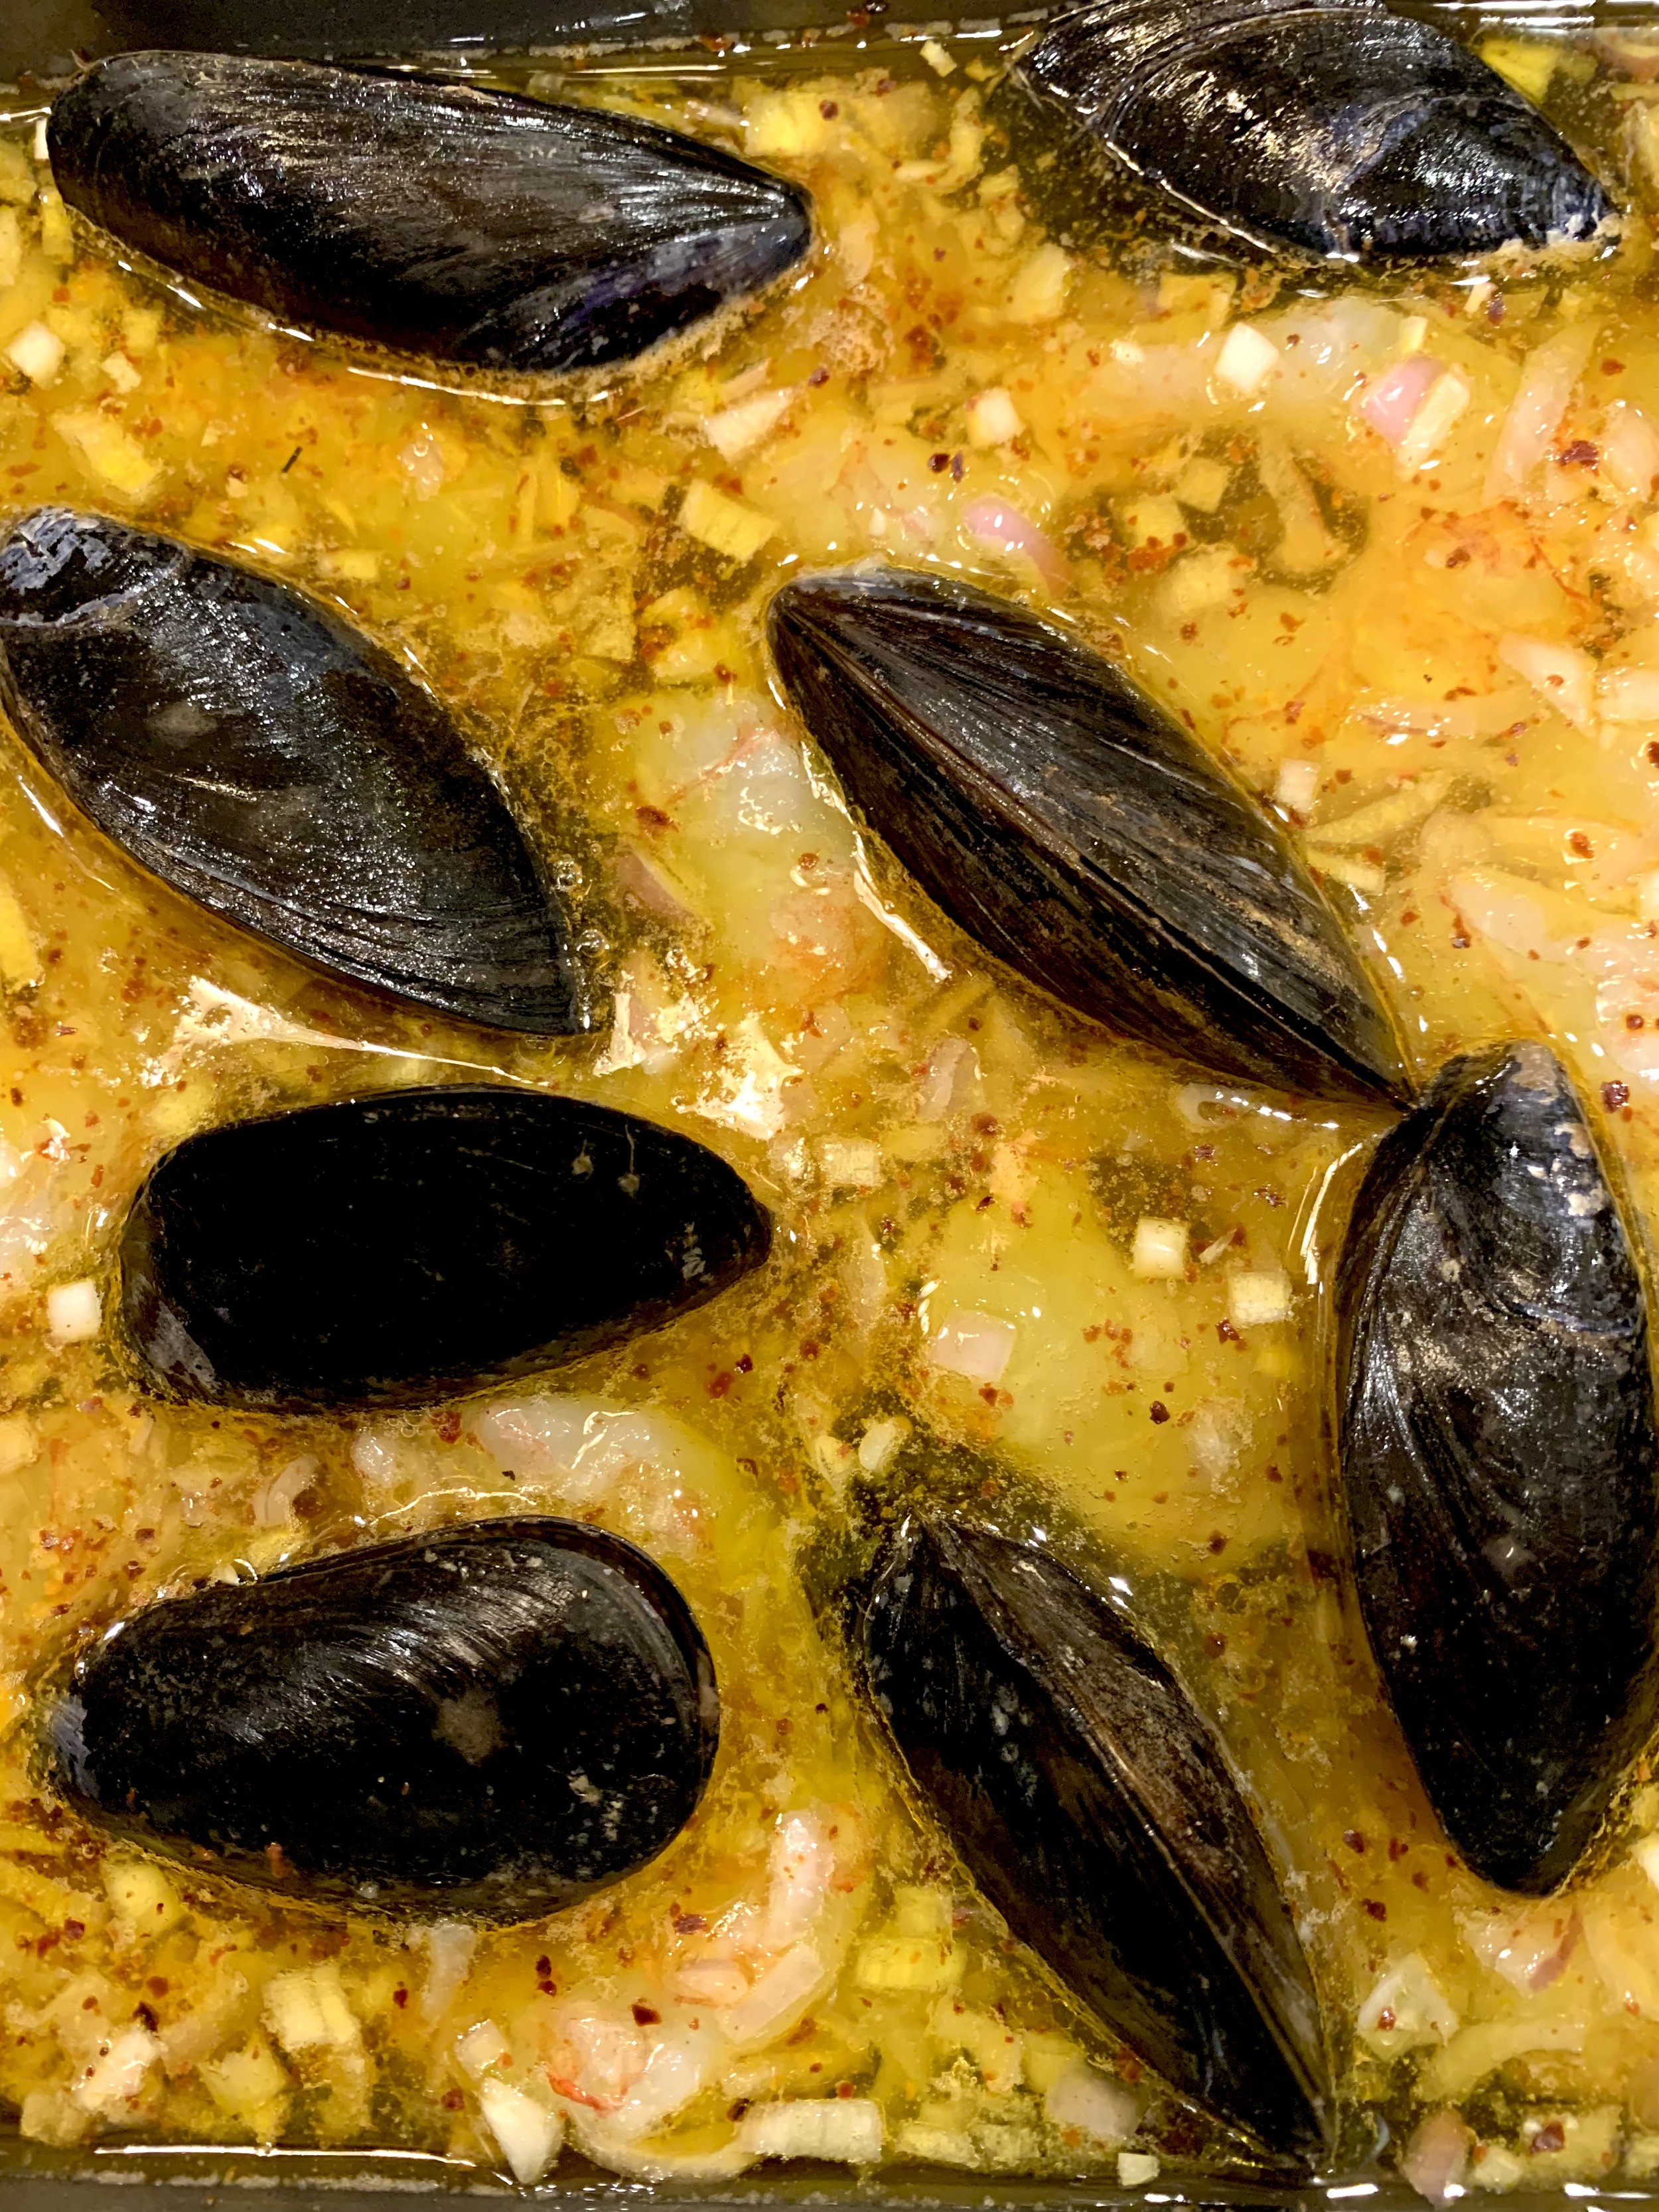
While the smoker is preheating, in a shallow roasting pan or a cake pan, add an entire minced shallot, a cup of dry white wine, half a cup of extra virgin olive oil, and two teaspoons of crushed red pepper flakes. Nestle your pound of mussels and pound of raw shrimp into the liquid.
Once the grill is preheated, place the pan of mussels and shrimp on the grate and close the lid. I didn’t cover the mussels with aluminum foil because I wanted the smoke to penetrate the meat. If you use a grill, cover the mussels with aluminum foil. Steam the mussels and shrimp for ten minutes.

While the mussels and shrimp are cooking, prepare the pasta. I used a truffle pasta. If you can’t find a truffle pasta, you could grate over some truffle or find a truffle oil to add to the dish. The truffle flavor pairs wonderfully with mussels because they also have a slight mushroom flavor.
You also want to fry a up a few pieces of bacon for your finished product. When cooking several pieces of bacon, like for this recipe, I like to just place the bacon on a cookie sheet lined with aluminum foil and bake at 400 degrees Fahrenheit for 12 to 15 minutes, or until the bacon is crispy.
At ten minutes, check the mussels and shrimp. You will know the mussels are done when they are all opened. The shrimp should also be a vibrant pink color. If most of your mussels are open, pull them from the grill and discard any mussels that are still closed. If the majority are not open, close the lid on the grill and let them cook for five minutes more.
Once the mussels are ready to go, head inside to finish up the dish. Be sure to not discard your mussel cooking liquid because this is the pasta sauce. Place the al dente truffle pasta in a large bowl and drizzle the mussel cooking liquid over the warm pasta. Sprinkle on the bacon bites, two tablespoons of fresh minced tarragon, and the juice of one lemon. Toss everything together and then set the mussels and shrimp into the dish. And that’s it! Time to eat!

I love this dish because it is light, but the flavors are so well balanced. The sweet, slightly salty mussels are complimented by the mushroom flavor the truffle pasta, but also pair perfectly with the bacon pieces and fresh tarragon. The acidity from the lemon also pulls the entire dish together. Enjoy!
And Happy Fishing!
So, I did an offal thing. It was completely out of character for me. I made deer liver pate. Every year while people are cleaning their deer I comment how “someday” I am going to use the organs from a harvest and make…something.
“When the blood in your veins returns to the sea, and the earth in your bones returns to the ground, perhaps then you will remember that this land does not belong to you, it is you who belongs to this land.” ~ Native American quote
I have had deer heart once before. But it wasn’t mine. And I didn’t prepare it. It was surprisingly good. That is about all of the adventure I have embarked on when it comes to organ meat, but I have read a lot about keeping organs and the benefits of their consumption.
Traditionally, hunters never discarded the organs. Organs were harvested and prepared for their nutritional benefits. They are excellent sources of minerals and vitamins. But don’t take my word for it. Here’s an article with lots of information about the benefits of organs.
I heard this thing recently, and this could all be rumor but I am going to share it anyway, that James Blunt, you know the celebrity, went on an all meat diet and ended up developing scurvy, the “sailor’s disease.” Scurvy is incredibly rare, but one way to develop it is to become a carnivore.
Scurvy is basically when your body becomes depleted of Vitamin C and you develop a vast collection of issues such as weakness, fatigue, wounds that don’t heal up properly, and other stuff. It doesn’t sound fun. James Blunt cured his scurvy by consuming orange juice until he developed acid reflux.
So, the moral of the story seems to be that being a carnivore doesn’t work if you’re a human. Or does it? Historically, there are groups of humans who survived solely eating meat. The best example is the Arctic Native American tribes the Inuit. The arctic tundra is not a suitable landscape for growing crops, so the Inuit diet consisted of fish and the mammals they hunt, including seals, walruses, and whales.
Obviously they do not develop scurvy or the other illnesses associated with being a carnivore. How is this possible? While many things most likely factor into the equation, there are two habits the Inuit engage in that researchers believe keep them healthy and able to survive of a solely meat-based diet.
First, the Inuit eat most of their meat raw, both mammals and fish, and this is thought to sustain more of the vitamins and minerals contained within the meat. Second, they eat the organs. If you want to know more about the Inuit and their all meat diet, this is a great book: My Life with the Eskimo.
So, in conclusion, I would like to send a message out to James Blunt. Next time you go full carnivore eat your organs!
Now that’s out of the way, let’s make this venison liver pate.
Pate was much easier to make than I initially thought. There are lots of different ways to make your liver concoction. You can vary which type of liver you use, what type of spices or vegetables you mix in, and even the fat you add at the end can be different. It’s basically a choose your own adventure with pate.
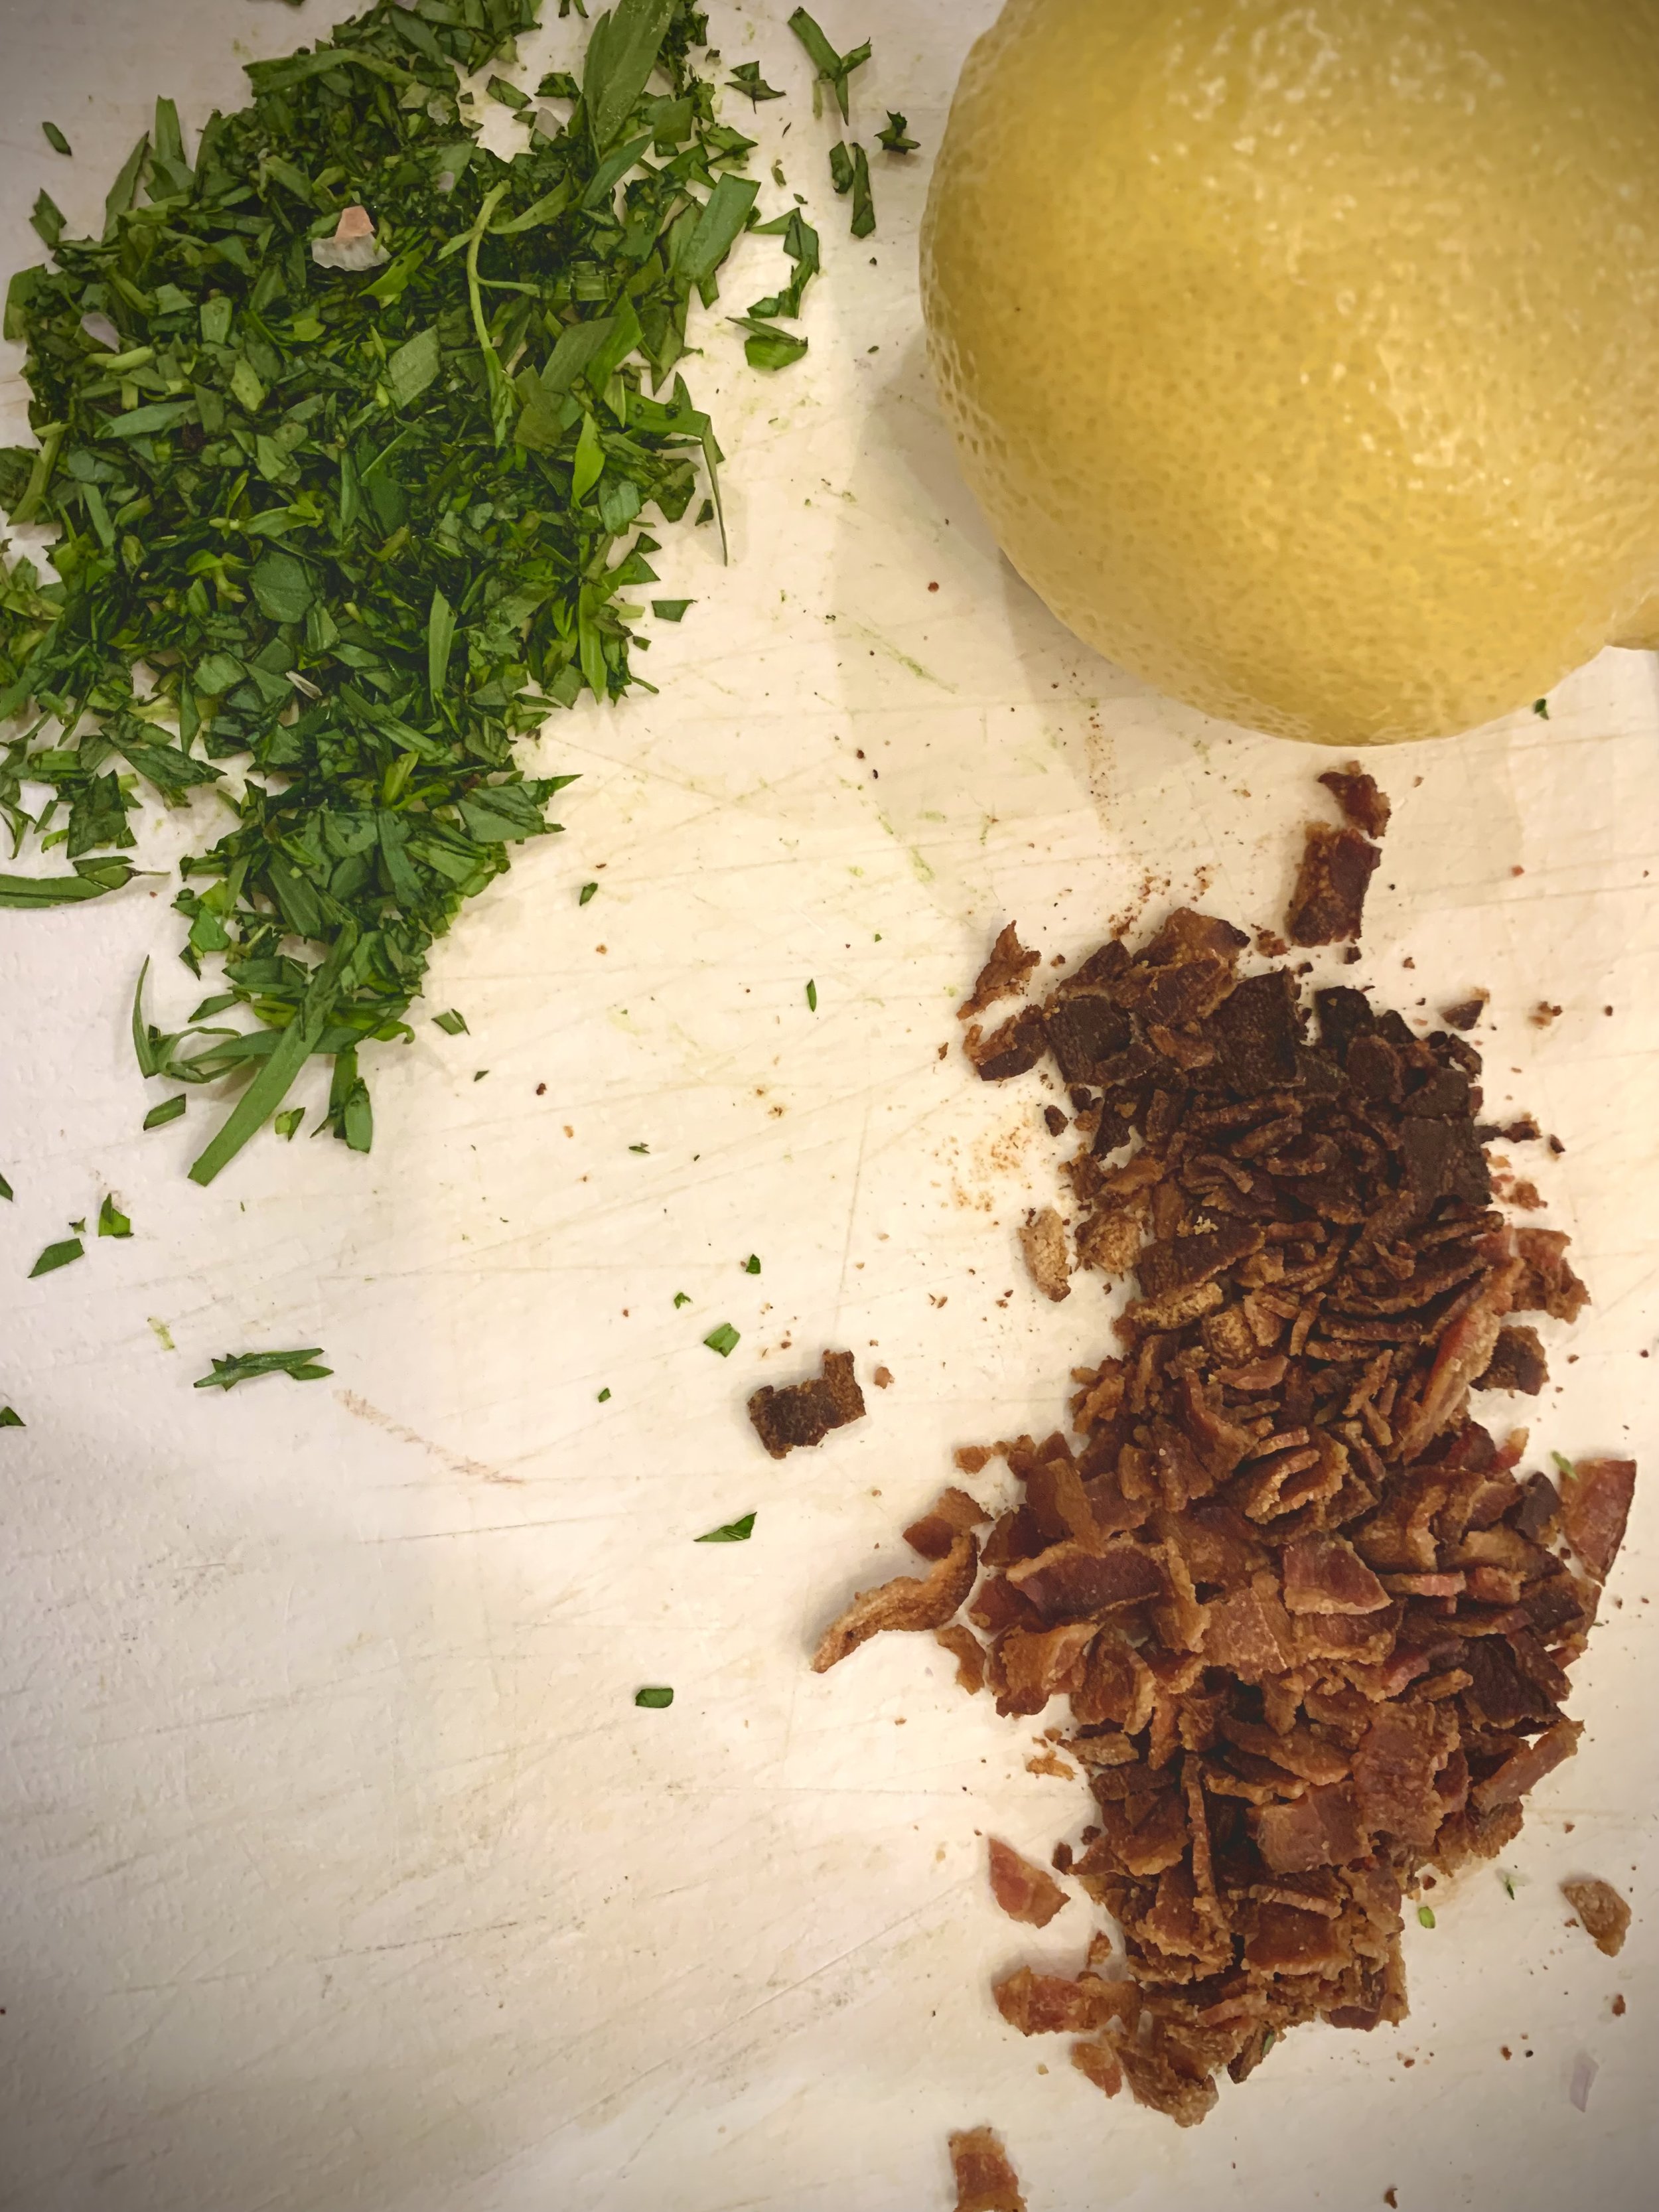
The key to a successful pate is to remove some of the rich “bloody” taste that liver is known for. Just to give you an idea if you haven’t tried liver, it has a strong iron taste. It is very distinct and lies somewhere between metal and blood. It is so distinct, you will always recognize it in a dish no matter how little is used. If you asked me what iron tasted like, I don’t know that I could find the words to accurately describe it, but if you had me taste something that is rich in iron, like liver, I could immediately pick that flavor out. While you can’t fully remove this definable characteristic of liver, you can lighten it. You want a pate that is reminiscent of the liver flavor. Achieving this is quite easy. I soaked the liver overnight in a mixture of salt and water. I used four cups of water and two tablespoons of salt.
In the morning, the liver had a more muted color. I thoroughly washed the liver, removing any access blood from it, and then cleaned off any thing that didn’t look edible, such as arteries or connective tissues. Just make it pretty.

Heat up a large, heavy bottomed skillet or a dutch oven. I used a very large cast iron skillet for my pate. Cook up five or six slices of bacon until crispy. Pull the bacon and set aside, but reserve the fat in the pan to use for sautéing your vegetables.

To your hot bacon grease, add one diced onion, four diced carrots, and 4 diced celery stalks. Also add in one chopped apple. It isn’t important the size you dice up your vegetables to, since you will ultimately puree everything, but try to keep the size uniform so your vegetables will cook evenly.

Cook the vegetables for about five minutes and then add the chopped liver. Season with salt, pepper, and oregano. Cook until the liver is cooked through, about ten to fifteen more minutes.
Drizzle in the cup of whiskey at this point and let things reduce for five to ten minutes. The mixture should be thick and the wine along with the starches from the vegetables should create a creamy coating over everything.

Alright, it’s time to turn this pile of vegetables and liver into pate! Be careful with this next step, as things tend to be hot and steamy. Fill a food processor with the liver mixture. I had to add about half the mixture, blend until it broke down into a paste, and then add the second half. If you have a larger food processor you may be able to fit the entire pan in one large batch.
Don’t forget to add your bacon back into the pate mixture at this point. I just dropped the pieces in whole and let them blend down, much to the dismay of the dogs who were very certain the bacon was going to be theirs’.
Grind until things are smooth. Slowly drizzle in your cup of heavy cream. If you are looking for a dairy free option you can use a can of coconut cream and it works nicely too. The cream really changes the consistency of the entire dish. It creates a beautifully smooth, creamy texture that almost melts in your mouth.

Afterwards, put the pate in the fridge to cool for at least two hours. It tastes best cold. You can preserve it if you aren’t going to use it immediately, like say you are making it for your party tomorrow, by pouring melted butter over the top. This creates a nice seal on top.
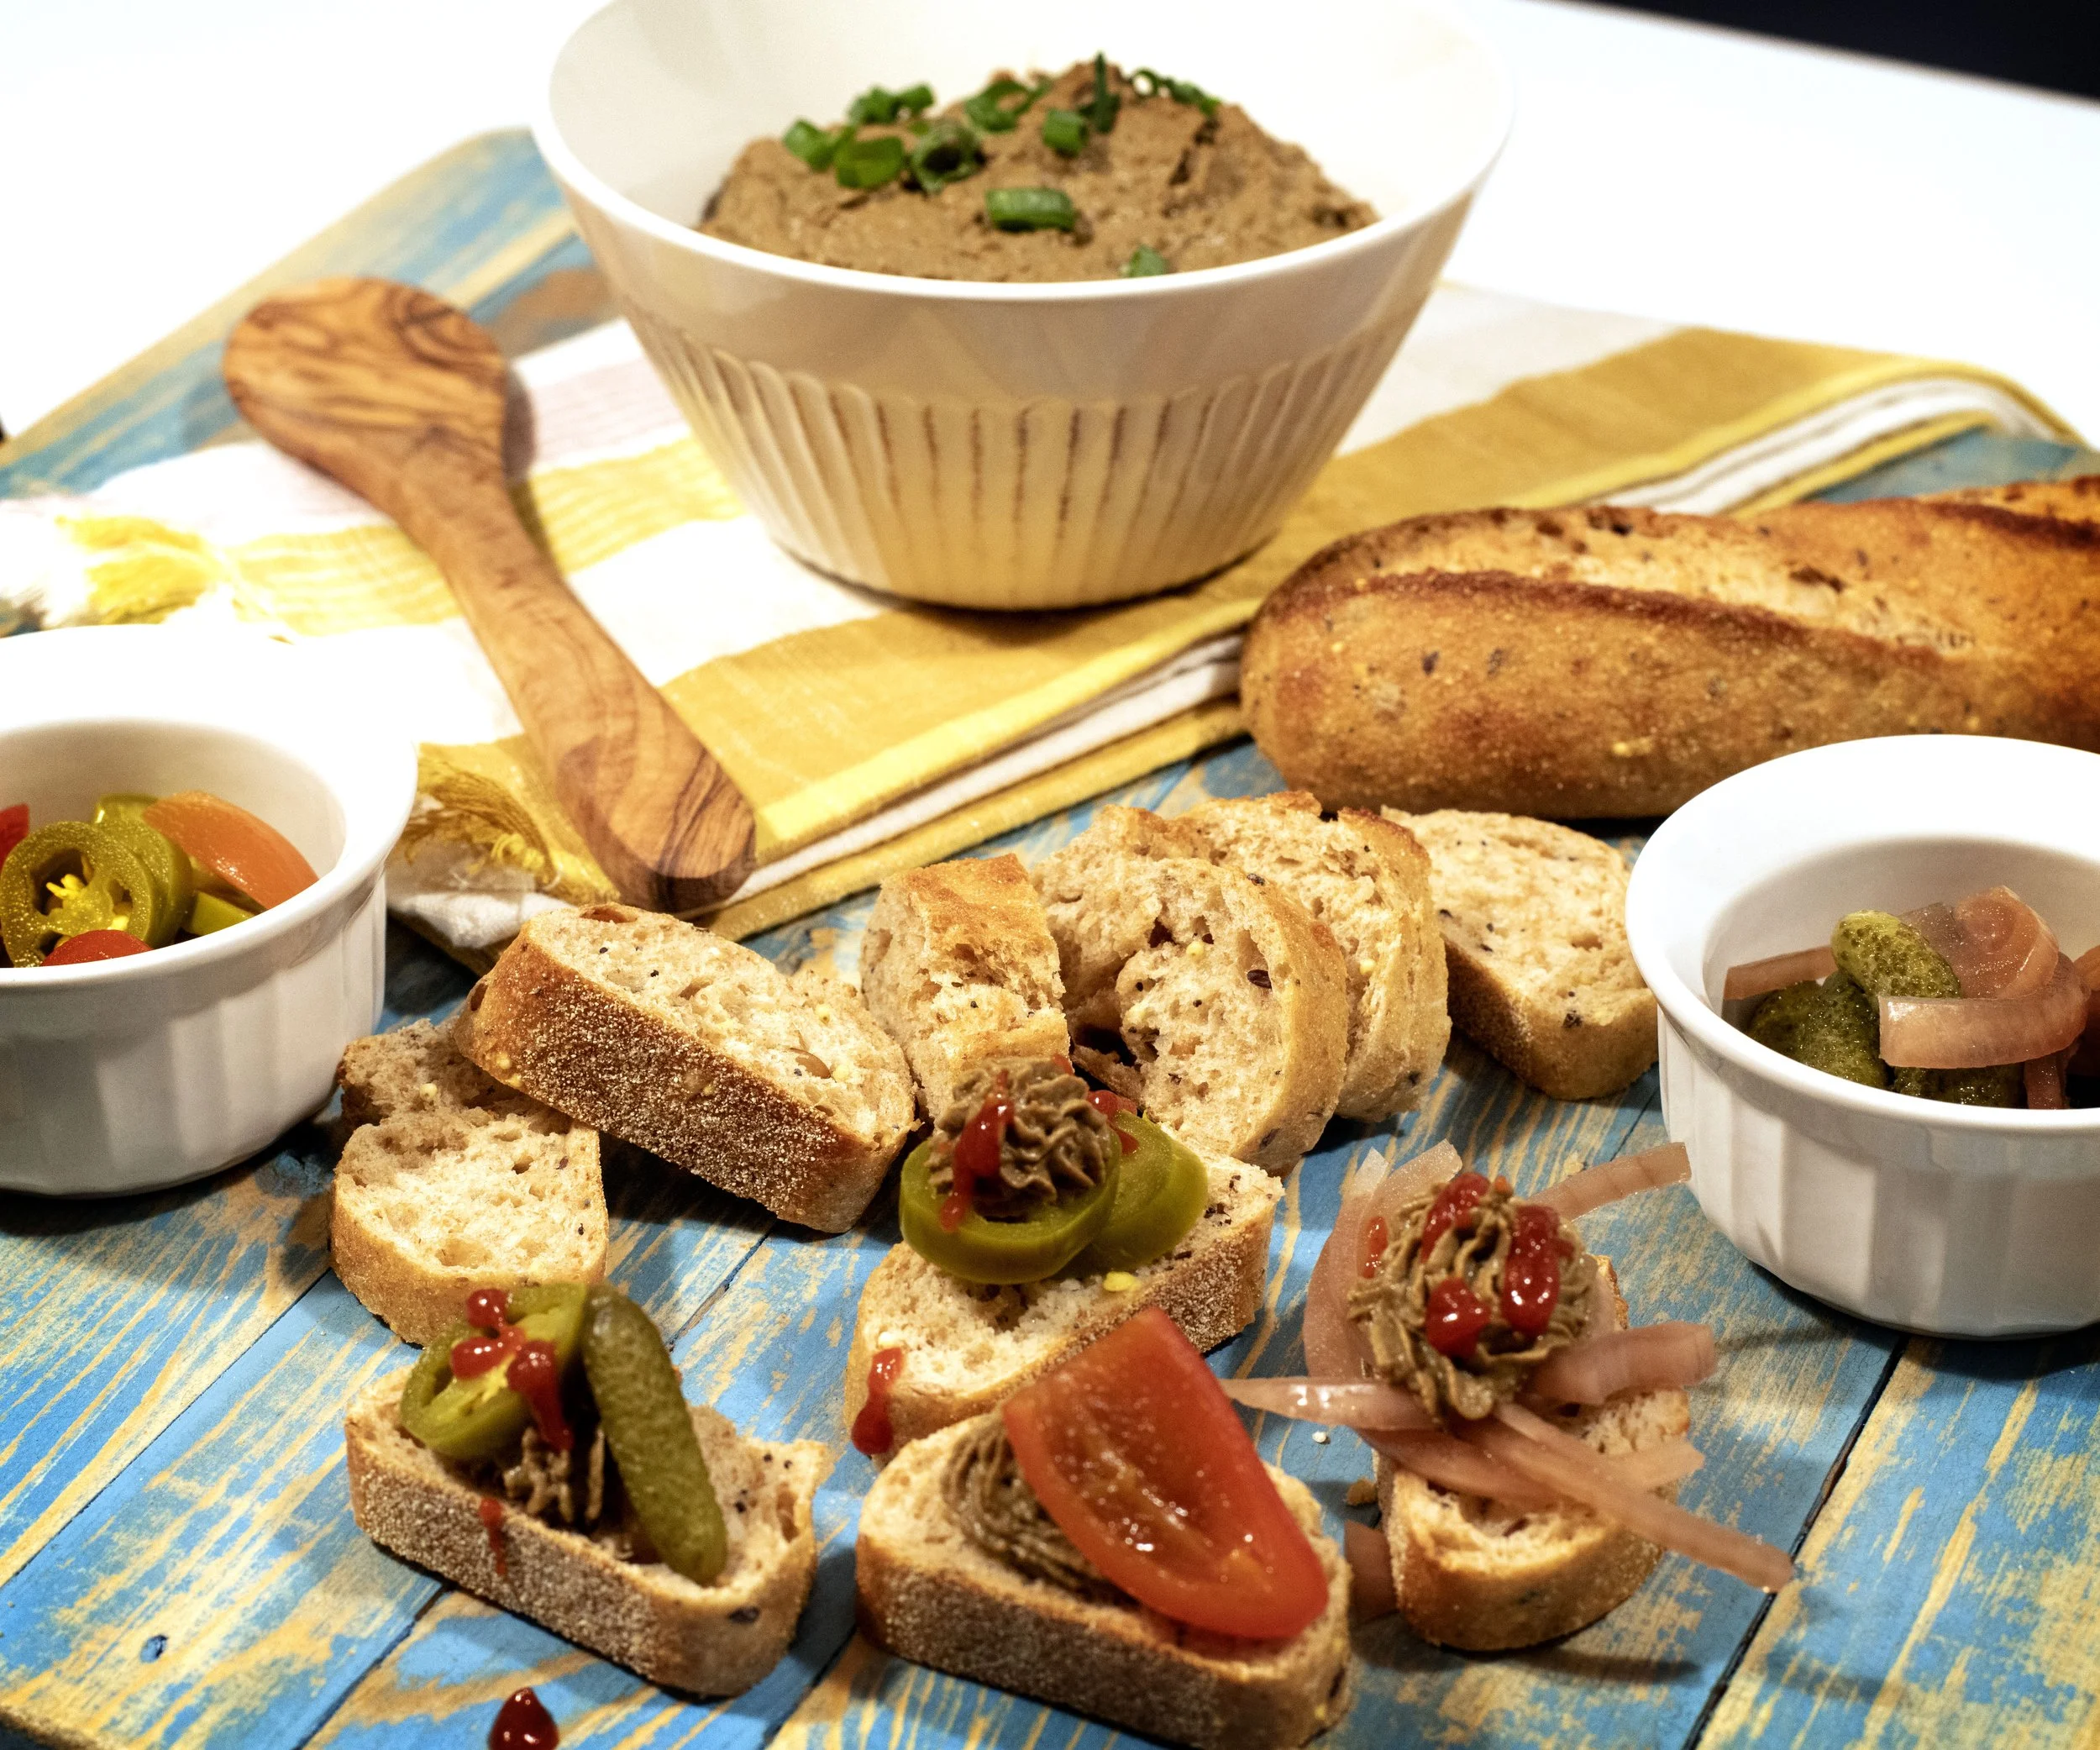
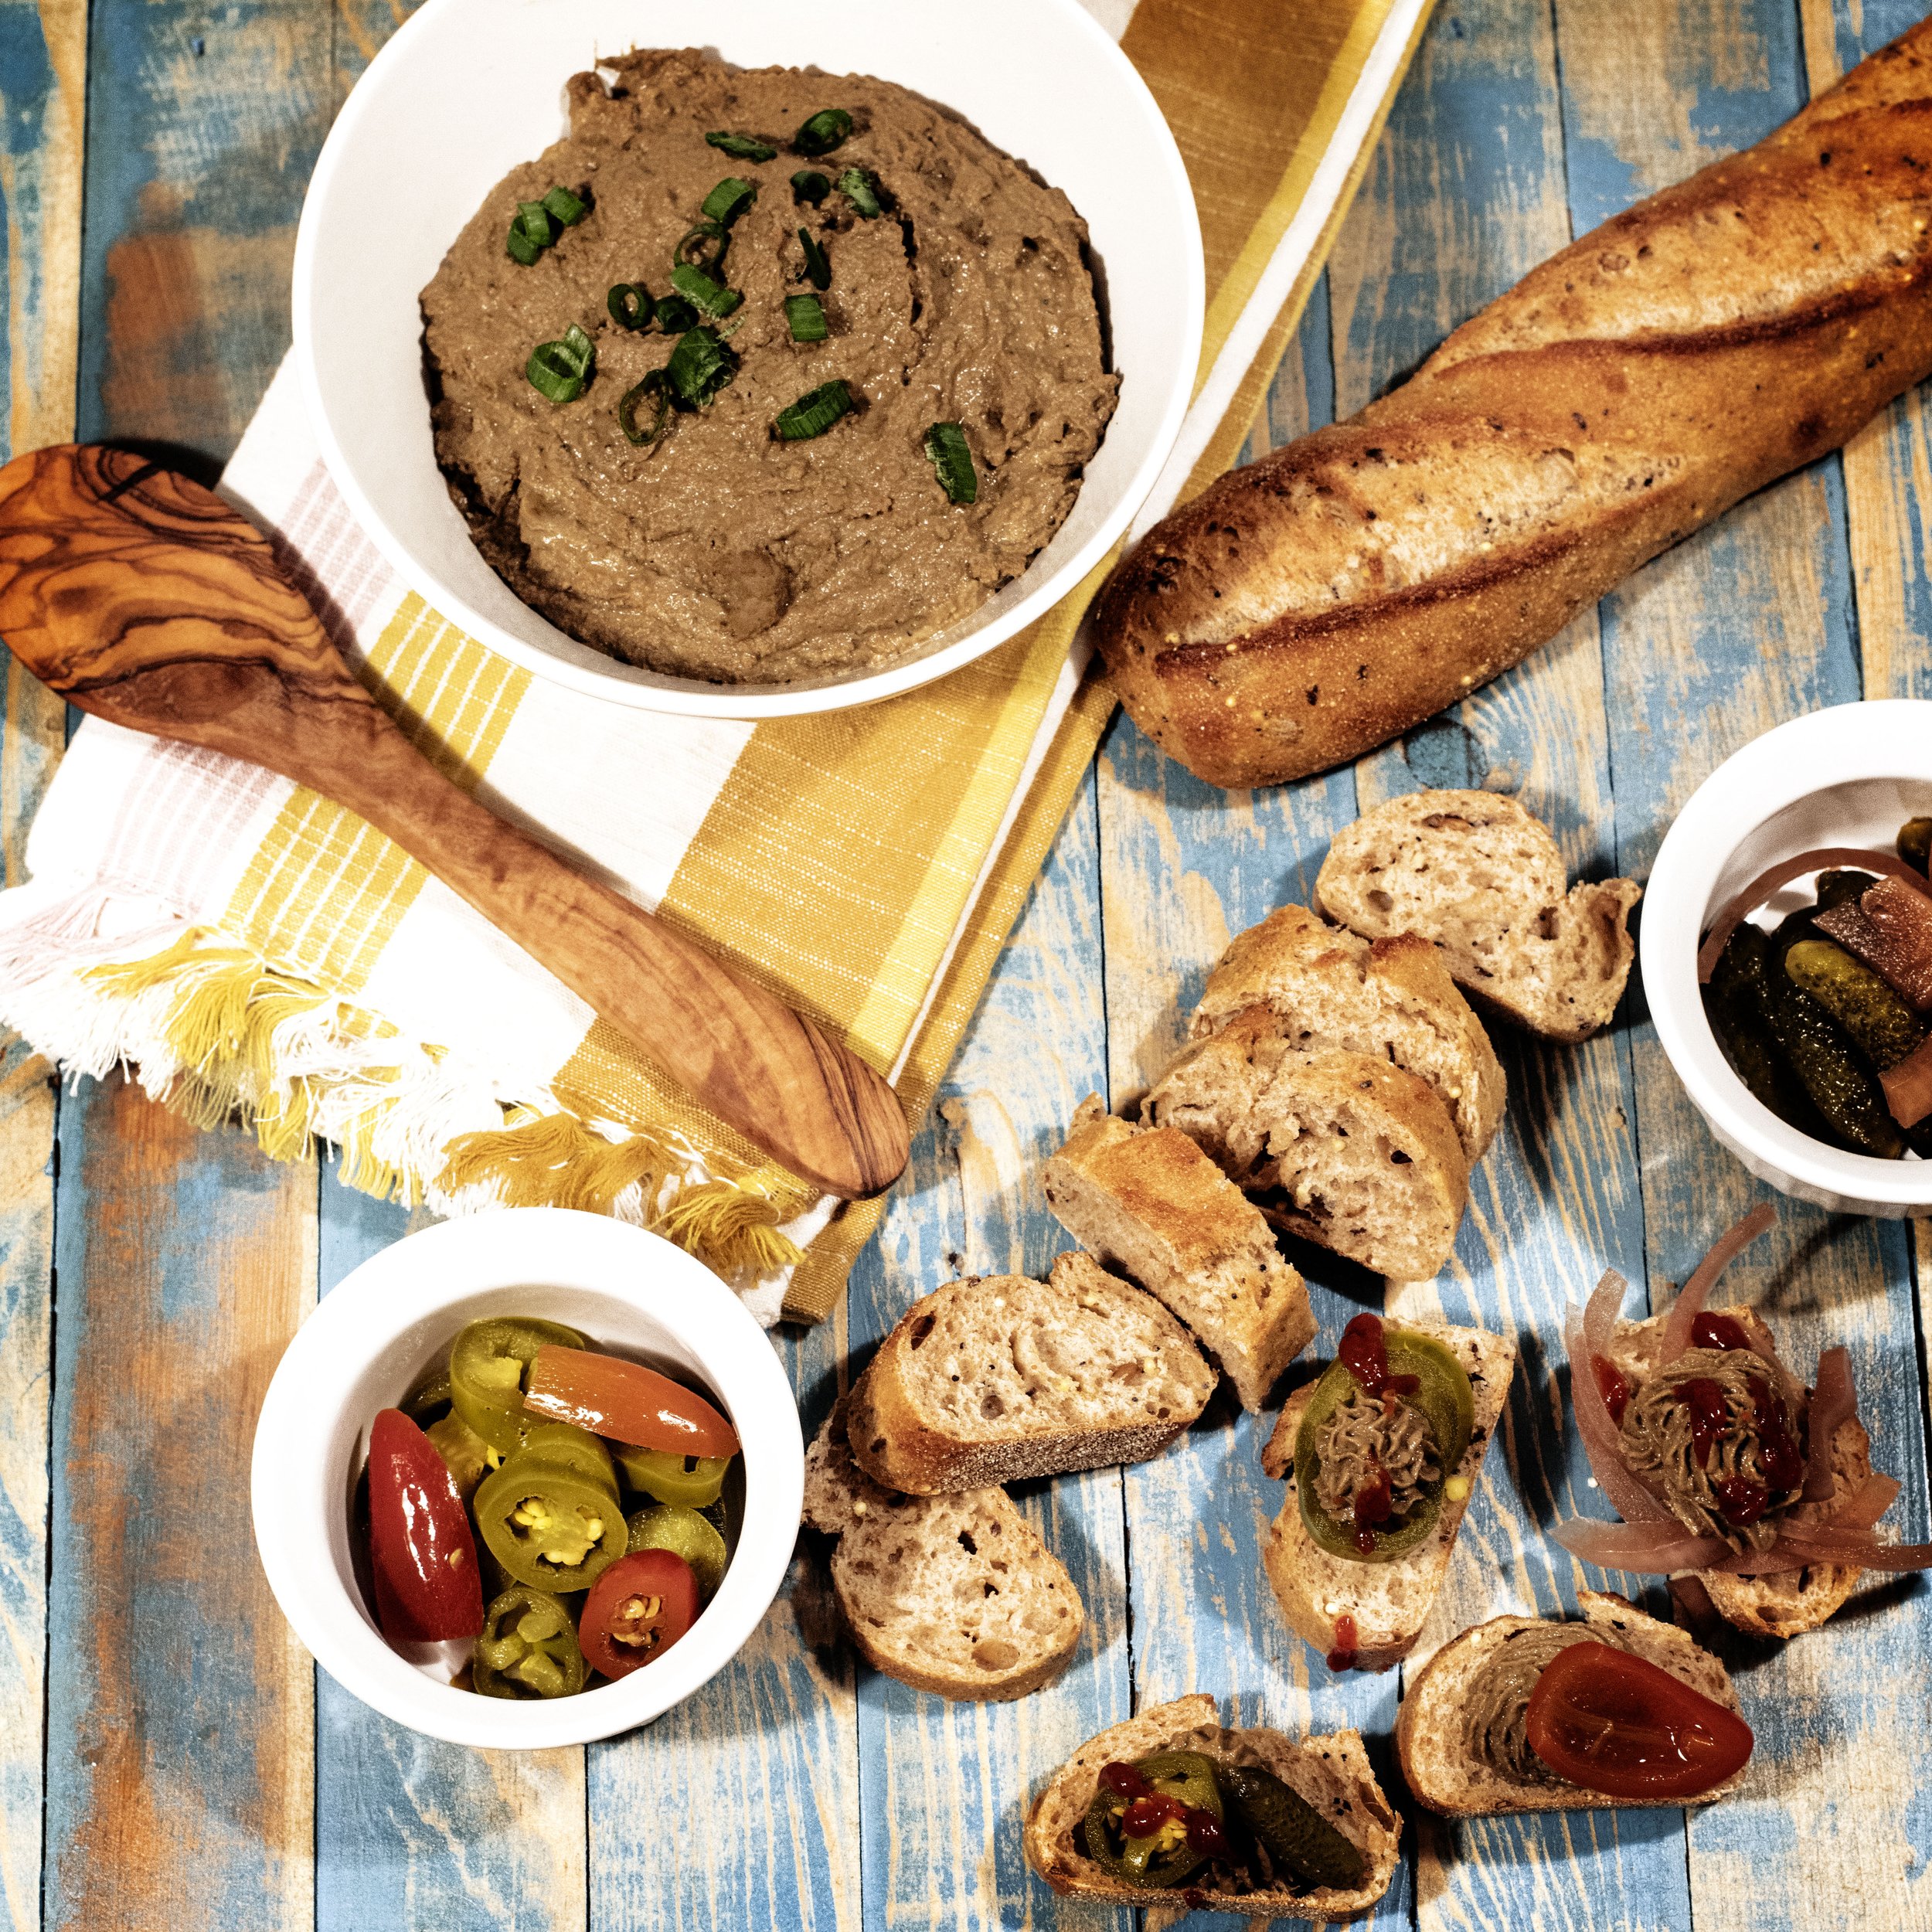
Alright, let’s serve this pate up! This was my first time eating pate. It was actually my first time eating liver ever. I will admit, it took me a few bites to wrap my head around it. It is rich! It is earthy! It is…a lot.

One thing I learned is how you serve pate can change everything. Just pate on a little slice of bread isn’t my most favorite presentation. It just tasted like liver. Which isn’t a bad thing if you are a liver fan. My parents, having grown up on liver and onions, loved it just plain. I needed a little more bling for my pate.
So, to plate up your pate, first toast a thin slice of baguette. Add a little butter to your slice. Smother some pate on top. Finally, garnish with a pickled vegetable of your choice. The most popular is a cornichon pickle. My favorite was pickled red onion. Other options are pickled jalapenos, capers, cucumbers, pickled beets, or radish slices. Another item that made it that much better was to add a drop of a mustard based hot sauce like my all-time favorite from the Caribbean island of Grenada.
I am curious, what do you like to top your pate with? And what is your favorite liver to use?
Anyway,
Happy Hunting!
Lately, everywhere I look all I see are crunch wrap supremes. Instragram seemed to be filled with personalized versions of the Taco Bell treat. And I will admit, the crunch wrap supreme is my particularly favorite item when visiting this fast food establishment. So I couldn’t resist the temptation to watch video after video of people re-creating it, and I therefore also couldn’t resist creating my own wild game twist. So, here it is: the Elk Crunch Wrap Supreme.
Manila clams are actually an imposter to the Washington ocean ecosystem. They are native to Japan and were accidentally introduced to the salty seas of the Washington coast line in oyster shipments. They can be found all along the Pacific coast line of the United States, and are actually a welcome addition to the waters because they are delicious! The clams are identified by their oval shaped shells with heavy ridge lines running the horizontal length of the shell.
I was so happy come Saturday evening to have a spicy, warm, rich dutch oven dinner ready to share with the hunting camp. This recipe takes a bit of time to cook, but is worth the wait and is very simple to put together. It is perfect for a chilly evening and a tired, maybe even exhausted, camp full of people.
I am not always the best pre-planner. If I am headed on vacation, I am the one packing my bags thirty minutes before we are scheduled to leave. I tend to forget essentials, you know, like my tooth brush. I do not know why I have to wait until thirty minutes before our scheduled departure to start preparing for my trip, but I do it every time. And every time, as I am realizing I don't have any clean socks to pack, because that would require a pre-check of my dresser drawers to ensure there are socks available for my trip, I curse myself for procrastinating. You would think I would learn my lesson. Arriving at your destination without pants to wear can be quite unfortunate. But every vacation, no matter what, I still find myself packing that bag thirty minutes before jumping in the car and hastily roaring away, most likely with a pair of dirty socks, no toothbrush, and pant-less.

"I wanted to be a skinny little ballerina but I was a voluptuous little Italian girl whose dad had meatballs on the table every night." ~ Lady Gaga
This incredible skill of procrastination is also useful in other situations. This past New Year's Eve, I was invited to a late night celebration. I was invited well over a week in advance, and was told to bring three simple things: myself, a drink to share, and an appetizer dish to share. Guess what was ready with an hour before party time? Nothing. Not my drink to share, not my appetizer dish, and certainly not myself.
Realizing people would probably not care if I stopped at the store and grabbed a bottle of some drink to share and that I was dressed like a slob (with dirty socks of course), I did think people would notice if I arrived with no appetizer in hand. I contemplated buying one of those pre-made vegetable or meat and cheese trays, but I figured my fellow procrastinators would also devise this plan and arrive with the same appetizer.
I opened my refrigerator in search of something to throw together, and luck would have it, there was a pack of elk chunk waiting to become my quick, throw together New Year's Eve appetizer. I quickly ran the chunk through my meat grinder. It resulted in about a pound of ground elk. To the ground elk, I added a cup of panko bread crumbs, some fresh chopped parsley, and a little nutmeg. I also seasoned generously with salt and pepper. I also added in one beaten egg and two tablespoons of milk.

I find the best tactic for mixing meatballs is to just dig right in with your hands. This gets everything incorporated really thoroughly. Also, it allows you to test the consistency of the meatballs. If the meatballs feel too wet and things aren't really sticking together, add more panko bread crumbs. If things feel to dry, add in more milk.
Since this was a quick throw together appetizer, I used what was available in my pantry to make my meatballs. If you don't have, or maybe you don't like, panko bread crumbs, traditional bread crumbs will also work. Also, I don't always have fresh parsley on hand. I actually never have it on hand, but for some reason on this particular evening I did. If you don't have fresh parsley, dried would also work. You would only need a tablespoon of dried parsley instead of a quarter cup like with the fresh.

Roll the meatballs into balls using about a tablespoon of the meat mixture. Place them on an ungreased baking sheet. For easier clean-up, line the sheet with aluminum foil. Bake the meatballs in a 400 degree oven for about 12 minutes. The meatballs should be slightly browned and your kitchen should smell delicious!

While the meatballs are roasting away, pull out a crockpot. Set the crockpot on low heat.
To the pot, add 3/4 to 1 cup of hoisin sauce. I started with 3/4 of a cup and then added more at the end of I wanted more of the hoisin flavor to stand out. A beautiful dark amber color, hoisin is a sweet and salty sauce commonly used in Chinese cuisine. It is a pungent sauce packed with a ton of flavor, so start with less and you can always add more.
To the hoisin, add one tablespoon of soy sauce, a teaspoon of sesame seed oil, two cloves of minced garlic, and a teaspoon of ground ginger. To help liven up the flavor of the spices in the hoisin sauce, add a tablespoon or two of rice wine vinegar. Give everything a stir and a quick taste. The sauce should taste salty and a bit spicy. Now it is time develop the sweetness of this sauce. I always taste things before I start adding my sweetener to see where things are at. This is important with the hoisin because it also adds sweetness to the dish, and you don't want the meatballs tasting like lollipops! Anyway, slowly add the honey in a drizzle at a time, tasting as you go, until the sauce is where you want it. If you desire a bit more salt, add a little more soy sauce. If you want more hoisin flavor, drizzle some more of that in. I ended up with about a tablespoon of honey at the end.

After the meatballs are done cooking, add them to the hoisin sauce, making sure to coat all the meatballs with the sauce, and you are ready to party! I took the entire crockpot to the gathering with me, this way everything stayed nice and warm. To serve the meatballs, sprinkle a few sesame seeds on top.
Meatballs are a great party appetizer. A pound of meat and a few simple ingredients make a deliciously quick treat. They can be served using only toothpicks, so there is no need for utensils or plates. They can also be made in advance and then just added to the crock-pot to heat back up.
These salty and sweet Asian-style meatballs received lots of praise at the party, and no one suspected they were a product of procrastination.

"Be worthy of your game." ~ George Bird Evans
Learning to process game meat has been an eye opening experience. It is a challenging and ever-evolving labor. Cleaning a harvest is different, not only for different groups of animals, but even for different species within a specific subgroup of animals. For example, it is obvious that a fish is cleaned differently than a duck, but it isn't always obvious that a duck may be cleaned differently than a goose, or even another species of duck. Cleaning also varies on how you plan to prepare or use the animal. I feel I have only touched on the surface of cleaning animals.
Cleaning is just the beginning step of processing game meat too. Storing and preserving meat is an entirely different story. And not to mention learning how to use different parts of the animal! We often hear stories of how Native Americans used every part of an animal. Meat was obviously processed and eaten, but hides or feathers were used for shelter creation or clothing, bones could be constructed into tools or weapons, and tendons or sinew could be used to create thread or string. Of course, those few examples only brush on the surface of how many parts of an animal are useful.
Utilizing the entire animal was definitely a survival tactic for Native Americans, and as a modern day hunter, that drive for survival isn't quite the same. However, many hunters strive to use as much of an animal as possible. Whether this desire comes from a simple curiosity as to what you can come up with to use what you have at hand, or is from a deeper desire to use every part of the animal as a form of respect, there are limitless possibilities on what to create or how to utilize an animal in its entirety, and it is definitely a learning process.
So, while this might be a small step in terms of all the possible things I could use a pheasant for, it is a first step and I enjoyed trying something new with a different part of the bird. After cleaning all the meat from the pheasant, I saved the carcass and made a simple pheasant stock. While I was excited to find a use for the leftover bones of my pheasant harvest, my primary drive for creating a pheasant stock developed from a nagging feeling I got when using chicken stock in my pheasant recipes. For some reason, it bothered me when I would create a soup or sauce recipe for my pheasant meal, but had to use chicken stock as the base. It seemed silly. So, I made a small batch of pheasant stock from the carcass and can now use that as the base for whatever pheasant recipe I work on next.
For the stock, a few simple ingredients are necessary to help develop a deeper flavor profile. Aside from the pheasant carcass, you will need carrots, celery, and onion. I used around four medium sized carrots, three stalks of celery, and two medium sized onions. You could also add a few cloves of garlic. To create a little uniqueness in my stock, I also added in a four inch piece of whole ginger root.

Preheat the oven to 400 Fahrenheit and roast the pheasant carcass, celery, carrots, onion, and ginger root for 20 minutes. There is no need to cut anything up or do any type of prep work before roasting. The only step I took was the cut the onions in half. I did not peel the carrots or even remove the onion skin. If I had added garlic to this stock, I would have roasted the cloves whole as well.

Once the vegetables and pheasant are done roasting, transfer everything to a large pot. I did remove some of the skin from the ginger root before adding it to the pot, but that was about it. I left the onions whole and broke the celery in half so it would fit in the pot, but other than that not much work to be done! At this point, toss in a couple of bay leaves and add enough water to the pot to cover everything by about two inches. The amount of water needed will vary based on the size of your pot, but it should be somewhere between eight and twelve cups. I used ten for my pot. Heat the pot over a medium heat and watch until the water starts to boil. Once it boils, cover the pot and reduce the heat to a simmer. Let the stock simmer for a few hours, checking occasionally to make sure there is still enough liquid in the pot and that the pot is still just simmering and not boiling. I let my stock simmer for about four hours. The liquid reduced from ten cups to eight by the end of the cooking time.

If you are interested in creating a little bit of a different flavor profile for your pheasant stock, instead of using onions you could substitute leeks. You could also add fennel for a hint of licorice. Herbs can also be infused into the stock, such as thyme, sage, or basil. Strain the entire pot through a fine mesh colander, and discard all the vegetables and carcass. Allow the liquid to cool. In the end, the stock should be a beautiful auburn color and have a mild savory flavor.
I plan on using my stock within the next couple of days, so I poured it into mason jars and stuck it in the fridge. It should last in the fridge for about five days. Canning the stock is another option; however the process for cooking is a bit different. I prefer to freeze homemade stock that I am not going to use. I put it in a large Tupperware container and just pop it in the freezer. It will last indefinitely in the freezer.
This stock has a hint of the richness from the pheasant bones and also a clean, fresh taste from the vegetables. It is not salty, which took me a minute to get used to. When using store bought chicken stock, the stock is salted and, for me, that is the main flavor that stands out. This pheasant stock is a base starting point for any sauces, broths, or soups you might create with it. Think of the stock as a building block that will enhance and develop flavor in your dish. This recipe allows you to extract the umami (one of the five basic tastes) to use as an ingredient from a bird carcass or other bones. It also gives a little more reward to yourself and the animal that provided for you.


