
You won’t find beans or tomatoes in this Real Texas Chili! Staying true to the chili Texans love, this chili starts with a homemade chili paste base, onions, and wild game! It’s a wild game twist on a Big Bowl O’ Red.

I am not always the best pre-planner. If I am headed on vacation, I am the one packing my bags thirty minutes before we are scheduled to leave. I tend to forget essentials, you know, like my tooth brush. I do not know why I have to wait until thirty minutes before our scheduled departure to start preparing for my trip, but I do it every time. And every time, as I am realizing I don't have any clean socks to pack, because that would require a pre-check of my dresser drawers to ensure there are socks available for my trip, I curse myself for procrastinating. You would think I would learn my lesson. Arriving at your destination without pants to wear can be quite unfortunate. But every vacation, no matter what, I still find myself packing that bag thirty minutes before jumping in the car and hastily roaring away, most likely with a pair of dirty socks, no toothbrush, and pant-less.

"I wanted to be a skinny little ballerina but I was a voluptuous little Italian girl whose dad had meatballs on the table every night." ~ Lady Gaga
This incredible skill of procrastination is also useful in other situations. This past New Year's Eve, I was invited to a late night celebration. I was invited well over a week in advance, and was told to bring three simple things: myself, a drink to share, and an appetizer dish to share. Guess what was ready with an hour before party time? Nothing. Not my drink to share, not my appetizer dish, and certainly not myself.
Realizing people would probably not care if I stopped at the store and grabbed a bottle of some drink to share and that I was dressed like a slob (with dirty socks of course), I did think people would notice if I arrived with no appetizer in hand. I contemplated buying one of those pre-made vegetable or meat and cheese trays, but I figured my fellow procrastinators would also devise this plan and arrive with the same appetizer.
I opened my refrigerator in search of something to throw together, and luck would have it, there was a pack of elk chunk waiting to become my quick, throw together New Year's Eve appetizer. I quickly ran the chunk through my meat grinder. It resulted in about a pound of ground elk. To the ground elk, I added a cup of panko bread crumbs, some fresh chopped parsley, and a little nutmeg. I also seasoned generously with salt and pepper. I also added in one beaten egg and two tablespoons of milk.

I find the best tactic for mixing meatballs is to just dig right in with your hands. This gets everything incorporated really thoroughly. Also, it allows you to test the consistency of the meatballs. If the meatballs feel too wet and things aren't really sticking together, add more panko bread crumbs. If things feel to dry, add in more milk.
Since this was a quick throw together appetizer, I used what was available in my pantry to make my meatballs. If you don't have, or maybe you don't like, panko bread crumbs, traditional bread crumbs will also work. Also, I don't always have fresh parsley on hand. I actually never have it on hand, but for some reason on this particular evening I did. If you don't have fresh parsley, dried would also work. You would only need a tablespoon of dried parsley instead of a quarter cup like with the fresh.

Roll the meatballs into balls using about a tablespoon of the meat mixture. Place them on an ungreased baking sheet. For easier clean-up, line the sheet with aluminum foil. Bake the meatballs in a 400 degree oven for about 12 minutes. The meatballs should be slightly browned and your kitchen should smell delicious!

While the meatballs are roasting away, pull out a crockpot. Set the crockpot on low heat.
To the pot, add 3/4 to 1 cup of hoisin sauce. I started with 3/4 of a cup and then added more at the end of I wanted more of the hoisin flavor to stand out. A beautiful dark amber color, hoisin is a sweet and salty sauce commonly used in Chinese cuisine. It is a pungent sauce packed with a ton of flavor, so start with less and you can always add more.
To the hoisin, add one tablespoon of soy sauce, a teaspoon of sesame seed oil, two cloves of minced garlic, and a teaspoon of ground ginger. To help liven up the flavor of the spices in the hoisin sauce, add a tablespoon or two of rice wine vinegar. Give everything a stir and a quick taste. The sauce should taste salty and a bit spicy. Now it is time develop the sweetness of this sauce. I always taste things before I start adding my sweetener to see where things are at. This is important with the hoisin because it also adds sweetness to the dish, and you don't want the meatballs tasting like lollipops! Anyway, slowly add the honey in a drizzle at a time, tasting as you go, until the sauce is where you want it. If you desire a bit more salt, add a little more soy sauce. If you want more hoisin flavor, drizzle some more of that in. I ended up with about a tablespoon of honey at the end.

After the meatballs are done cooking, add them to the hoisin sauce, making sure to coat all the meatballs with the sauce, and you are ready to party! I took the entire crockpot to the gathering with me, this way everything stayed nice and warm. To serve the meatballs, sprinkle a few sesame seeds on top.
Meatballs are a great party appetizer. A pound of meat and a few simple ingredients make a deliciously quick treat. They can be served using only toothpicks, so there is no need for utensils or plates. They can also be made in advance and then just added to the crock-pot to heat back up.
These salty and sweet Asian-style meatballs received lots of praise at the party, and no one suspected they were a product of procrastination.

"My favorite animal to hunt is probably elk. There's nothing like the sound of a bugling bull splitting the cold air at first light. And that smell is unmistakable. Once you experience their musk in the wild there's no going back! A close second would be a varmint hunt." - Chris Pratt
If I could only have one meal for the rest of my life, this meal would be it. That is a very bold statement, but horseradish and elk are that good together. Like the deer for the gorgonzola topped tenderloin recipe I posted back in February, I did not harvest this elk. My husband did. I am getting sick of sharing his stories, and not my own. However, he ended up with the elk tag, and I, once again, did not. BUT I helped a lot.
I scouted and hiked with him for this bull, and I helped clean it after he shot it. That was my first cleaning experience, and it was very educational to say they least. I have a new respect for dad and the amount of work he put in during his elk hunts when I was little. It is easy to sit down to the table and gobble down elk steak and eggs with little appreciation for the amount of effort, sweat, and hard work someone puts in to harvesting such a large and intelligent animal.
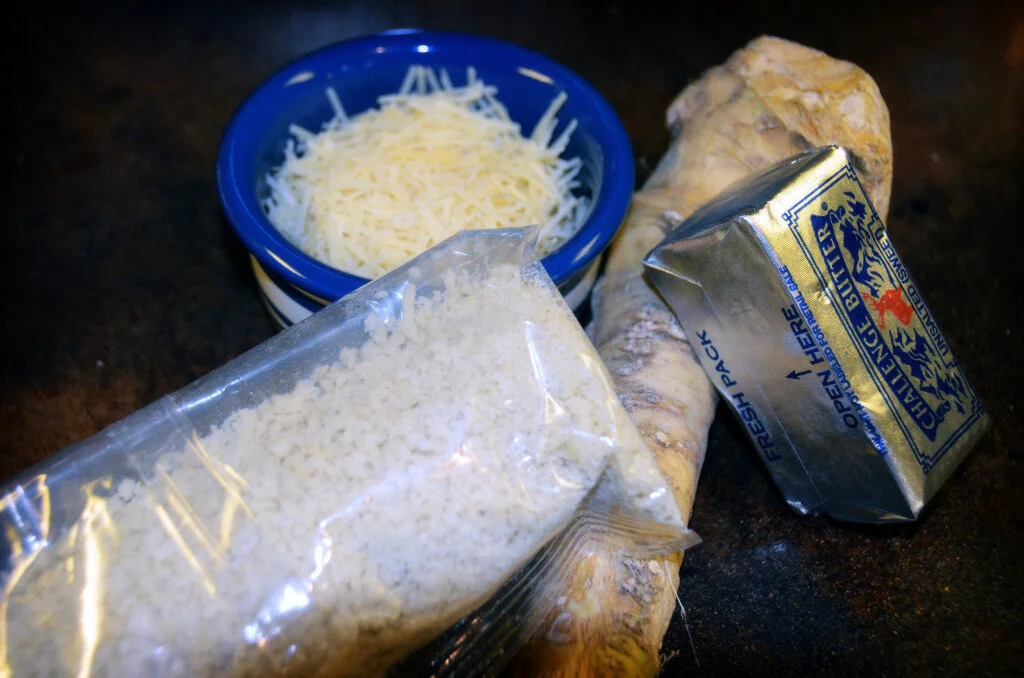
Before you start preparing the meat for the meal, you need put together your horseradish crusts. The crusts need about thirty minutes in the fridge, so you want to make them at the beginning. The players for this crust are horseradish, fresh or prepared, grated parmesan cheese, panko bread crumbs, and an entire stick of unsalted butter. You can also use salted butter, but I use the unsalted because then you can control the amount of salt that you add to the mixture. In a medium size bowl, drop in all the ingredients. If you are using the fresh horseradish, you will need to grate it before adding.
I would start with a cup of the panko bread crumbs and then you can add more if you think you want more crunch once you have mixed everything together. I use about a cup of the parmesan cheese, a cup of the bread crumbs, and a couple of tablespoons of the horseradish. Like with the bread crumbs, I would start with a smaller amount, like two tablespoons, and then add more if you want more heat. I am a big fan of the heat from horseradish, so I end up with about three and half tablespoons in this mixture. It is much easier to mix up the crust ingredients if you let the butter sit at room temperature before you start, but I always forget to do that. I wouldn't recommend microwaving the butter in this case because you don't want your butter melted, just soft. You can use a spoon to mix all this together, which is what most people would probably say, but let's be honest here: mixing butter with a spoon never works and you just end up crushing your panko bread crumbs into dust. Use your hands! It is much easier.
Once you have the amount of panko, horseradish, and salt you want, it is time to start forming the crust patties. Line a cookie sheet with a piece of wax or parchment paper and make some room in your fridge where the sheet can sit flat.

I make my crust patties about a quarter inch thick and the diameter of the steak you are going to use. Stick the patties in the fridge for about thirty minutes so they can set, and now it is time to get started on preparing the steaks! Usually when I prepare elk steak, I cut the tenderloin or back strap in thin, butterflied steaks. I do this for two reasons: first, it is a force of habit because that is how my dad cooked his elk the entire time I was growing up. Second, you get a WHOLE lot more meals from the limited amount of meat. While I still do a lot of meals with the thinner cuts, I decided to try something new with this bull, which was to cut the tenderloin into much thicker steaks, and it made for some amazing steaks.
For this recipe, I cut the tenderloin steaks about two or two and a half inches thick. Another way to quickly measure is cut the meat the thickness of a slice of bacon, since that is what you are going to wrap the meat in. You could use either tenderloin or back strap for this recipe. I think this would also be great with deer.

After I cut the steaks, I wrap them with a slice of bacon, using two toothpicks to hold the bacon in place, and season them with a little salt and pepper. I let the meat sit out for about fifteen minutes, however thirty is the recommended amount of time to take the chill off them. Taking the chill off helps the meat to cook more thoroughly than when you just throw a piece of cold meat into a hot pan.

While the meat is coming to room temperature, I make the sauce. I LOVE this sauce, and would probably dunk any steak in it, but it is especially great with this recipe because it just adds to the heat of the horseradish in the panko crust. The ingredients for the sauce are very simple: sour cream, mayonnaise, and prepared wasabi horseradish. I put equal portions of sour cream and mayonnaise, which for two people is about half a cup of each, into the bowl and then add the wasabi horseradish to taste. Like the crust, I like it HOT! In this case it works out to about a tablespoon plus a little extra. A good starting point would be two teaspoons and add more from there. If you can't find the wasabi horseradish, you could also substitute prepared horseradish, plain wasabi, a wasabi sauce, or even the hot oriental mustard. Anything with a little heat will work, but if you can find the wasabi horseradish I would recommend giving it a try. It is delicious.

With the sauce ready and crusts chilling in the fridge, there is only one thing left to do: start cooking those steaks! Okay, so the process for cooking these steaks is a little different from what I am used to, but it works really well. For this, you need a stovetop pan that you can also put into the oven. For the most part, you are going to be safe if your pan has a metal handle. You might need to check if your pan can do both the stove top and the oven, because you don't want to ruin your pan. To get started, heat your broiler on high. Also, preheat your pan on the stove top on medium-high. Once you can feel the heat coming off the pan you are ready to start cooking some steak. So, I actually get out a timer for this, and it has resulted in perfectly cooked meat for me. If you don't have a timer you could guess on the times, but a timer really does help. So, to start you want to cook the bacon along the outside of the steaks. I rotate the steak FOUR times in order to cook the bacon. I cook each rotation for 30 seconds. Since the steaks are a bit thicker, you can get them to balance on their side during cooking. I use tongs when I do this, because there is a lot of hot grease bouncing around from the bacon. Once you have cooked all the bacon, you can start to sear the steak itself. I do the first side for three minutes, and then flip it and do the second side for another three minutes. Remember, once the steak has touched the pan do not mess with it until you are ready to flip it. You don't want to tear your meat. Three minutes per side will give you a medium rare finish on this thick of a steak. Elk tastes MUCH better if you don't over cook it. A well-done elk steak will be tough and it really exacerbates the "gamey" flavor of the meat. If you want your steak cooked more, you can increase the time to four or even five minutes per side. If you like things a little more on the rare side, drop the cooking time to two minutes per side. After you have seared both sides of the steak, drop your horseradish crusts on top of the steak and stick the entire pan in the oven under the broiler.

You are only trying to brown your horseradish crust and melt the butter and cheese in the crust, so you don't want to walk away during this part of the process. Things can change VERY quickly under the broiler. I find that it takes about a minute and half in my oven for the crusts to start looking a beautiful, and very delicious, golden brown. This is with the pan on the middle rack of the oven. I would expect this to last anywhere from thirty seconds to two minutes, depending on your oven's personal temperament. Keep on eye on things is the best advice. Once the crust is bubbly and perfect, pull your pan and it is time to start plating! I served the steak with a side of asparagus I grilled on the stove with olive oil, a little garlic, and some salt and pepper. I dropped a bit of parmesan cheese over the top at the end. I also poured a glass of cabernet sauvignon, which pairs really wonderfully with a dark, red meat like elk. And don't forget to get yourself a serving of that sauce for dipping your meat in! Seriously, like I said before, if there was only one meal I could have for the rest of my life this would be it!
Steaks
*tenderloin or back strap cut into two inch thick steaks (one per person)
*bacon (one slice per steak)
*salt and pepper to taste
Horseradish Crust
*one stick unsalted butter
*two tablespoons horseradish, prepared or fresh
*3/4 cup parmesan cheese, grated *one cup panko bread crumbs
*salt to taste
Horseradish Sauce*
*half cup sour cream
*half cup mayonnaise
*tablespoon wasabi horseradish
Begin by preparing horseradish crusts. Combine softened butter, horseradish, parmesan cheese, panko bread crumbs, and salt. Form into 1/4 inch disks and refrigerate for thirty minutes. Prepare steaks by seasoning with salt and pepper and wrapping in bacon. Let rest at room temperature for up to thirty minutes. Prepare the dipping sauce by combining sour cream, mayonnaise, and wasabi horseradish. Preheat broiler on high and a pan on the stove top on medium high heat. Once pan is preheated, place steak on side in order to cook bacon. Cook bacon for thirty seconds, and then rotate meat. Perform this three more times, for a total cook time of two minutes. Sear steak for three minutes and flip to second side for additional three minutes. Place chilled horseradish crust on top of steaks and place entire pan in oven broiler for up to two minutes, or until crust is bubbly and golden brown. Serve with horseradish dipping sauce.

"Be worthy of your game." ~ George Bird Evans
Learning to process game meat has been an eye opening experience. It is a challenging and ever-evolving labor. Cleaning a harvest is different, not only for different groups of animals, but even for different species within a specific subgroup of animals. For example, it is obvious that a fish is cleaned differently than a duck, but it isn't always obvious that a duck may be cleaned differently than a goose, or even another species of duck. Cleaning also varies on how you plan to prepare or use the animal. I feel I have only touched on the surface of cleaning animals.
Cleaning is just the beginning step of processing game meat too. Storing and preserving meat is an entirely different story. And not to mention learning how to use different parts of the animal! We often hear stories of how Native Americans used every part of an animal. Meat was obviously processed and eaten, but hides or feathers were used for shelter creation or clothing, bones could be constructed into tools or weapons, and tendons or sinew could be used to create thread or string. Of course, those few examples only brush on the surface of how many parts of an animal are useful.
Utilizing the entire animal was definitely a survival tactic for Native Americans, and as a modern day hunter, that drive for survival isn't quite the same. However, many hunters strive to use as much of an animal as possible. Whether this desire comes from a simple curiosity as to what you can come up with to use what you have at hand, or is from a deeper desire to use every part of the animal as a form of respect, there are limitless possibilities on what to create or how to utilize an animal in its entirety, and it is definitely a learning process.
So, while this might be a small step in terms of all the possible things I could use a pheasant for, it is a first step and I enjoyed trying something new with a different part of the bird. After cleaning all the meat from the pheasant, I saved the carcass and made a simple pheasant stock. While I was excited to find a use for the leftover bones of my pheasant harvest, my primary drive for creating a pheasant stock developed from a nagging feeling I got when using chicken stock in my pheasant recipes. For some reason, it bothered me when I would create a soup or sauce recipe for my pheasant meal, but had to use chicken stock as the base. It seemed silly. So, I made a small batch of pheasant stock from the carcass and can now use that as the base for whatever pheasant recipe I work on next.
For the stock, a few simple ingredients are necessary to help develop a deeper flavor profile. Aside from the pheasant carcass, you will need carrots, celery, and onion. I used around four medium sized carrots, three stalks of celery, and two medium sized onions. You could also add a few cloves of garlic. To create a little uniqueness in my stock, I also added in a four inch piece of whole ginger root.

Preheat the oven to 400 Fahrenheit and roast the pheasant carcass, celery, carrots, onion, and ginger root for 20 minutes. There is no need to cut anything up or do any type of prep work before roasting. The only step I took was the cut the onions in half. I did not peel the carrots or even remove the onion skin. If I had added garlic to this stock, I would have roasted the cloves whole as well.

Once the vegetables and pheasant are done roasting, transfer everything to a large pot. I did remove some of the skin from the ginger root before adding it to the pot, but that was about it. I left the onions whole and broke the celery in half so it would fit in the pot, but other than that not much work to be done! At this point, toss in a couple of bay leaves and add enough water to the pot to cover everything by about two inches. The amount of water needed will vary based on the size of your pot, but it should be somewhere between eight and twelve cups. I used ten for my pot. Heat the pot over a medium heat and watch until the water starts to boil. Once it boils, cover the pot and reduce the heat to a simmer. Let the stock simmer for a few hours, checking occasionally to make sure there is still enough liquid in the pot and that the pot is still just simmering and not boiling. I let my stock simmer for about four hours. The liquid reduced from ten cups to eight by the end of the cooking time.

If you are interested in creating a little bit of a different flavor profile for your pheasant stock, instead of using onions you could substitute leeks. You could also add fennel for a hint of licorice. Herbs can also be infused into the stock, such as thyme, sage, or basil. Strain the entire pot through a fine mesh colander, and discard all the vegetables and carcass. Allow the liquid to cool. In the end, the stock should be a beautiful auburn color and have a mild savory flavor.
I plan on using my stock within the next couple of days, so I poured it into mason jars and stuck it in the fridge. It should last in the fridge for about five days. Canning the stock is another option; however the process for cooking is a bit different. I prefer to freeze homemade stock that I am not going to use. I put it in a large Tupperware container and just pop it in the freezer. It will last indefinitely in the freezer.
This stock has a hint of the richness from the pheasant bones and also a clean, fresh taste from the vegetables. It is not salty, which took me a minute to get used to. When using store bought chicken stock, the stock is salted and, for me, that is the main flavor that stands out. This pheasant stock is a base starting point for any sauces, broths, or soups you might create with it. Think of the stock as a building block that will enhance and develop flavor in your dish. This recipe allows you to extract the umami (one of the five basic tastes) to use as an ingredient from a bird carcass or other bones. It also gives a little more reward to yourself and the animal that provided for you.

”All really wild scenery is attractive. The true hunter, the true lover of wilderness, loves all parts of the wilderness, just as the true lover of nature loves all seasons. There is no season of the year when the country is not more attractive than the city; and there is no portion of the wilderness, where game is found, in which it is not a keen pleasure to hunt.” ~ Theodore Roosevelt
Cooking is a continuous learning process, and working with wild game is no exception. For me, I tend to focus on building harmonious flavor profiles, and concentrating on that one area takes up more time than I have in a day. However, there are hundreds of aspects in the cooking process that can all be developed, modified, re-evaluated, and maybe even re-invented. I try to break myself of solely focusing on flavor medleys and try to improve and learn in different areas. This recipe, coconut pheasant soup, allowed me to not only work on creating a great flavor profile, but also forced me to look at how textures work together, which is equally important in a dish's presentation.
I find pheasant meat to have a unique texture. Many people compare pheasant to chicken. I don't think the comparison is accurate when describing pheasant. Pheasant, like chicken, is a mild flavored meat. Some meats have very strong and distinct flavors, and working with them can be challenging because they fight with other flavors. Pheasant is not like that and can be incorporated into a large number of dishes acting as a base for building flavor.
Where I think pheasant differs from chicken is the texture of the meat. Pheasant is a bit more tough than chicken, which I am sure comes from the differences in how pheasant and chickens live and also how they eat. Pheasant meat is a bit darker and much leaner than chicken also. This difference can best be captured by simply pan frying a chicken breast and pheasant breast and comparing the two. The chicken breast will be moist and light, because of the extra fat in the meat. The pheasant will be tougher and much drier. Because pheasant meat can dry out so quickly when cooked, it is commonly marinated, cooked low and slow, or even wrapped in a fat source, such as bacon, to create moisture and tenderness.

I find myself making a lot of meatball recipes because I think the slight toughness that develops when quickly cooking pheasant works well in meatball form. However, after making a few meatball recipes, I decided that I wanted to try something else with the breast meat. I am a big fan of Thai food, and especially a hot cup of tom kha gai. A coconut based soup, tom kha gai is a spicy soup found in Thai and Lao cuisines. Traditionally, it is prepared using galangal, kaffir lime leaves, lemon grass, thai chili peppers, mushrooms, and fish sauce. While chicken is the main protein source for the soup, many restaurants also offer shrimp or tofu options. Besides having a deliciously sweet and spicy broth, one of my favorite attributes of tom kha gai is how it uses textures to enhance the soup. The mushrooms are soft and tender, while the chicken, since it is boiled, has a meatier, tougher texture. A little crunch can also be added with a sprinkling of green onions. The broth is very thin and silky.
The last time I had tom kha gai, I made a mental note to try and create a version at home using pheasant, since pheasant has that meatier texture that I love in the soup. So, here the recipe is! And I found it to be a great use of my pheasant.
To a large stock pot, add a tablespoon of cooking oil and heat over medium heat. I used coconut oil for my cooking oil, but you could use vegetable, canola, olive, or whatever oil you prefer. Add in the minced garlic, lemon grass, and grated ginger root. Heat for two minutes, being careful not to burn the garlic. If the garlic starts to brown, turn the heat down. There are three different options for the lemon grass with this soup. I used two tablespoons of lemon grass paste, which is found by the fresh herbs in a tube. You could also use a stalk of fresh lemon grass. The stalk can either be added whole to the soup and removed at the end, or you could mince it up and leave it in the soup. The paste or minced stalk both add a bit of crunch to the soup, which some people may not like. If you do not want the bits of crunchy lemon grass, I would suggest just adding the stalk. I like the crunch, so I went with the paste. It is really a personal preference on textures, so go with whatever method you find most appealing.


To the garlic and ginger, add one tablespoons of red curry paste. Stir and coat everything with the paste. Once incorporated, add a cup of the pheasant stock and dissolve any leftover chunks of the paste. You also want to break up any thing sticking to the bottom of the pot, as this will add even more flavor to the soup base. For the stock of this soup, I used homemade pheasant stock. The recipe for it can be found here: Homemade Pheasant Stock. You could also use chicken or vegetable stock.
Once the red curry is fully dissolved, add the rest of the pheasant stock, three tablespoons of fish sauce, and a tablespoon of honey. If you don't have honey on hand, any sweetener of your choice will do, such as brown or white sugar. Stir everything and bring to a light boil. Once the soup base reaches a slow, rolling boil, reduce the heat to a simmer and allow to cook for twenty minutes. This will reduce the soup base down and concentrate the flavors of the lemon grass, ginger, and red curry. The lemon grass, which is a culinary herb commonly found in Asian style cuisines, adds a subtle citrus flavor to the soup while the ginger gives a spicy, fresh crisp flavor, and the red curry adds a hint of heat.
After the twenty minutes, bring the heat back to medium and add the three cans of coconut milk. The milk will create the smooth and silky texture found in the soup, and you can adjust how creamy you want the soup to be based on which coconut milk combination you use. I used two cans of full fat coconut milk and one can of lite. You could do three full fat, all three lite, or a combination of the two. The more full fat cans you use, the thicker and creamy the soup base will be. Bring the soup base back up to a gentle, rolling boil and add the pheasant meat chunks. In order for the meat to cook correctly, make sure they are cut into bite size pieces all roughly the same size. Allow to cook for five minutes.
Add the sliced mushrooms to the pot and allow the cook an additional five minutes. With the mushrooms, I used white button mushrooms, but you can substitute in other types. A lot of recipes use shitakes, which add a nutty element to the soup. Baby portabellas or crimini would also be great in this soup, as both have an earthy flavor and a slightly meaty texture.

Turn the heat off from the pot and add the final ingredients to the soup: the fresh squeezed lime and orange juices, and the torn Thai basil. I sometimes struggle with finding Thai basil at my grocery store. They don't always carry it. I tried to substitute in Italian basil, and I didn't like the way it worked with the curry flavor. Thai basil has more of a spicy bite to it, while Italian basil can almost be described as sweet. They are two very different flavors. If you can't find Thai basil at your store, I would actually suggest substituting cilantro or green onions instead of Italian basil.

Well, that is it for this coconut pheasant soup recipe! This soup is easy to put together and has a unique flavor profile of spicy and sweet with a hint of citrus, but it also has great textures and is beautiful to look at! Enjoy!
Those are truly great meals that you eat slow, share stories, and possibly go back for seconds, or thirds depending on how long you decide to wait before you make the effort to actually put on pants.

Breakfasts like those long Saturday morning ones seem like the perfect opportunity to share a wild game meal; however, I find that breakfast is the area I struggle the most with when using wild game. If I do add deer or elk to the table, I tend to follow the same pattern each time: deer breakfast sausage. I might get inventive and make a burrito from the sausage or some type of scramble, and don't get me wrong, those are fantastic meals and I gobble up every satisfying bite, but sometimes I want to share something that is a little different, a little unexpected.
This past weekend, I awoke for my late Saturday morning breakfast, still in my pajamas, and decided it was time to try out a new wild game breakfast item. I thought about how to best add wild game to the meal without getting too strange, and decided on taking one of my favorite classics and putting a wild game spin to it: the deer eggs benedict.
First popularized in New York, eggs benedict is a savory breakfast dish composed of a toasted English muffin topped with Canadian ham or bacon, a poached egg, and creamy Hollandaise sauce. Many variations of the dish exist, including substituting the Hollandaise sauce for a Béarnaise sauce, and switching the ham for salmon, steak or chorizo, adding spinach, tomatoes, or avocado. The meal base eggs benedict creates is a wonderful starting part for experimenting, especially when it comes to adding in some wild game.
Eggs benedict is the perfect lazy Saturday meal. It is not a particularly difficult meal to pull together, but it does require a bit of time. And honestly, it also makes quite the kitchen mess with the necessity for so many pots, pans, and utensils. But that is what makes it the perfect Saturday breakfast, as there will be plenty of time to clean-up after this meal is shared, bellies are full, and maybe an early afternoon nap happens.
To start, pre-heat a skillet over medium-high heat. Season your deer steaks liberally with salt and pepper. Compared to beef, deer is a very lean meat, and when steaks are cooked to medium or well-done the texture tends to become very rubbery and chewy, for this reason, I recommend eating deer rare or medium-rare. For this benedict breakfast, I used deer tenderloin steaks that were about an inch and half thick., so I cooked each side for about four minutes and then tented the steaks under aluminum foil. When you are ready to slice the meat, work across the grain and make about quarter to half inch slices.


While the steaks are resting, prepare the béarnaise sauce. Traditionally, eggs benedict is served drizzled in Hollandaise sauce. I switched the Hollandaise for Béarnaise in the this recipe. Hollandaise and Béarnaise are both quite similar, as both are lusciously rich and creamy sauces with a cheerful yellow color. The preparation base is the same for both sauces: eggs yolks emulsified in warm, melted butter and a hit of acid. Where the sauces differ is the type of acid used and the addition of flavors. Hollandaise gets it acid from lemon juice, and a slight heat is typically enhanced in the sauce with the addition of white pepper or cayenne. Béarnaise sauce gets is acid from white wine vinegar, and it's flavor profile is further developed with the addition of fresh herbs and shallots. I love the combination of the lightly licorice flavored tarragon herb with deer, so I decided to make a tarragon béarnaise for this eggs benedict.

To create the Béarnaise sauce, melt two sticks of unsalted butter, or 1 cup. Let the butter cool just slightly. You want it to be warm enough to emulsify the egg yolks, but you don't want it so hot that it actually cooks the egg yolks, which will result in a lumpy sauce. Add egg yolks and the white wine vinegar to a blender and turn the blender on a medium speed. Once the yolks are broken up and mixed a bit, slowly start drizzling in the warm butter. As the butter and eggs start working together, the sauce should thicken. Once all the butter is added, drop in the shallots, minced tarragon, and season with salt and pepper. Let everything blend for a few more seconds. I leave the sauce in the blender after I have prepared it, this way it will stay warm.
After the steaks are cooked and the Béarnaise sauce is ready, it is time to poach the eggs. There are several egg poaching techniques out there. Some people add vinegar to the water, other people poach in a shallow pan of water, and some even use a giant pot of boiling water. The technique I am sharing is the easiest for me. In a large pot, bring about five to six cups of water to a gentle boil. Have your eggs broken into separate bowls or ramekins in preparation for addition to the boiling pot. Using a large wooden spoon, create a whirlpool in the pot. Drop the eggs one at time into the swirling water, and watch as the eggs fall apart and then, almost magically, start to pull together into perfectly poached eggs. Allow the eggs to cook in the water for two and half minutes before removing with a slotted spoon.
Okay, after all that mess making, it is time to assemble the benedicts! Toast a slice of sourdough bread and brush on a little butter. To the buttered bread, add a thick, juicy slice of beefsteak tomato. Top that with two or three thin slices of the deer steak. Carefully balance the poached egg on top of the stack, and finally drizzle on a healthy pour of the Béarnaise sauce.
I love a beautifully cooked deer steak served with a side of potatoes or asparagus, but this deer eggs benedict really opened my eyes to all the possibilities of working with wild game. Breakfast can be more than steak and eggs or breakfast burritos. This meal is creamy and savory, with a hint of tartness, and even a little sweet from the tomato. It makes for a great lazy Saturday breakfast that is sure to impress all your diners. And it is pretty great for the chef as well!
Living in the middle of a desert, seafood isn't always the best choice. Anytime I order fish or other seafood from a restaurant, I can almost taste the freezer burn. I can actually see it on the crab legs when I am at the grocery store. Don't get me wrong, I still buy those crab legs and cook them up as a special treat every once in awhile, but I am still saying that in the middle of the desert, seafood is not like seafood you get other places.
That being said, oddly enough our little town has a sushi restaurant. If you had opened up a sushi restaurant in this simple little uranium mining town thirty years ago, you would have been laughed out of town. And most likely gone bankrupt, because I can't imagine the tables would have been full. However, as the town has blossomed, or actually a better word is probably exploded, into a tourist destination quickly over the last ten years, the cuisine has evolved. There are several Thai restaurants, a handful of Mexican places, and even this sushi restaurant.
Anyway, for being a sushi restaurant sitting in a barren dust bowl of red blow sand, cactus, and sweltering heat, it is actually pretty good. The fish is flown in daily from Hawaii, and they try to source local ingredients for the rest of their ingredients, such as vegetables and fruits. I think the local produce is part of what appeals to me when I dine at the sushi place, and in particular I like their La Sal Roll. Named after the mountains to the west of the town, the La Sal Roll is a salmon based roll with asparagus, lime, cucumber, and avocado. The roll has a refreshing bite from the lime and cucumber, but is also hearty from the avocado.
This roll is the inspiration for this deer steak dish. With summer dragging in an extra long heat wave this year, eating has been...challenging. It feels so hot that steak sounds awful. But it is also summer, the season of grilling, which makes steak sound appealing. It's a confusing state to live in. This deer steak is a great compromise. It takes the refreshing flavors of lime and cilantro and pairs it with the kick of jalapenos, creamy avocados, and a bit of spicy ginger.

"People get a little bolder and more wild in summer. You've got things going on kabobs, things cooking on the bone. There's something about standing over a grill or outside with the family that inspires us." ~Guy Fieri

For the steaks, I used deer backstrap and cut it into four medallions about three inches thick. It would also work great with tenderloin or another steak cut. Another substitution would be to use elk, moose, or pronghorn. I think this sauce would pair great with any of those steaks. Let the steaks rest at room temperature for ten to fifteen minutes. Then season them liberally with salt and pepper.

While the steaks are resting, preheat the oven to 400 degrees. On a rimmed cookie sheet or in a roasting pan, place some cherry tomatoes and asparagus. I usually do four to five cherry tomatoes and half a bundle of asparagus per person. Drizzle a little olive oil over everything, season with salt and pepper, give everything a quick mix using your hands, and throw those puppies in the oven. They should take about twelve to fifteen minutes to cook. You will know they are ready with the tomatoes are just starting to burst.
Next, prepare the sauce. To a large bowl, add two big handfuls of cilantro, just torn with your hands into chunks, one jalapeno sliced into rings (if you aren't a fan of spicy, remove the seeds before you slice up the pepper), two teaspoons of grated fresh ginger root (which I suggest purchasing a microplane to use. They are the best, and can be used on cheese, garlic, nutmeg, or for zesting fruit), two cloves of garlic (which can also be grated on the microplane!), the juice of three limes, and four tablespoons of coconut aminos. I like to use coconut aminos for this recipe because it adds that salty soy sauce taste, but it also adds a hint of sweetness. If you don't have coconut aminos you can always just substitute in soy sauce or tamari. Whisk everything together and set aside.


To cook the steaks, heat a skillet over medium high heat. Wait until the pan is good and hot before adding the steaks. This will create a really nice crust to the steaks. I like to actually time my steaks when cooking them. Since these steaks were fairly thick, I let them go for three minutes per side, for a total of six minutes cooking time. That resulted in a medium rare steak. If you are more of a medium person, add a minute. More of a rare person? Subtract a minute. If your steaks are thinner than three inches, subtract a minute.
Once you have cooked both sides, it is time to add the sauce. Leave the pan on medium high heat and slowly drizzly the sauce into the pan and over the steaks. The pan should be hot enough when the sauce hits the pan, it sizzles. You are almost caramelizing the sauce for a minute. Let it bubble around the steaks for about thirty seconds and then turn the heat off. Let the pan sit while you prepare the plates.

For plate preparation, dice up half an avocado per person. Make the pieces bite size chunks. Lay two medallions onto each plate. Place the roasted cherry tomatoes, asparagus, and avocado around the steak. Pour the sauce over everything and garnish with a little fresh cilantro.
So, if you are looking for fresh twist on steak, give this recipe a try. I love the heat you get from the jalapenos, the spicy little kick of the ginger, and the sweet hints from coconut aminos. Enjoy!


